


SPLIT RIMS AND FITTING INNER TUBES
Fitting inner tubes and tyres are so easy to do but so often they’re done totally wrong and these are the only things between you and the road so it’s worth paying attention to and do it right first time every time.
Lets start with rims.
We’ve seen so many rims fitted which are rusty and flaking inside………….. rust flakes off and cuts or rubs into the inner tube and you get a flat tyre!
So knowing this, rims need to be perfect inside as they do on the outside as does the inner tube and tyre. If your going to use old genuine rims then make sure there is no rust, you can grind and clean them up with flap wheels, wire wheels and sand paper but it doesn’t get to the bottom of the problem and rust will reappear even after painting. It’s best to have your rims sand blasted. This will cut into the rust and providing you get a coat of paint on them straight away rust won’t come back for years. Use a wire wheel or rust killer and rust will come back! You can chrome them, but chromers sometimes polish inside the rims, this takes metal off and then leaves a shinny surface. Tyres find it hard to stick to and in some cases with some tyres the tyre will spin and rip a valve off. Chrome can also flake and cut inner tubes. Ideally if a rim is to be chromed the inner rim should be hard chrome and not polished. A good sand blasting and painting or epoxy powder coating is perfect for rims providing the threads on the studs are blanked off first. Also if you epoxy a rim or hub then, parts of it may need filing to make it fit, nuts and washers will cut into the epoxy so always keep and eye on the nuts and tighten regularly.
After market rims can vary in size where the tyre fits, Vietnam stainless rims can be so small, tyres fit easy by hand and come apart as easy. This is an indication which could lead to a problem later on, wheels like this are great if your working at the side of the road but be careful, your life is in the hands of a undersize or slippy rim!
A tyre should be tight on a rim. A good tyre and rim should have the tyre hard to pull off the rim, and getting a tyre off the rim may need a vice or tyre tool to crack it off the rim. Tyres vary from manufacturers in the size of the inner diameter also, they should be all 10”/254mm but they vary massively. We find this out when fitting various tyres to tubeless rims, some are easy to fit on tubeless rims and hardly ‘pop’ onto the tyre bead. Others are a right pain to fit and need lots of heat to make them pliable and when you blow them up they ‘bang’ into the tyre bead! This is how they should be………. tight for safety but a pain to disassemble! We also see this between makes fitting them to split rims.
So it would be the same with split rims and tyres. Tight tyres are the Sava race MC31 and the MC20, MC18 and MC20, Heidenau K61, K58 and Conti Race tyres. Loose tyres are the Michelin SM100, S83, S1 and some of the standard ‘J’ rated tyres. These are all available in www.scootertyrestore.com
Either way providing you have the correct air pressures in the tube this should hold the tyre in place. But not all the time, trust me a loose tyre or rim will give you problems. I’ve spun a tyre on a rim a few times in the IOM on the TT course. In the end I ‘Super glued’ the inner tube to the tyre and rim to stop it spinning and it worked! I’ve also known electricians tape been wrapped around a rim to make the tyre tighter on the rim but this just moves so don’t do it.
Ideally for safety a rim should be assembled dry to create friction between the rim and tyre, but we know it’s widely advised to use something like soap or special tyre soap to help a tyre slide into place. With tubeless rims you have no choice you won’t be able to fit a tyre without it. Don’t use grease or oil, it will slide a tyre into place and stop rusting but it’s not adding friction.
INNER TUBES
Inner tubes vary with different valves. A Lambretta should have a tube with a valve which is 10mm offset from the center line of the rim. Lots of inner tubes come with valves in line with the center line of the rim. As much as people say these are no good don’t let people cloud your judgement…….. a tube can easily deflect up to 90 degrees and still fit and work fine. 10mm is nothing in terms of degrees when we’re talking rubber inner tubes and the factories freely allow for this deflection in the design of an inner tube. Ideally if you want, pick a valve with this 10mm off set but it’s quite hard to work this out until a tyre has air in and even 10mm offset inner tubes are hard to tell f they are correct or not.
Lambretta and Vespa inner tubes are different!
The Vespa valve is much longer, don’t fit a Vespa tube to a Lambretta! They fit the rear with little problems but have a longer valve and the valve will hit on the fork bolt, especially when the dust cover is fitted. It may clear on the stand but at speed the valve will move and can rip out with an instant puncher.
A Lambretta inner tube valve should be between 45 – 90 degrees coming out of the wheel rim and be a short valve version. And positioned when correctly fitted and not hit on a fin on the rear hub but this can come down to where the hole in the rim is fitted, so check this out.
We now only use two inner tubes
One to look out for is where the valve comes from the tube, always inspect this area for rips or coming away from the bonding even from new. This was an area we found some faults with the German supplied inner tubes. Even though we designed their Lambretta tube for them we pulled out of selling them for political reasons.
We’ve looked many times at inner tubes and designs and even had a few samples made in different factories. When it came down to it, most wanted to supply so many tubes they would last us for 20 years! In the end we opted for manufacturers with a history in making quality tubes.
Ok time to fit the inner tube. Lets talk fitting a new tube out of the box! Remove it and pump a bit of air into it to make it take a round shape, only enough to give it a round shape. Always avoid getting grit and metal fillings on it, so have clean non greasy hands. Get your tyre, you need to check 3 things
- Does the tyre have an arrow for direction of rotation? If so make sure you are aware of this when you fit the inner tube. Don’t just look on one side of the tyre always check both sides
- Check that the tyre is not a uni direction tyre. To my knowledge Continental Scootys, Twist, Twist Sport and Twist Race tyres are uni directional, which means they are front or rear fitting. These have two arrows on showing direction of rotation for a front tyre and a rear tyre. Other tyres can be fitted on the front or rear without worrying about direction. But you can apply the same rules to any tyre make
- Check that the inner tube will be fitting into the tyre with the valve on the near side so you can get to it with the wheel fitted
Check the inner tube valve will fit in the rim hole, we see this all too often. Either the valve base is too big or a rim has a hole too small. If the hole is small you need to drill, file or grind it so the valve seat area fits into the tube freely. If this is the case make sure there are no sharp edges and you chamfer the hole either side and smooth it off. This does NOT want to be sharp!
When your happy you know what is going where, have a good look and run your hand inside the tyre looking for any debris which could cause a flat. Run your hands around the inner tube to wipe off any grit. If your using a used inner tube inspect it for an defects (it’s worth pumping the inner tube up massive, this will show any splits) and the same for the tyre (always inspect the tread area for cracks, splits or sharp objects etc).
Fit the inner tube, it should go in easy, if you’ve added too much air it will be hard to fit. It should be loose inside the tyre, you need it to move as you assemble the rims. If it is too flat you can trap the inner tube between the tyre and tube. Take the rim with the hole in, depending on the rim you will see it is not so simple just to fit it the way you think it should. Rims vary, the narrower the rim the tighter it will be to fit, so a standard can be quite hard to get everything together. A wide rim should be easier but there are so many copy rims things all vary. It’s much easier to fit the rim backwards and spin the rim into position, this makes it really easy to get the valve into the rim. As you fit the valve through the rim hole push the rim into the tyre. As discussed it should be tight but for now we’re only looking at the valve area, you don’t need to worry about fitting the rim tight into the tyre at the opposite end. What we’re looking at is, does the valve fit into the hole of the rim and come all the way through? The chances are the valve will not whatever you do. If it doesn’t don’t expect it to pop through when you pump up the tyre, sometimes it will if you pull at it but this will put stress on the valve which you don’t want. The chances are the hole in the rim is very close to the tyres side wall, some pattern rims are so close it’s near impossible to get a valve into the hole because the tyre wall is half in the hole. If this is the case all that is needed is a little semicircle cut out, cut into the tyres side wall with a sharp Stanley knife blade. We are only talking cutting the rubber where there is lots of excessive there is no need to cut into the bead, this is more so when fitting tubeless tyres.
If you have this little nick correct the valve will be allowed to come through easy, maybe use a little soap just to help it through. If ready, line up the rim with the valve and push the rim into the tyre, take care not to twist the rim on the tyre twisting the inner tube and stretching the valve. It should be easy to push the rim into the tyre with a bit of brute force. Once the valve side is fitted have a look at the tube and valve area from the other side, the tube should not be trapped at all between the tyre and rim. Look to see if any of the tube will get in the way of the last rim half, if it’s too loose the tube can trap so you may need a bit more air. If clear fit the rim with the studs, be careful not to catch the studs on the tube. Line the studs up to the 4 holes and push the rims together, fit a washer and then a nut (its also worth putting a bit of grease around the studs before fitting) Ideally use nyloc nuts to stop them coming loose or at least use spring washers if you use standard plain nuts but always use plain washers to spread the load. Tighten the 4 wheel nuts ….. tight, but not too tight to snap the wheel studs, this does happen on some of the cheaper rims!
If all is ok, add more air to push the tyre onto the rim and into it’s positioning. Now we all over do this….. say put 40 psi in allowing it to seat then we drop air pressure to the desired pressures. BUT really we should fit the rim to a hub to do this because the air pressure will push apart the rim between the studs and can distort it. Now check the valve does not have a leak, either do as the old guys do and spit a bit in your hand and paint it into the hole where the valve is fitted or spray a soapy water solution into it. If there’s no bubbles all is fine, if there is a leak tighten the valve with either the valve cap if its tool type or with a special valve tool.
And that’s it, lets hope all is well and you haven’t trapped the tube, even if you have I’ve known them to still work.
But is it? After market rims are not made as good as they should be but can be no problem if you’re prepared to do a little more work. Ideally this should be done before you fit the tyre. Bolt the two half of rims together. Try to fit them to your hub, the chances are they will be tight and won’t fit without a hammer! The four holes will be miss matched to the hub, but it could be the hub anyway! When you assemble the rims together you can usually see the other four holes are slightly miss matched. If you have the time you can file and elongate the holes to fit or you can drill out to the next over size until they slot onto the hub. It’s not uncommon to have to drill a 8mm hole to 10mm! Not good I know but these things are always a compromise and you have to do what you have to do! Not only do the holes not fit but also the four inner edges may foul the hub so this area may need grinding or filing. For many years it’s been common practice to epoxy powder coat the rims and hub……….. now this does cause a problem to fitting and if forced on the hub the hub can crack! If you’ve coated the rims and hub then expect to drill holes and file the inside faces to make the rim fit as free as you can. The freer the rim/wheel fits to the hub the better it will be when you need to work on it next time. There should be no need to fit a wheel/rim with a hammer, but expect to need one or a good kick to shock off a wheel later as the rims seat onto the hub studs which have a small taper to locate and lock the rim.
Today we have tyre and tube sealers, is it worth using them? In a tubeless then yes 100% fit it, in a tube well you may as well. These sealers are excellent and really do work BUT it is not the be all and end all for safety in an inner tube. Tubes can rip and split for no reason at all and a sealer is hard pushed to seal that. But with a small leak it can help to at least get you safely to the side of the road.
Once a wheel is fitted with a new tyre with regards to riding. Always ride for a good few miles to scrub in a new tyre. Always ride a Scooter for a few miles to get tyre temperatures up to temperature. Try thrashing off from cold especially with a really grunty motor and the tyre may grip but the engine may spin the rim on the tyre ripping out the valve and an instant deflation! You can pin the the wheel with small self tapers or spot weld the rims on the inside where the tyre bead sits. Always make sure you have the correct air pressure for the front and rear depending on tyres, the load and type of riding you do. And always check air pressures on every ride you do especially if you normally ride one up and you need to take a passenger.
Lastly all Scooter tyres can be fitted with an inner tube, it doesn’t matter if the tyre is a tubeless or a tube only tyre, but this is different for tubeless wheels and tyres, but can only fit tubeless tyres to tubeless rims.
If you want a real good set of wheel rims then we recommend the BGM Stainless Steel wheel rims, there are 2 versions, polished and plain Stainless Steel, these are a work of art and worth every penny. We also offer Stainless Steel MB wheel rim fastener kits which look original.
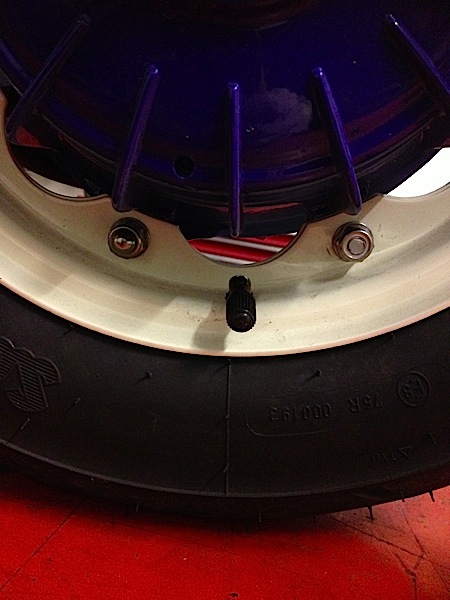
Holes in rims can effect valve positioning, this is center between the studs but is direct towards the rear hub fin, some valves can be touching the fin

This rim has a valve hole offset to center of the studs which would clear the hub fin, but gets in the way of one stud
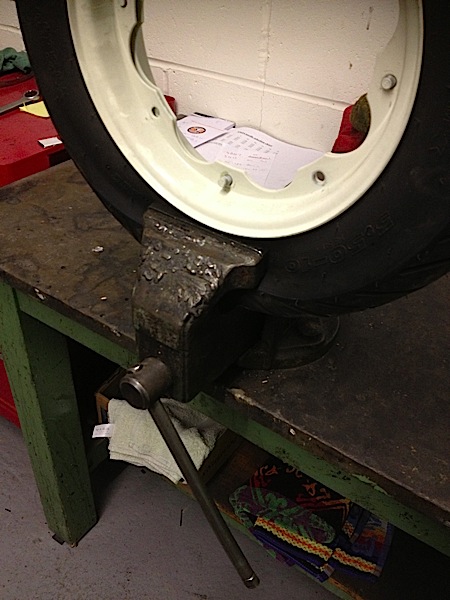
Really tight tyres can be gripped in a vice below the rim

Hook a lever underneath to prize off the rim
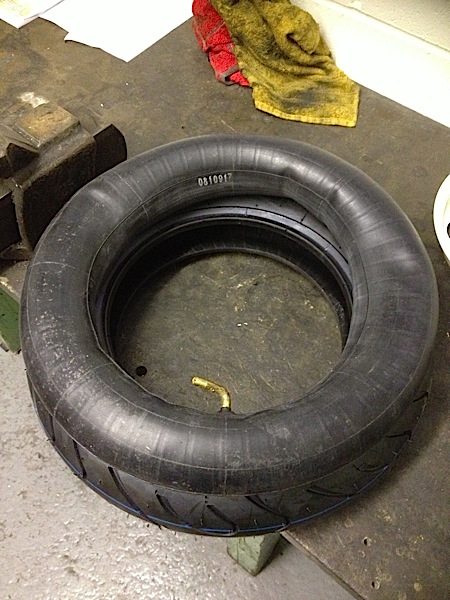
Blow air in to slightly inflate the inner tube, it should be able to spin free once fitted into the tyre

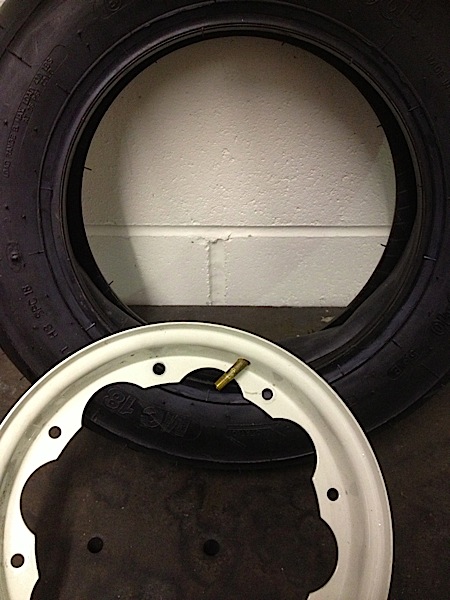
Always check the direction of rotation before you fit the inner tube
Fit the rim upside down then spin it into position it is much easier to fit a rim like this
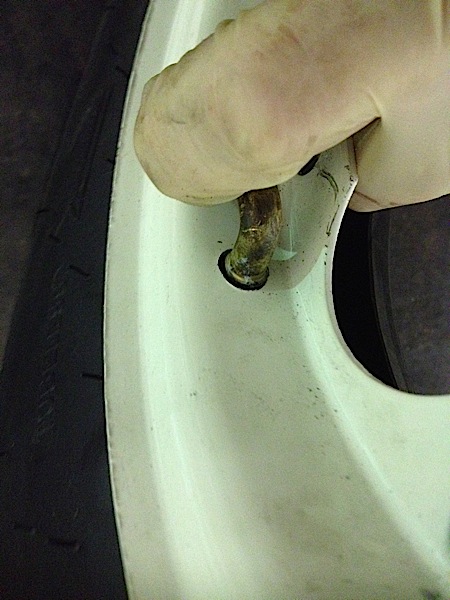
Pull the valve into position and push the rest of the rim into place
It can help to pull the valve into position using a ring spanner

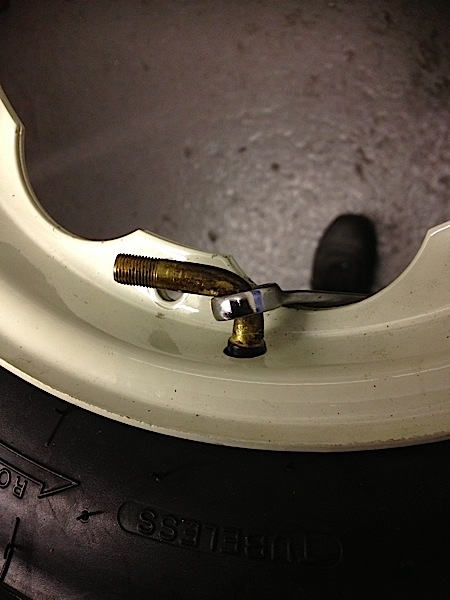
This is a valve perfectly positioned into the rim hole, BUT try as you might the valve may never do this the wheel design is not brilliant
.jpg)
You may need to drill the 4 holes out so a rim fits onto a hub, this area may also need grinding or filing especially if the hub and rims are epoxy coated
You can read more about tyres here
- Tyres – Whats right
- Tyres – FAQ’s
- Tyres – Types and styles
- Tyres – Tubeless rims
- Tyres – Fitting tubeless rims
Mark Broadhurst, if you have any questions email mark@mbscooters.co.uk


