


FITTING CRANKSHAFTS, BEARINGS, SEALS AND GASKETS
As with all things Lambretta, this is a job that needs doing in steps and correctly. It’s an easy job if you know what you are doing and have the tools. But it can be done by a novice but you need to know a few things.
Okay engine casings vary from manufacturers and today there are a lot of casings to choose from – from original casings to super expensive over the top casings. Here I’ll cover the most common casing used – the standard Italian, Indian and Spanish versions. After market ones also apply.
Stripping a crank out can be easy or it can be a night mare if the mag housing has welded it’s self in, which does happen. If in doubt don’t go and break a perfectly good mag housing, even though they are cheap to replace. Don’t go and try to drill out drive plate screws – if in doubt give it to someone who can do these jobs or you will have an expensive rebuild.
This write up is not about stripping out a crank, I’ll skip that. It’s about building up a new crank, bearings, seals and gaskets as this is a common question asked by customers. Most can strip a motor, clean and prepare it for the rebuild but the rebuild can get sticky especially if they hit a problem half way through.
STARTING WITH A BARE CASING
I always start an engine by building the crank and mag housing and rear hub bearing. It balances the engine out and gives you something to block up or hold in a vice or engine stand.
TIP – with a bare casing and mag housing check the mag housing easily slides into the casing. It should nearly just drop in, if you need to tap it or hammer it, do something about it. This will save time, effort and heartache later. To do this – grind the casing where the mag housing goes – ideally use a flap wheel in a drill or die grinder. Any tight areas need relieving so the mag housing is free, some mag housing have high spots where they have locked before, take care of these marks. The mag housing should push in and out easy – the idea is later you can rock the mag housing as you fit it where the seals are butting up against the seal areas on the crank – it makes fitting 10 times easier.
Now make sure the casing is super clean and make sure the parts are clean and wiped ready to go.
DRIVE BEARING
There are 2 types of bearing 1) the standard drive bearing with no seals fitted and 2) then theres the single sealed bearing that we introduced to Lambrettas in the 80’s and have never looked back. The sealed bearing is to be preferred which we call the touring bearing. The single sealed bearing fits to wards the crank – seal side to crank. DO NOT USE a 2 sealed bearing! Apart from the sealed bearing both types of bearing fits the same way and the same procedures have to take place which ever bearing type you are going to use.
TIP – the single sealed bearing helps take the pressure off the crank seal, it helps stop gearbox oil from entering the crankshaft area. This is a big job to replace later on if a seals fails. So use a sealed bearing as a double safety fit. More in a bit………
CASING DRIVE BEARING SIDE
Casings can vary slightly in size of hole machined out and how the hole is machined. New can be worse than old if using an Indian SIL or UNI casing as they don’t care too much about correct sizing – it’s not much of an issue but if you get an oddball you could be struggling – same if a casing has been repaired and welded and the casing has pulled and made the hole egg shaped.
CASING REAR HUB BEARING
Your going to need to heat the casing to fit the drive bearing. This is the best way! As your heating the casing and it’s expanded you may as well do the rear hub bearing at the same time.
CASING AND ENGINE MOUNTS
As the casing is hot you may as well fit new engine mounts or very good old engine mounts – if they have been removed, you can fit bearings if the engine mounts are still fitted.
BEFORE YOU START
Check the engine casing over, your checking for worn threads, cracks and damage to bearing areas – lets presume you’ve already done this and your at the rebuild stage. But it’s worth mention as it’s not always obvious to some.
CASING BEARING AREAS
Have a real good look at the drive bearing area and the rear hub bearing areas. Drive bearing area can get some damage or be machined slightly wrong. A casing thats had a bearing knocked out and in cold may have a loose bearing area as each time metal is pushed away opening the hole. The easy check for this is – with the casing and bearing at the same temperature check to see if the bearing drops into the casing or can easily be pushed or knocked in. If it does, the only thing you can do apart from replacing the casing is fit the bearing using Loctite bearing fit or super strength retainer. Again do the same with the rear hub bearing. Whilst your at it, check for cracks in the casing between the machined hole and the 4 stud threads. This is a regular failure area. Any cracks should be welded and remachined first. If a bearing drops in cold, again its then down to the loctite method.
MB Scooters make over sized drive and rear hub bearings to help stop scrapping casings.
You see some people giving advice on freezing bearings to fit them – this is a big NO NO. A frozen bearing left in a freezer over night will shrink! It may drop into the casing dead easy but you have no idea if it’s tight or not. If you try to fit a bearing thats the same temperature as the casing you will find out if it drops in easy. This usually is called room temperature – but we know around the world room temperature is not the same, building a casing in minus figures or temperatures in sweltering heat. What ever the temperature, if both casing and bearings are in the same place its about the same.
Providing temperatures are standardised and the bearings just don’t fall in you can presume at this point the casing size and bearing size are correct or there abouts. Now if you heat the casing correctly, bearings can just drop in as alloy expands more than steel. In use a casing and bearing gets hot and expands. A casing will expand more than a steel bearing but both bearings are clamped in place and shouldn’t move. But they can and scan spin in the casing, so in some cases if a bearing is a little loose use loctite bearing fit or retainer, it’s not a bodge thats why it was made in the first place and it works wonders at filling gaps and holding things in place.
TIP – UNI casings are machined in a strange way in the drive area – the casing has a rippled effect where the outside of the bearing fits. And fuel/air/gases can leak out into the gearbox area as can gear oil can run into the engine giving large amounts of un curable white grey smoke when hot.
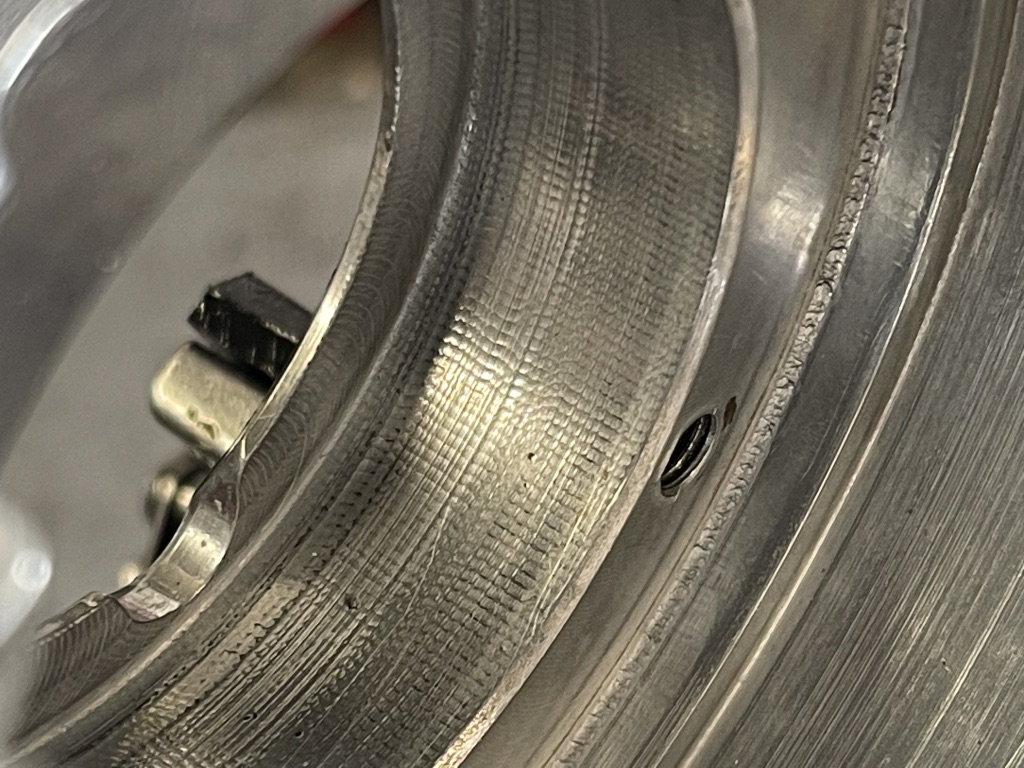
This shows the chatter marks on a UNI casing, these wont seal without sealer
HEATING A CASING
It’s all about preparation – make sure both bearings are wiped clean where they will touch the casing. Make sure if your using fitting tools wipe them clean. Make sure you have your loctite/sealer ready and have a clean rag at hand with your tools required.
There are a few ways to heat a casing, the best way is to get a casing super hot the hotter the more expansion. Obviously if you get it too hot it will melt, you don’t want this, but this will depend on what you have at hand.
Personally I use gas welding equipment to heat a casing. Obviously not everyone has this at hand. If doing it this way use a cutting/heating up torch, move it fast all over the casing to give a unified heating up, leaving move heat around the thick engine mounting area and the drive and rear hub bearing areas. Don’t hold it slow in one place it will melt something. The chances are – if you haven’t got an oddball casing both bearings will just drop in place.
You can heat up a casing with boiling water, but you need alot and it leaves water in places where the bearings go and water and bearings don’t mix!
You can heat a casing in an oven if it fits – but this will smell the house out.
You can use a gas stove – again it will smell the house out.
Most people would have a small gas torch or an electric heat gun, these work fine but you need to get as much heat into the casing as you can – you won’t melt a casing doing this, it won’t get hot enough.
A casing is hot enough – if you touch it, it will burn your hand, if you can bare it for say 5 seconds plus it could be doubtful it’s hot enough and your going to need force to drift in or pull in the bearings and if you cock a bearing to start with the bearing will push metal out.
However you heat the casing, that clean rag comes in to hold the casing and move it in place without burning your self.
FITTING BEARINGS
The casing needs laying down safe on a flat surface. You can grip the casing in a vice to leave your hands free to work, grip the casing on the flatfish area at the bottom of the casing with the cooling fins on the bottom outside. With the mag side upper most theres easy access to both bearing holes. At this point don’t mess about as the casing can cool quite quickly, this is why you need everything at hand.
If everything is 100% perfect you can fit a bearing and casing dry – BUT every now and then they don’t seal and fuel, oil, air can pass around the outside of the bearing which means you’ve got another strip down after fitting the cylinder kit and pressure testing it. And sometimes even with a well sealed engine when rebuilt cold, when warm you can get gearbox oil coming into the engine and burning white smoke.
So what to do?
DRIVE BEARING SEALING
As your fitting the drive bearing you can finely wipe some bearing fit or silicone sealer around the outside of the bearing, you don’t need much just a very fine smear. Don’t wipe it on the casing it will burn you. If your worried if the bearing is slightly loose in a casing use loctite, if you really don’t want a leak use a sealer. The best trick is a silicone type fuel resistant sealer carefully smeared onto the bearing where it will butt up against the casing and around the sides, any excess smear into the gap between the casing and the bearing. Wipe off any excess with the rag, but not the hands – it’s easy to burn them.
Once the bearing is fitted, wipe the sealer around the outside of the bearing, but keep it away from the inside of the bearing

Smear the gasket on both sides and fit, wipe sealer into the outside of the gasket to help seal the outside of the bearing
REAR HUB BEARING SEALING
It’s the same method with the rear hub bearing. Oil can and does go around the outside of the bearing. If the bearing is slightly loose wipe loctite around the bearing, it should seal with loctite but I’ve know them to leak if not enough loctite is used. Or use sealer and make sure when the the bearing hits the casing the sealer squirts into the top hat area and spills out and give it a wipe around. As with the drive bearing make sure nothing goes into the moving parts of the bearing.
TOOLS FOR THE JOB
You don’t need tools if you know what you are doing. Both bearings can just drop in, but in my experience sometimes the bearings don’t drop into position and stay a little proud and causes problems. You can use a drift – a long straight bar. Use a 1/2 pound hammer to gently tap the drift/bar around the outside of the bearing taping gently from one side to the other and at a quarter again but be careful not to hit the casing gasket face on the drive side. You should hear a solid ting as the bearing hits the casing DONT KEEP HAMMERING after this!
If a bearing is tight or you fit it slightly on a kink it will lock up easy as would a bearing with loctite been fitted in a hot casing – this is the importance of getting on with the job. This is why it’s safer to use a good tool to fit the bearings.
PULLING TOOLS DRIVE SIDE
There are a few tools on the market, some good some bad. We do a drive side bearing drift to knock the bearing in. Or if the bearing has dropped in, lightly tap the bearing in to hear the ting, then leave it in place to weight it down.
If it’s a tight one, you need a bigger hammer, the problem is you can hammer and knock the very weak lip on the casing that positions the bearing. Most bearings can be fitted easy in this way providing you make sure the bearing goes in straight, if after a bit of hitting and it seems tight, bend down and see if the bearing has cocked over, if it has, use a drift/bar to tap the higher point to line it up square to the casing.
A better safer way is to use a puller. This our preferred way – these should keep the bearing pulling in true and once its bottomed out you won’t break the weak lip. Because of our experience seeing so many broken casings we’ve redesigned our drive and rear hub bearing pullers to avoid any problems on the pain in the arse casings. Both tools will fit and remove the bearings safely.
The rear hub bearing usually drops in and finally tapped to the bottom, again with a small hammer and drift on the outside. NEVER hit a bearing on the inner race!
Today so many bearings can be tight, so the hammer is required tapping at 4 points until bottomed out. With the tighter bearings and with our MB bearing using the special internal sealing O ring, as the O ring is about to be clamped, the bearing can sit proud. So a puller is better, we do a puller to pull the bearing and lock in place. You can use the rear hub bearing plate to pull the bearing in place and hold it until the casing cools down – but it’s a risky job as the studs are a weak area and casings can crack!
Don’t move the casing until the casing cools and locks onto the bearings.
SEALING BEARINGS AND PLATES
Don’t even think of screwing the plates up until the casing is cold – back to room temperature otherwise you have no control over how the screws tighten.
DRIVE BEARING, GASKET, SEAL, PLATE
Before you start get prepared.
You can use an original plate but for the price throw it away and get a MB plate. Alloy plates bow, steel plates are okay but are slightly higher and can cause problems with modern cranks. MB plates fit perfect and are slightly thinner. Wipe the drive plate so it’s clean. Fit a seal – the best seals for the job are the Viton type which resists modern fuels DONT let anyone else kid you on in this department.
The lip of the seal, spring side faces the crankshaft. Fit the seal dry, this will stop a seal spinning in the plate. If the seal is super tight in the plate you can use grease or oil or loctite around the outside of the seal this helps the seal slide in and will lock in position. MB plates and seals are a tight fit, gently tap around the seals out side so it eases into place. Don’t over do it and twist the seal – there is no need. Then wipe grease onto the inner seal area where the crank will run.
Drive screws – there are 3 types.
1) Straight flat screw driver type
2) Posi/cross screwdriver type
3) Allen key type.
Normal standard counter sunk screws shouldn’t be used, these are too small. I have preferred the high tensile allen key type (you do get non high tensile screws these mush over, don’t use them, if even one strips it’s hex -change it now) First degrease the screws which are usually oiled. Use a little loctite and I mean a very fine smear – it’s all you need. Too much and screws can snap as they lock up, or in time on a strip they become locked in – if this happens theres always a trick to get them out.
There are different types of drive gaskets around. We have used Paper, Viton, metal sandwich types and all have been replaced with a very special white material that resists the gasket breaking down in use from the fuels. Providing the thickness is correct and some other manufacturers supply them incorrect! All MB’s work, but we now prefer the white versions. Once clamped they can not go anywhere or break down through oil/fuel mixture.
The main problem is oil coming around the outside of the bearing, you may have addressed this as described earlier. But you can double check this at this point by smearing a fuel resistant sealer into the outside area of the bearing and wipe between the bearing and casing. Smear the drive gasket both sides and drop in place. A good gasket should push in place and seal tight to the outer bearing area. Some remade ones are smaller then the outside diameter of the bearing so doesn’t seal the bearing to casing. This is why you need to use fuel resistant sealer on the gasket and smear it around the outside of the gasket
Now offer the drive plate with seal fitted. Make sure the lip is greased, make sure the screws are loctited. Fit each screw, slowly hand tighten the screws to pull the plate in square. Once the plate is tightening up it should start to crush up against the gasket. Now start to screw the allen screws tight – do this slowly at opposite screws 12 o’clock – 6 o’clock – 3 o’clock then 9 o’clock and keep going a little bit at a time. Continue feeling the screw so each one is tightened the same. You know they are tightened correctly when your feeling the tool and screw wanting to deform the hex – don’t go any further. It’s surprising how tight you can get these screws.
REAR HUB BEARING PLATES
With the rear hub bearing locked in place in the casing, it needs the plates fitting. You can fit the original thin shim then plate but the problem with these are – rear hub bearings and casings vary in heights and it’s not uncommon to see the bearing stuck up to 1mm area. If you use the original plates and over tighten them the plates and screws bow!
MB offer various recessed plates to fit and leave a small gap between the plate and casing – these are to be preferred.
If your not sure you got the bearing sealed, its worth smearing a fine smear of a sealer in-between the casing and outside of the bearing – it’s just a double check, oil can come around the back of the bearing and onto your brake shoes. Use new 6mm studs and loctite them in place, then use 6mm nylon nuts to stop them vibrating off. Thats it the rear hub bearing is done.
CRANKSHAFTS
There’s a whole variety of cranks now available. Which ever one you’re using you need to do some checks.
1) Never expect a crank to be inline new or old. By inline that’s means the crank webs are running true to each other. If in doubt have a real professional check it out. We only sell a few types of crank as experience now shows these cranks are super tight on the crank pins and are true in line
2) Some crank shoulders where the seal butts up when fitted – can be sharp, or have a small radius. Decent cranks have a good chamfer on them where the seal rides up against it and pops into position without lipping over the seal and locking up and damaging the seal.
You can machine a new chamfer in lathe if it has a sharp edge and no leading edge. Leave that for a professional machinist. Both drive and mag side needs doing – this is basics and if not done, people will blame the seal for been crap particularly Viton seals as these tend to be a bit harder than nylon seals. Our MB Viton seals are as hard as they need to be and usually have a larger than normal chamfer to help this lipping over problem.
FITTING A CRANKSHAFT
First fit the flywheel bearing inner sleeve. There are 2 bearings.
1) Thin Li, Tv, Sx, Gp125 types
2) Fat Gp200 types
Most modern race type cranks use the fatter Gp200 type. Always check this, the depth of the Gp200 type on the crank shoulder is 10mm, the other is 13mm. The 13mm can be modified and machined by a professional to 10mm if you want. Theres no need to do this as modern thin flywheel bearings are wider and stronger than original Innocenti bearings. MB only sell the modern plastic caged wider high load bearings in either size.
To fit the inner sleeve you need a tube, perfect in size to slide down the crankshaft. MB make a perfect drift to fit the inner sleeve. If you use bars or other things you can damage where the seal goes and may leak.
Never grip a crankshaft seal or bearing face in a vice!
First check the inner bearing sleeve doesn’t just drop on the crank, do this with both items at room temperature! An inner sleeve should be fitted at room temperature – this gives you some feel when you knock on the sleeve. NEVER EVER heat the inner sleeve with boiling water or heat gun!
For 2 reasons
1) Heating the inner sleeve gives you a false feel, it may drop on easy but you have no idea how tight it is and it is known for the sleeve to unscrew its self in a running engine.
2) Always wipe some loctite on the crank where the sleeve goes.
Hold the crank cradled in your arm and chest, wipe the crank with loctite, fit the inner sleeve, put the tube drift down the crank and slowly tap with a small hammer – feel the sleeve slowly tightening up as you tap away. The sleeve should be tight but not so tight it locks solid half way down. If it does, the inner needs pulling off and the crank polished a bit with emery to free fitting of the inner sleeve. It’s common for a sleeve to be loose half way down then get tight. ALWAYS use loctite!
Once fitted you can fit the crank in the drive bearing.
Make sure the drive seal lip has a smear of grease all the way around it. Oil or grease the crank shoulder for the seal. Keep the crank where it fits in the bearing dry. Wiggle the crank into the casing, usually with the con rod at bottom dead centre – be careful not to rub or scratch the sharp splines on the seal lip when wiggling the crank into position.
The only way to fit the crank into the drive bearing and seal is to pull it in. NEVER EVER knock the crank in even with a soft hammer on the flywheel thread area it knock the crank out of line!
MB make a perfect sleeve to pull the crank in using a drive bolt. You can use the splined castleated sleeve but I wouldn’t. As the crank is in place, fit the pulling sleeve and bolt and start to pull the crank in position. A good crank bearing combo will mean the crank needs holding by hand on the flywheel taper as you tighten the bolt with a ratchet.
IF the crank pulls in with no resistance, remove it and use a very small amount of loctite on the crank shoulder, this will lock the crank to the bearing and seal any gear oil from coming through.
Whilst your doing this – the big TIP is – allow the crank to move back and forth each time as you tighten the bolt. As the crank shoulder comes to butt up against the seal lip. Do this and the crank will slide into the seal lip and it won’t lip over and ruin the seal. Viton seals can be hard especially in winter, heating them with a hot air gun can help. But the back and forth twisting always works. Once fitted the crank should easily turn by hand, if it does fine. If it doesn’t and you need to persuade the crank to turn then you could have lipped the seal. The only check is remove the crank – with a crank extracting tool. Look at the seal if the spring has come off or seal damaged you have to start again – with a new seal and follow the instructions. So always buy a spare, just in case.
With the crank fitted correctly and spinning free – you’re good to move on.
First check the gap between the drive plate and the crank webs with a feeler gauge. The gap needs to be 0.5 – 1mm. If it’s tighter the crank needs removing and a crank spacer shim needs fitting on the crank so where it butts up against the bearing it increases the gap.
At this point you have to be aware that the con rod is free of the crankcase. The cranks we sell will clear, thats why we sell them. Some cranks especially 60mm versions can touch or lock onto the crankcase as the diameter can vary. Add into he fact that 62mm stroke cranks are all over the market, these are even worse! In the worst case a trench needs cutting into the casing. Do not think you can cut a corner and grind off the high spot of the con rod, its doesnt matter how good you are at cleaning there will be metal inside the con rod and bearing. You can strip the crank apart to modify the con rod – but we’re now into very specialist stuff of crank rebuilding with over sized crank pins and tools to do the job.
The other way is to remove the crank, seal off the drive bearing and seal area and grind and scoop out a channel for the con rod to clear and you need at least 0.5 – 1mm clearance.
This is the worst scenario but happens all the time as people making and selling cranks don’t care. A crank fitted with a Yamaha con rod as we’ve suggested from the 80’s always fits in a 58 or a 60mm crank which are the cranks we suggest for ease. 62, 63 and 64mm version are a total oddball and this should be looked at before you even think of fitting a crank. You do this with mock up spacers, fitting the crank, doing the work, cleaning and starting the procedure again.
Or if you suspect a crank could be a pain in the beginning, MB make precision dummy bearing bushes for the drive and mag housing to mount the crank in place and find out if the crank con rod is going to touch. And you can do all this dirty work before any bearing and seal is fitted.
MAG HOUSING OVERHAUL
Overhauling a mag housing is easy with again heat. Again all cleaned and prepared with the various parts laid out in front of you.
Lay out the parts in order of fitment.
1) small mag seal
2) seal retainer
3) outer bearing
4) Li/Sx?Tv spacer – if using the same crank with narrow bearing
5) Large mag seal
6) Large circlip
Heat the casing so you can’t handle it. With the mag flat down on a flat face, use 2 figures holding the seal inside the lip and offer it into the mag housing keeping your hand away from the alloy. You can push the seal in place with a wide flat blunt screwdriver into the area where the spring is as the spring should face up. Or use a MB nylon drift where you can push the seal in by hand, or a slight tap with a small hammer to make sure it’s seated. There’s no need to use a Viton seal here as this seal doesn’t come in contact with fuel. Drop the dished spacer in, it should locate inside the casting and it’s flat side down. Now the bearing, it should just drop down if the mag is hot enough without a hammer. If your using the Li thin bearing then you fit the spacer. If your using the wider Gp 200 bearing then leave it out and fit the Large mag seal (always use a Viton seal) this is the hardest part as the Large seal can get stuck, easy to fit with the MB Large mag seal drift, it may take a hammer to fit it square and fully home. It does help if you grease the outside of the seal first. Next the circlip where you need a large set of circlip pliers, offer it in place and let it go, the circlip should spring into the groove. If it doesn’t use a blunt small drift and tap it in place.
Let the mag housing cool right down to room temperature, you can slowly cool it under the cold water tap but there’s no need the nylon race bearings can take the heat.
Once cooled you have to grease the bearing and seal area. Use a high melting point grease, feed in the grease with your finger and push in the grease in to find all the gaps. Once full, run your finger around and scoop out some grease so when its fitted there will be a void to allow expansion when hot.
If you over fill it, grease will come out of the small mag seal into the stator. If you under fill it the bearing can dry and melt.
FITTING THE MAG HOUSING INTO THE CASING
It’s never as simple as just fitting the mag housing. Casing height varies as does how far out the crank fits into the drive bearing.
You need to measure with a vernier from the mag housing face on the casing down to the crank webs. Write this figure down. You then need to measure the mag housing from the gasket face to the end of the mag housing that will fit to the crank web. You now need to find what thickness mag housing gasket to use. If the mag housing measurement is longer than the engine measurement it’s obviously going to lock up, so work out will a gasket lift it away and leave a gap? The Mag housing needs to be shorter than the casing gap and you need 1mm gap between crank and mag housing. MB offer 3 different gaskets 0.5, 1 and 1.5mm. If its still tight with a 1.5mm gasket then you can mount the mag housing in a lathe and turn the face down to help.
If you have your measurement correct, time to fit the mag housing. You need to seal the mag face and you need to seal it with petrol resistant sealer. Finely smear the sealer on the engine face and mag face. Fit the gasket to the engine, it will only go one way as the studs are off set.
Offer up the mag housing it can only go one way, carefully offer it down the crankshaft so the sharp threads don’t touch on the crank seals. If you made sure the mag housing was free in the casing in the beginning the mag will push down easy, only the tight seals and interference of the bearing will stop it dropping straight down. The mag housing will stop where the large mag seal hits the crank shoulder – at this point – wiggle the mag housing side to side to help the seal lip climb over the shoulder. If it’s still tight at the same time turn the crank from the drive side with the pulling tool still fitted.
If all is good lightly tap the mag housing down.
Tip – to locate the mag housing so at a later date when you strip it again you can keep the ignition timing correct. To do this, use a counter sunk screw like a drive plate screw, fit it in the hole at 1 o’clock from the stator hole in the mag housing, nip it up, fit a slightly wider 6mm washer to the opposite side stud and fit a nylon nut, nip this up a bit. Fit 6mm wider washers to the other studs and nip these up. Tighten the counter sunk screw so its tight and centralises the mag housing in place, then fully tighten the other nuts tight.
Use a counter sunk screw to centralise and locate the mag housing in the same place, do this every time and timing marks will always be the same on strip downs
Then check the gap between the crank web and the mag housing – this should be around 1mm. If it’s too tight then you have to strip it add a thicker gasket and start again.
Use feeler gauges to check gaps between crank webs, drive plate and mag housing
If you use the counter sunk screw locating method each time then the top dead centre and timing marks are the same at a later date.
Finally turn the crank, it should turn free by hand with very little effort. If it’s near impossible to turn, something is wrong and you have to do it all again.
And that its you’ve fitted your crankshaft, bearings, seals and gaskets. All that would be left is to check for any leaks when the cylinder is fitted when you do your pressure test.
Areas to look at.
1) air from the crank fitting in the drive bearing
2) air leak around the outside of the drive bearing
3) cracks in the casing
4) leaks around the mag gasket faces
5) leaks inside the mag housing
6) leaks from stator and mag housing studs
If youve sealed it as I’ve suggested, you shouldn’t see leaks.
Your good to go.
Any questions email mark@mbscooters.co.uk


