


TECH ENGINE MB GASKETS
I don’t really think about gaskets as a technical part of a Lambretta engine or any engine for that matter as I just take them for granted I guess like most people do!
But gaskets can be really technical when they need to be, it’s a science all on it’s own and there are manufacturers of gasket materials and manufacturers who specialise in using these materials and cutting them to shape.
So do you fit a gasket and forget? Do you use grease or sealer or fit them dry……… well it all depends and it depends on the application.
Ok we all know a Lambretta can drip oil from the crankcase side, we all know head gaskets can go and more recently base gaskets can go. But why?
Most of these problems come down to some basic mechanics, I take these for granted because I’ve been involved with mechanics and gaskets for 40 years. What I do forget is not all people know about mechanics or just think they know about mechanics. There is plenty of information on the web and there are some very good Scooter books, manuals, technical articles in Scooter magazines and now we have some videos which cover all aspects of mechanics on a Lambretta engine.
It’s no secret I was chosen for the technical side of the very popular edition 1, 2 and 3 of Sticky’s Spanners manual which is probably the best source for Lambretta mechanics. The problem is, as always and with other technical articles which I’ve been involved with Scootering magazines is time and and how much information that you can get over in a cropped piece of writing. So here is a full explanation of gaskets in a Lambretta engine.
I’ve been making gaskets from the age of 15. We were taught how to make a gasket to get the bus back on the road if the stores where out stock. We were supplied special gasket paper. Not news paper or any old paper as a gasket usually needs to an oil proof paper but it doesn’t stop there. Not only does it need to be oil or water resistant but it needs to be pressure resistant in some applications and it also needs to be crush and heat resistant!
A gasket is not just a piece of paper or card! Ok in real bodge emergencies anything can be done but lets talk about making a reliable Lambretta engine.
Lets look at the gaskets in a Lambretta engine gasket set.
- Cylinder head gasket, small block
- Cylinder head gasket, large block
- Cylinder base gasket, small block
- Cylinder base gasket, large block
- Cylinder exhaust gasket
- Cylinder inlet gasket, small block
- Cylinder inlet gasket, large block
- Mag housing gasket
- Drive side gasket
- Crankcase side gasket
And then we have the extras which MB do separately.
- Mag housing sealing plate
- Gear pivot gasket
- Gear adjuster block gasket
- Crankcase side drain plug washers
Lets look at each gasket, I’ll try to explain what the gasket is used for, how it should work, the faults that it gives if any and how to fit one.
HEAD GASKETS
All engines from Innocenti came with a head gasket but they come in different sizes to suit different piston sizes
125 = 52mm
150 = 57mm
175 = 62mm
200 = 66mm
Then you have to allow for slight misalignment of heads and over sized rebores so expect to measure a gasket up to 2mm bigger than the bore. This is not ideal, we maybe talking your pride and joy but really we are talking low engineered shopping trolleys! And something simple for a non mechanic to be able to strip and rebuild either at the side of the road or in your own home. Yes we know Innocenti set up a great mechanical workshop system all around the world. But we are now talking now modern times.
Some head gaskets come in different thicknesses, most are 0.5 – 0.7mm thick as standard. Some Sx150’s came with 2 x 0.5mm head gaskets. 200’s came with either 0.5mm or 1.5/2.0mm depending on model. The difference between the thickness from the factory was to alter compression ratios between models. The cylinders and heads were not adapted to get squish clearances bang on, in fact Innocenti never really went for squish clearance nor did they address it. Heads from Innocenti where never cut to suit the dome of the piston, which if you want the best from your engine a perfect squish with correct compression ratio is always best for speed and reliability.
As we all know Scooter tuners and manufacturers pushed the limits of the Lambretta engine and gave us over sized kits, namely the 190, 205, 225, 230, 240, 250, 255 and in some cases 260 or 280cc conversions. All using different methods of head gaskets and thicknesses. These big bore gaskets bored out to work with 70, 71 and 72mm+ pistons get very thin between the outer edge of the piston and cylinder stud hole and it’s not uncommon to see burn marks at this point where gases leak into the stud hole, so beware!
Going off a little bit I’ll try to explain were a head gasket can help on a engine rebuild. For many years I have preferred to use the 1.5mm thick head gasket with my special TS1 style engines. I’ve used these to help improve the TS1 engine. The thicker head gasket not only is stronger and tends not to blow out like the thinner gaskets. By using the thick gasket it gives you more scope with important port timings and also very importantly these days with more long stroke cranks out there it helps to sets them up better.
If you use a 1.5mm head gasket and a perfectly machined cylinder head and you set it up to get a perfect squish clearance from 1.00m to 1.30mm and then if you check the transfer port timings you will find they are much lower anything from 130 – 138 degrees standard (with a fixed crankcase height and fixed con rod length) With the fat head gasket conversion the transfers will come down to 120 – 125 degrees. Which will make for a better engine that will have power much lower down in the rev range. Turning engines into touring specs rather than on off racing engines.
This also applies to the RB style engines which I feel are too over tuned. By doing this, you can alter exhaust port heights to suit your style of riding and get even more power but the trick is it will promote ride-ability!
Add to the fact that a 60mm crank will need to find another 2mm of space. The fat head gasket helps a 60mm work even better, in fact it’s the only way to really set up a 60mm engine without either welding the top of the cylinder or extending it with a liner. I see questions asked so many times ‘if I fit a 60mm crank do I fit a 1mm packing plate’ This is another story, basically you would fit no packing plate but fit a fat head gasket to take up the difference in stroke.
Also at this point we recess into the head to get everything to fit correctly, the problem is on some set ups you need to let the piston stick out the top of the cylinder a bit more, beware as the top ring can pop out! An engine set up ‘my way’ would have the piston stick up above the top of the cylinder, add the fat head gasket and a recess in the head and you get great port timings and correct squish clearance. Using 107mm rods really limits you on setting up a good motor, use a 110mm rod and different packers and any cylinder kit can be set up and improved over standard.
The head gasket in a Lambretta is traditionally Aluminium or Aluminum as the yanks say but I’m going to call it alloy from now on. This is a soft pliable non magnetic silver looking metal material. But don’t think all Aluminium is the same it is not! There are different grades, some good and some bad. We’ve used one supplier, as do other dealers, they supply the 125 – 175 in a hardened state material and NEVER EVER give us any problems for two reasons.
1. The material is hardened which is what we need
2. 125 – 175 cylinders have the cylinder studs closer together which really aids head gaskets not blowing!
BUT the same company also supply 200 and 225 head gaskets made from a really soft material which just blows out under pressure and doesn’t last five minutes and we do not sell these – but others do, so beware!
The reason they use soft alloy is, in the day when this manufacturer made the tooling to cut the gaskets they could afford to make a steel pressing which will cut the hardened alloy. Then later on as the 200 and 225’s came along and they made a cheaper wooden cutter which just does not have the strength to cut the hardened stuff.
I tell you this as a little education, these 200/225 gaskets are freely sold by well know dealers. I learnt my lesson in the 80’s and refuse to sell soft head gaskets and have now sourced 200+ head gaskets who use the hardened material.
WHAT DOES A HEAD GASKET DO?
A head gasket has three functions.
1 and 2 allows for crush which allows for deformation of the matting surfaces to seal between the alloy cylinder head and either an iron cylinder or now some alloy cylinders. I say crush because a Lambretta head is tightened to 18-20 lbs ft which is tight. I say deformation because a Lambretta head once used is not perfectly flat. Bad heads can be miles out, put one on a perfectly flat surface and you can see day light between each point where the stud and nuts would tightened.
Sometimes even an iron cylinder can deform or warp. This comes about for a few reasons, heads over tightened in the past can distort the heads flat surface. Also because of a poorly designed and weak head, which are usually genuine Italian heads and pattern Italian heads. Later Indian, our MB heads and the new AF heads are much better and a must to be used on all 200 engines but as explained below the Lambretta head design is not so good.
And 3. Stops the gases blowing out between head and cylinder. As this is where the soft gaskets fail, the material just has no strength to stop the high pressure from just pushing, burning or blowing the material out between either the two long cylinder studs by the exhaust port or on the off side side or as explained into the studs holes.
They hardly ever go on the plug or inlet side of the studs as these are closer together like the 125 – 175 motors where you never see the problem. Like I say it’s only ever on 200 studded engines as the 200 engine has cylinder studs which are really on its limit of reliability. This is the 200’s down fall in engineering terms. If it was a modern engine it would have 5, 6 or 8 head bolts or studs holding down and spreading the load on the heads flat area. A modern engine would use studs on the cylinder base, which would also improve cylinder distortion and allow a better transfer system to be used.
The 125, 150 and 175 are usually no problem at all. As long as the cylinder and head faces are true, fit them as per manual and they work forever. If you’re not sure if the faces are true then get some thick glass or a ground metal thick plate and either use grinding paste or a fine sheet of emery paper to reface the head and cylinder. Do this by moving the head or cylinder in a figure of 8 slowly for a minute or so, then twist it 1/4 of a turn and do it again until it’s been turned a full 360 degrees and check by wiping the surface. You will see dark and light areas which indicate high and low spots. Keep doing it until the sealing areas are all ground flat. Of course the other way is to mount them in a lathe and do it that way.
Fitting a gasket should be fitted with dry surfaces on both the head and cylinder. Remember a surface may look flat but always check them out, especially if you’ve had problems with blown gaskets. Providing the faces are flat and dry you can fit a gasket dry and tighten the head correctly.
BUT head gaskets can leak if fitted dry. I first came across a warped head on a 125 Jap motocross bike in the 70’s, it was so easy to find a fault the head gasket area whistled when kicking the bike over. A classic symptom but this does not always happen. The usual indicator of a warped head gasket area is when you strip them the area is either burnt black or covered in oil, you can usually tell if the head nuts are loose.
I fitted head gaskets using Loctite for years! I use any at hand which was usually stud lock, retainer or high strength retainer. A fine smear either side is all that is needed. Loctite is not made for the job but it works really well, it takes the heat and seals solid and also fills in any very small gaps or casting holes which you see on most Lambretta heads. I’ve only ever fitted a gasket with Silicone instant gasket once in the early 80’s and had to push my bike after 1 mile when it blew out the Silicone, so never again but I do see it been used!
Today because of how cylinders, heads and gaskets move with compression and expansion in use, I’ve now moved to a sealer that can take heat and doesn’t go hard but still stays elastic and moves with this expansion and compression. Loctite can not cope with long life movement.
Heads do warp, even the stronger ones. This is usually down to over tightening the cylinder studs or using nuts and washers that are not very good. I used to have lots of problems myself in the past, I tried every suppliers combination of cylinder studs, nuts and washers.
It helped using Vespa P200 studs, but I was doing so many engines I bought Piaggio out and all the suppliers which stocked them. In the end I gave up and started again and had High Tensile special studs CNC made to suit every cylinder combination used, which included the shortened Suzuki 190 cylinders and extended cylinders with packing plates. With these studs I used wider thicker washers and special MRB designed head nuts. Then hey presto no head nuts working loose, no studs snapping or stretching and 200 head gasket problems disappeared over night.
The basics are…….. use good cylinder studs, nuts and washers along with flat surfaces and don’t over tighten the head. Tighten the 4 nuts by hand with only a socket, then start to tighten slowly again diagonally then torque up to 18 – 20 lbs ft. Tighten any more and yes it may seal a gasket BUT the chances are it will distort the head and it can also distort the cylinder. Not just the flat face but it can distort the cylinder bore where the studs run, which is the usual place where we see seize marks.
If you’ve blown up your engine and melted a piston. The chances are you have distorted your head. Not only the head but the cylinder face especially if it’s alloy but also cast iron. Not only this but the inlet faces can distort. If you’ve blown it, flatten the faces and always do a leak down test and use a sealer on all joints!
DO YOU HAVE TO USE A HEAD GASKET?
The answer is no! IF the squish clearance is correct you can fit a head with no gasket, again if flat and sealed correctly. Which leads me onto other ways to seal a head. From the 1980’s I have done special engines where I have machined a top hat spigot onto the cylinder, machined the head to suit and this will do two things. It will locate the head perfect to the bore and it will make a better sealed head, providing everything is machined right.
The problem of doing this is; you need a workshop and lathe as every engine and cylinder set up is different. Fit a cylinder designed like this with a standard con rod and you have no control to get the squish right without either machining the base of the cylinder or recessing into the head or machining the top of the cylinder. It’s a workshop, pain in the arse job to do so we stopped doing this conversion over the counter only on our engine rebuilds. This hasn’t stopped a certain Italian and UK manufacturer copying the idea without knowing the pit falls and offering it to the masses!
I developed the idea further on my Race-Tour cylinder kits by extending the top of the cylinder which allowed the head to be machined to drop down into the bore. This located the head again giving perfect centralisation. It has adjustment because you can fit varying thickness head gaskets to get the squish correct. Its the best of both worlds! I also went one step further and designed the cylinder to have 4 more stud holes to go into the head. This conversion also helps where our cylinders can be used with 58, 60, 61, 62, 63, 64mm crankshafts without having to machine anything other than the head to get things to work! You can even fit this head design dry if you wanted, but I prefer to seal them.
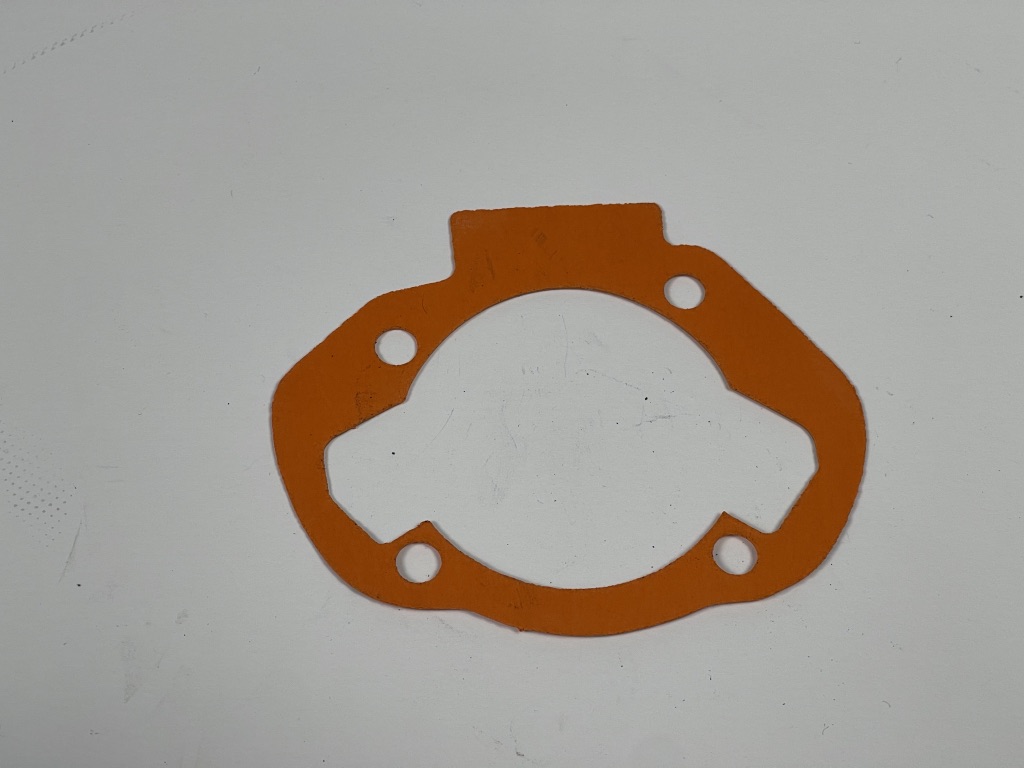
CYLINDER BASE GASKET
On to the dreaded base gasket! Why do I say that, oh it’s caused us some problems on the forums over few years, but I will explain later. As I’ve pointed out Lambrettas have a small and large block.
Small block 125, 150, 175 up to 190, 195 and 200cc, then the large block 200 to 225 and up 260cc.
All Innocenti engines use a base gasket and it should be around 0.5mm, I say ‘SHOULD be around’ as these base gaskets will be slightly thicker when new. The materials used in this application will have some crush built into it.
In the old days, paper oil proof gaskets used on the base would be made with asbestos. But the clever people in the know went and banned asbestos!
From that point gaskets went down hill! The manufacturers never really found a man made substance to replace it. I still remember and still have the steel cupboard where we used to keep all our gaskets, it had a smell, a smell like no other, I guess it was the asbestos in the gaskets. I never thought anything of it, I quite liked it, it was a cupboard where I kept my new stock, I liked it, I could only afford to buy gaskets in bulk and it was one of the products that got me into mass sales to trade. But as Lambrettas were made in India they still use the bad stuff to make gaskets so you may come across some of the old style gaskets floating around.
Sticking with the old stuff, how many times have you seen a base gasket stuck to the bottom of a cylinder? I’ve seen thousands, they are so hard sometimes it takes a hammer and sharp scraper to remove it. You don’t see this with modern gaskets! I’m aware of these gaskets because you have to totally remove the old gasket when doing a rebore.
On to the modern materials. But first lets look at why sometimes base gaskets become a modern day problem. I’ve already said a cylinder should be bolted down by short studs, not long cylinder studs like a Lambretta but short studs like a modern 2 stroke engine. Because of the Lambretta design the base gasket sealing area is very small. The small block in comparison to the large block is much better like the head gasket situation. You hardly ever get a problem from a small block base gasket. But look at the large block, the area to seal the cylinder base is very thin, add to the fact that most 200’s will have transfer ports opened and matched to suit a cylinder like a TS1, RB, Rapido or old style stage 6 or group 4 tune.
This thin area does not help seal the base gasket as the cylinder becomes a shear at points and will cut into the base gasket material. And in reality you really do need some area to work mechanically and get a good seal. Using gaskets on a stage 6 tuned motor will usually blow the gasket out at the transfer point as any gasket is not strong enough to seal at 2 – 3mm! Which would lead us onto using no base gaskets, later.
Modern gasket materials is where we became foul of the manufacturers and I learn’t a lot about gasket materials! We had sold our own base gaskets for years, the manufacturers would send different coloured gaskets without saying anything. I never thought about it, just another colour, can’t mean much! We had no problems and just carried on. Even after asbestos disappeared we didn’t seem to have any problems.
Then when we spent most days for 3 months dynoing an engine to compare the RB to TS1 cylinder and developing what we did and how we did certain jobs to get the best power. I found that our orange gaskets were breaking up on every strip down which could be 10 minutes after a run.
You could not reuse them (as you shouldn’t) they seemed to go mushy! At this point we had had no complaints for many years with our orange gaskets, it was something I looked into and talked with our manufacturers who suggested a stronger grey material that we had used very successfully on our exhaust gaskets that we could even reuse up to 20 times on the dyno. As we introduced the newer grey gasket time went on and some of these gaskets would seem to fail.
When I say fail, people complained they went mushy again! Personally I had no problems. I have photos proving our grey gaskets held together after stripping engines. What we found after months of research was the grey material would go mushy IF the head nuts became loose. Engines we inspected had loose head nuts, cylinders that came back showed signs of leaking head gaskets showing loose head nuts. As I researched the problem, it turned out the grey material needed to be torqued down well beyond the pressure that 4 x 8mm head nuts could ever do!
And this was the problem, let the nuts come loose and the gasket just had no strength to hold its self together. Other research found the binding material of the paper was rubber in place for asbestos! And now you can see why base gaskets are not to be taken for granted.
As phone call after phone call between us and the manufacturers we came across sheets of technical information, it really is a science. It was always a compromise between heat, oil, fuel, pressure and how much compression you could apply to the joint!
We moved onto a different material which in theory ticked all the boxes. But I have seen the similar looking materials supplied with the RB cylinder and also the Mugello and Casa cylinders and these fail very quickly, it’s something non of us can control.
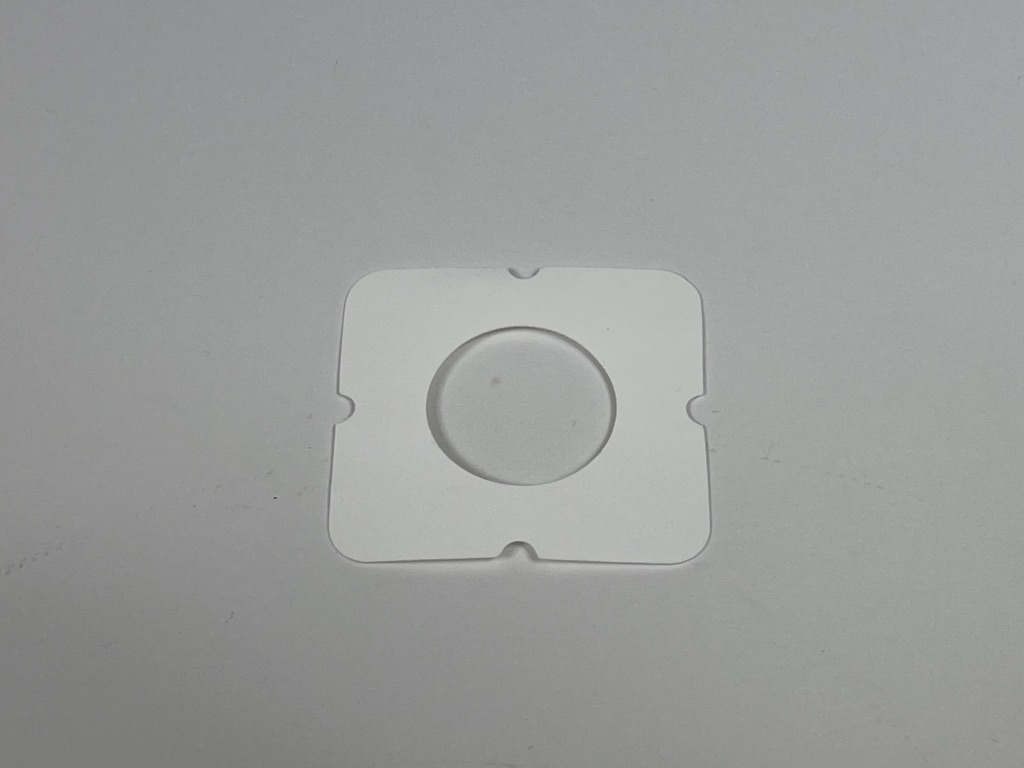
Today through a good customer who worked for the company we used to make our gaskets put us onto a special very expensive white material. And it totally transformed gaskets. It worked, you could hardly snap a gasket it was so strong! And just as importantly it resists modern fuels as it was the fuels that was turning the older gaskets to mush!
Today we mainly use this special white material and is the best to use on the drive plate, mag and inlet gaskets.
If you want a bullet proof base gasket we offer alloy gasket or packers in all sizes from 0.3mm up, these need sealing each side.
FITTING AND USING A BASE GASKET
In the old days we would fit a gasket dry or maybe with a smear of grease, this should offer a simple way to fit a base gasket. But as explained modern gaskets can give us trouble so I always suggest you use a good sealer.
What is a good sealer? Well I always suggest a silicone type of sealer, it is very flexible and drys after time, you can smear it around the outside of the base gasket and by doing this it grips both the cylinder and casing. If you put enough on which is not too much, don’t over do it, the sealer will also go to a beaded ball which also helps to seal. You could also use other gasket sealers, Welseal is good as is some of the Loctite range, Its just a personal preference sometimes, find what you like which works and stick with it.
The sealers we sell after years of research and testing are the best we can find and work perfectly especially resisting modern fuels.
I’ve never known a gasket fail because of using a sealer!
CAN YOU FIT A CYLINDER WITH NO BASE GASKET
Yes it is my preferred way, it takes out the unknown and that little niggle if the gasket is going to fail on you. Of course a base gasket will leak before it goes, so the base area will be damp or even leak.
Most people complaining about our older gaskets just kept running them with a leak and of course something will go wrong, it will not repair its self! Not only can the head and the top of the cylinder warp but the base area can warp as can the casings. I see loads of damaged casings on the base area. I see cracks and gouges and poorly fitted helicoils and timeserts, non of this helps the problems we face.
Re facing a base area is not easy, the cylinder can only be done on a lathe. The casing can be done by hand very carefully or it can be mounted in a milling machine. Sealers are so good and so forgiving it will fill damaged areas and 99% will seal the worst casing. This is why I like the stuff. This is why I prefer no gaskets on my engine rebuilds and I use a sealer.
I prefer using 110mm con rods and this is why I fit them to our Race-Tour cranks. I’ve used and perfected the Jap con rod conversions since the late 80’s. By using 110mm con rods as explained you can move the cylinder up and down to get port timings where you want. You can adjust the cylinder set up with fat alloy head gaskets and alloy cylinder packing plates.
If fitting an alloy packer I always Scotch Brite the casing, cylinder base and both sides of the packer. This gives a good key for the sealer to stick to and it works!
Ideally I like to fit just a packer without a gasket, you can fit one or two gaskets either side of a packer. I have only done this in the old days when packers where made by hand or there were limited supply’s in sizes. Today we have invested in lots of different sizes so we can set up an engine perfect. Our base packers and gaskets are slightly larger so if you use a cylinder with big transfer port feeds then they can be cut to suit which opens up more scope with cylinders like the RB, Monza, Mugello or any cylinder that is opened to the max or welded.
EXHAUST GASKET
All Lambretta models basically used the same exhaust gasket whether it was a 125 or a 200 except the Indian 200 cylinder version which was slightly bigger to suit the tuned exhaust port. Basically the standard exhaust gaskets were thicker than any other gasket and were made of alloy or copper which bound around some asbestos material. Occasionally you may see a plain alloy gasket with indentations in it.
If we are talking standard cylinders then fine use them, the only thing to watch is if the standard exhaust flange is warped through over tightening the thin flange which is very common as the Lambretta exhaust flange really is a bad design. From new everything works well, you don’t need anything special or sealer, just fit them and tighten the flange equally and nip up the nuts. Problems will occur if you tune the cylinder and try to open these gaskets to suit, it’s a waste of time so don’t bother the gasket will just fall apart.
One thing to note is you can fit a gasket the wrong way round! Look at the exhaust port and flange, look at the distance from each stud to the start of the exhaust port, one side is closer than the other so you could get the gasket back to front, It’s no major problem but fitted wrong and the exhaust gasket will mask off the exhaust port especially on a tuned cylinder.
Some modern day cylinders which either were not designed right by copying a standard exhaust port offset or the designer decided to do it equal – this I do not understand why, maybe they didn’t know this information!
Occasionally I see cylinder exhaust flanges made wrong. If you look at a GT, Casa and some of the Rapido kits you will see the exhaust port is not moved to one side like a standard set up – but is centralised. Fit a standard exhaust or a exhaust with the correct flange and these kits will have masked off exhaust ports meaning to fit the cylinder correctly you have more work to do!
During the 80’s various thicker gaskets were introduced. One been the fibre type and one been the copper type. I used a thick copper type on my LC bike throughout the early 80’s. These were thicker than the standard gasket at around 3mm. To be honest I didn’t get on with them. Every time you removed the exhaust ideally the copper gasket needed heating up to soften the copper and refit it. Pain in the arse especially if you were designing and fitting new exhausts every five minutes like I was, so I progressed onto the fibre throw away type.
I’ve always preferred these fibre type gaskets since, they have changed over the years depending on who supplies them. I’ve been making both the oval (standard type exhaust port) and the round type (TS1 style) since the late 80’s. Before asbestos was banned these gaskets were great and gave no problems, you could even use them a couple of times. As with base gaskets, the modern materials did create small problems but the thickness makes them stronger.
What happened with these gaskets is they would turn hard and brittle and occasionally they could blow out causing some terminal problems if you didn’t catch it. These later types couldn’t be reused, they usually fell apart when removing the exhaust.
But we always try to improve and offered a similar gasket but improved with a steel sandwiched in the middle, these are fantastic but sealed so well they would break up taking the joint apart – so only use once!
To improve things even more we redesigned this version to be covered by a thin copper coating holding the fibre together so you can reuse them.
The main problem is this; with standard oval exhaust ports………. and no one ever picks up on it! Exhausts flanges warp! Most exhausts both standard and aftermarket use 5/6mm thick flanges, these are not thick enough to take tightening up! The problem is the distance between each stud is too long and wide. It can be improved by making the flange 8/10mm like we do on some flanges.
On our RT cylinders we improved the exhaust flange by adding another 2 more exhaust studs, but really they are still to wide apart. On the round flange exhausts ports the problem isn’t as bad even though the studs are still a little too far apart and a 4 stud design would have been much better, like I did on the Power Valve cylinder.
Any complaints about exhausts gaskets usually come about from the flanges, just put them on a straight edge and you will see why. Sometimes even from new these flanges are warped, usually from welding. On a flat plate there will be high spots where the nuts are and a gap in the middle where the exhaust gasket needs to be sealed. There are too many exhausts that I can list which have flanges too thin, so always check them out if you have a gasket problems. You can file, grind or machine them flat……….. but if you have to do this then it is too thin in the first place. I have never needed to use a sealer with any after market MB exhaust gaskets!
We’ve also remade copper gaskets again. These are great if everything is straight and solid and the exhaust is fitted for a long time. We’ve also made the same gaskets in soft alloy.
A Lambretta exhaust is a high maintenance part so we careful.
INLET GASKET
Lambrettas use two sizes, the small and large block. Like the cylinder studs the inlet ports where smaller on the small block. Today we used the large block size on both our Race-Tour cylinders, some of the Mugellos swap around and can’t make their mind up which to use so always check before ordering a new inlet gasket. Inlet gaskets are usually made from 0.5 – 1.5mm think paper type gasket materials. But of course these have to be oil proof materials.
The inlet gasket is never normally a source of problems. You will always see people saying AIR leak when an engine is not well. If a gasket leaks on an inlet manifold joint you will know it will be wet. Inlet gaskets are never a problem providing that the inlet manifold flange is not warped or the inlet port flange is not damaged. It’s just a case of removing old gasket materials from both surfaces and cleaning them up. Even if a manifold flange is warped, which is rare as they are really a small flange, you can clean them up on a flat plate or with a file, dead easy!
I always use a sealer on an inlet manifold, but you could use grease, sealers will fill any holes so use it on a rebuild.
It’s the same for the TS1, Monza and RB style inlets, always use a sealer these cylinders can leak if you fit them dry or greased. And always keep an eye out on the RB style cylinders, we have seen lots of reed gaskets breaking up and going mushy, back to the same old complaining problem of modern materials. I’m glad its not just us who has these problems. Be careful if a reed gasket breaks up on the road, it will drag air in and can be terminal.
The only time we see inlet manifold problems is with over tuned inlet ports, it’s not so bad these days but in the 80’s and 90’s I used to see some terrible porting and it was always hard and a compromise to retune the cylinders and match a manifold. Today if I’m tuning an old style cast cylinder and I’m bolting a manifold down to tune through it and make a better job I may in some instances not even bother with a gasket and I always seal them after wards. This is especially true if I was doing a race type cylinder.
MAG HOUSING
All Lambrettas used the same gasket on the mag housing to engine casing. These are usually 0.5mm thick as standard. There are lots of manufacturers of these gaskets and come in different colours. Normally these don’t give us problems. BUT the mag housing can warp and I’ve seen lots of damaged casings in this area and its common to see cracks leading into the transfer port, especially the Spanish casings. Always check mag housing gasket faces, some remade SIL mag housings are machined very poor and have a groove cut into them that go into the 6 bolt holes and leak. These mag housings can be machined true, it’s the same for other remade mag housings! Again make sure you clean off any old gasket materials. I Scotchbrite both faces or use a fine 120 grit emery and always seal the faces upon assembly.
The main problems with the mag housing and it’s not a gasket problem. Is if a crankshaft is wider or a mag housing is deeper or usually if a mag face on the casing has had to be machined. This combination means a crank at some point rubs on the mag housing. If a crank turns but has a tight clearance between crank and mag housing with the mag housing fully tightened, when a drive bearing becomes worn and the crank can touch on the mag housing face, if this does happen it can be terminal.
I always say make sure there is a minimum gap of 0.5 – 1mm gap between the crank web and mag housing when assembling. If you don’t get this with a standard thickness gasket, then we do 3 different thickness mag gaskets to space out the mag housing.
This saves time machining the mag inner face which can only really be done on a lathe.
Another area we see is damaged or welded mag gasket areas on the casing! Some may have been machined down to get a good seal but some haven’t. You see this a lot with welded casing for big transfers, the casing should have been machined flat after welding but lots are not. If any welding has been done on the mag/base face or had an engine mount welded on the mag face needs to be machined flat as you get a dip in the weak transfer area. Using a thicker gasket gets back the clearance issue.
DRIVE GASKET
All Lambrettas used the same gasket. The old manual called it a Halite washer. Halite is a material from memory with a steel mesh inside it. I do come across lots of drive gaskets without this steel mesh inside and either way it makes no difference – both work.
The job of the drive gasket is to seal between the drive plate and bearing, stopping oil seeping around the casing and bearing and entering the drive seal area or straight into the crankcase. The drive gasket area is usually not a area for concern unless, like I’ve done on stressful days and left it out! Ouch!
From new an engine will burn gear box oil straight away if you forget the gasket. I’ve not done this for years and only done it twice, but never again, silly me.
I have come across problems with some casings where the bearing is machined too far down. You rightly fit the gasket tighten the drive plate and the plate doesn’t tighten down onto the gasket properly and you can’t see it! This is cured by sealing both sides of the gasket.
The main problem is fuel/oil can leak around the outside of the bearing and the casing. This has shown up on leak down tests a few times. The cure is to make sure the gasket is a tight fit in the recess in the casing once the bearing has been fitted correctly. Then seal each side of the gasket, when the plate is tighten it smears the sealer into all the gaps. Use fuel resistant sealer here every time.
We’ve used plain and Halite type gaskets for years, but as time has gone on these can turn to mush because of the fuels. Today we use our special white fuel resistant materials to cure this problem – expensive yes but not in the grand scheme of things on a rebuild!
CRANKCASE SIDE
All Lambrettas used the same gasket at 0.5 – 1.0mm. IF and its a BIG IF all the studs or threaded part of the side casing are good which they all should be then the side gasket is never a problem! He says! How many times have I seen old casings with stripped threads, missing studs or bolts or holes drilled and tapped far to big.
In the old days it was always a problem! Get one missing or loose screw and the chances are the gasket will leak!
I usually fit these gaskets dry, if all the threads, screws or studs are all good it will seal. I’m mainly doing new casing rebuilds and this works. In the old days or if I’m restoring an old casing then you do see damaged areas where screw drivers have been used to part casings or a casing may have been welded and filed back to get it something like flat. You sometimes see damage where a clutch inner cable has been clamped between the joints!
I’ve seen every botch going. Baring in mind the clutch is stripped more than anything else. The chances are, older casings have some damage, especially where people use the MCA type clutch compressor and screw it home too tight which cuts into the sealing flat area around the 4 studs where the compressor is used. In these cases I would smear some sealer into the damaged area.
Ive known some people use two gaskets or more to stop leaks. The more gaskets you use the weaker the joint will become and also it will space away the kickstart mechanism.
The exception of using two gaskets is on our old CNC external 6 plate clutch kit where we did use a gasket either side of the 10mm packer. Required to get the set up correct and seal the packer. Today we developed our clutch even further so you don’t need a packer and just fit the crankcase side as normal.
We make two crankcase side gasket thickness standard at 0.8mm allowing for crush and 1.2mm for those hard to cure! If careful these can be used again.
Others are making green silicone sealed gaskets – these are terrible they do not seal and break easy. Others have made thick cork gaskets! No need for these as they crush to easy if tighten too much!
This finally leads us onto the smaller gaskets.
MAG HOUSING SEALING PLATE
This is never a problem area, I fit dry and I’ve even fitted plates without gaskets with no problems.
GEAR PIVOT
This is never a problem area, I fit dry and I’ve even fitted pivot bases without gaskets with no problems.
GEAR ADJUSTER BLOCK
This is never a problem area, I fit dry and I’ve even fitted blocks without gaskets with no problems.
DRAIN WASHERS
These are never normally a problem providing you change these every time the screws are undone, if not these can crack and leak, but ours are usually strong enough to reuse. Drain plugs can come loose in use, a little loctite helps seal and hold them in place.
LIST OF SPECIALLY RE-MADE MB GASKETS/PACKERS
HEAD GASKETS
- 125
- 150
- 175
- 190 0.3mm
- 190 0.5mm
- 190 0.7mm
- 190 1mm
- 190 1.2mm
- 190 1.5mm
- 190 2mm
- 190 2.5mm
- 195 0.3mm RT
- 195 0.5mm RT
- 195 0.7mm RT
- 195 1mm RT
- 195 1.2mm RT
- 195 1.5mm RT
- 195 1.8mm RT
- 195 2mm RT
- 195 2.5mm RT
- 200 0.5mm
- 200 1mm
- 200 1.2mm
- 200 1.5mm
- 225 0.5mm
- 225 0.7mm
- 225 1mm
- 225 1.2mm
- 225 1.5mm
- 225 2mm
- 225 2.5mm
- 225 0.3mm RT
- 225 0.5mm RT
- 225 0.7mm RT
- 225 1mm RT
- 225 1.2mm RT
- 225 1.5mm RT
- 225 1.8mm RT
- 225 2mm RT
- 225 2.5mm RT
- 230 0.5mm
- 230 1mm
- 230 1.2mm
- 230 1.5mm
- 230 2mm
BASE GASKETS/PACKERS
- small block 0.3mm
- small block 0.5mm
- small block fibre 0.5mm
- small block fibre 1mm
- small block 0.7mm
- small block 1mm
- small block 1.2mm
- small block 1.5mm
- small block 1.8mm
- small block 2mm
- small block 2.5mm
- small block 3mm
- small block 3.5mm
- small block 4mm
- large block 0.3mm
- large block 0.5mm
- large block 0.7mm
- large block 1mm
- large block 1.2mm
- large block 1.5mm
- large block 1.8mm
- large bock 2mm
- large block 2.5mm
- large block 3mm
- large block 3.5mm
- large block 4mm
- large block 8mm
CRANKCASE SIDE GASKETS
- 0.8mm
- 1.2mm
INLET GASKET
- small block big bore
- large block
- large block white
- TS1 square white
- TS1 round white
- MB shorty white
MAG GASKET
- standard 0.5mm
- standard 1mm
- standard 1.5mm
- standard 0.5, 1, 1.5mm set
DRIVE GASKET
- drive white
EXHAUST GASKET
- oval copper
- round copper
- round fibre sandwich
SMALL GASKETS
- sealing plate
- adjuster block
- pivot base
- crankcase side fibre
- crankcase side fibre set
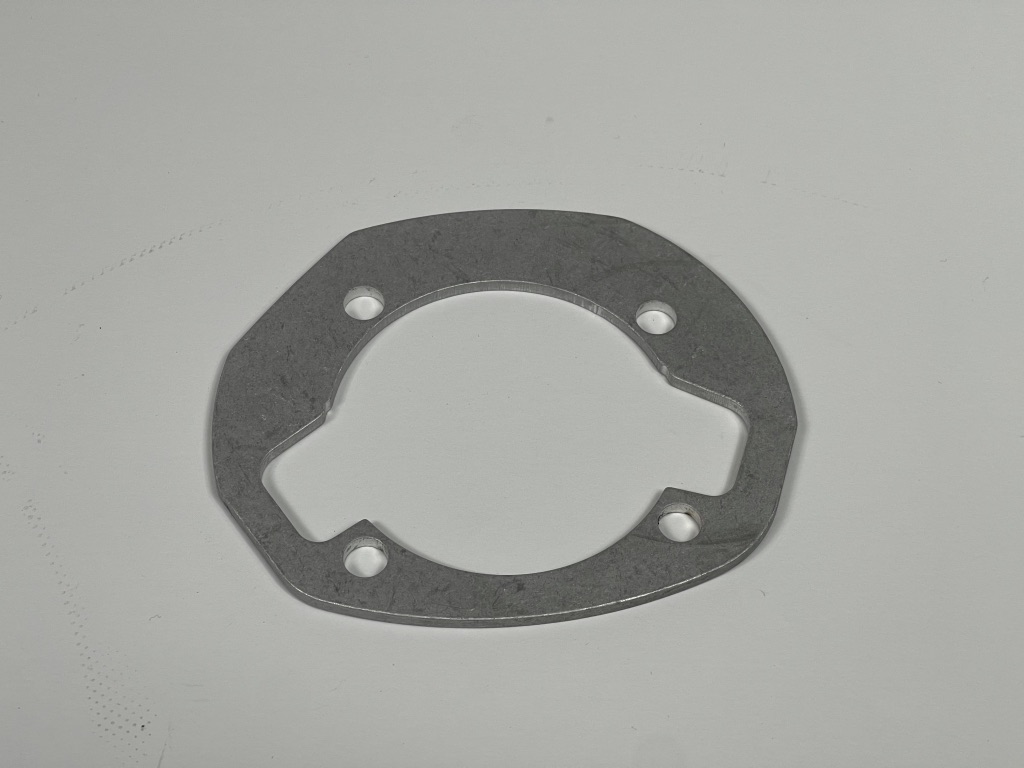
MB Alloy base packer/gasket
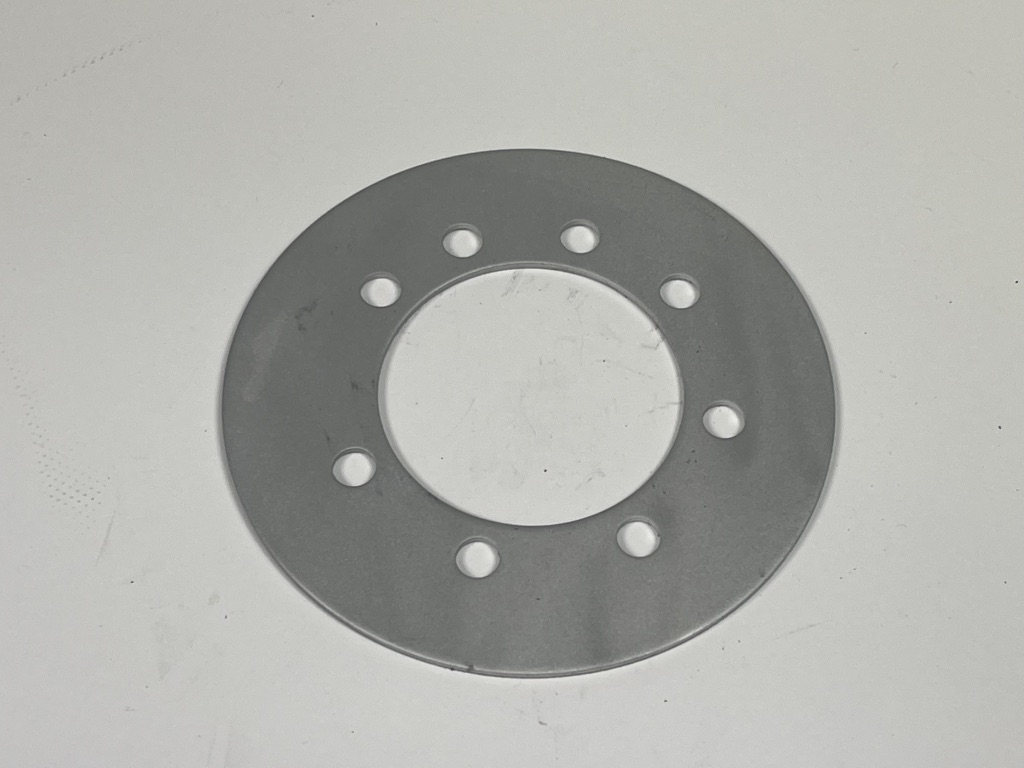
MB Dinner plate extra cooling alloy Race-Tour head gasket/packer
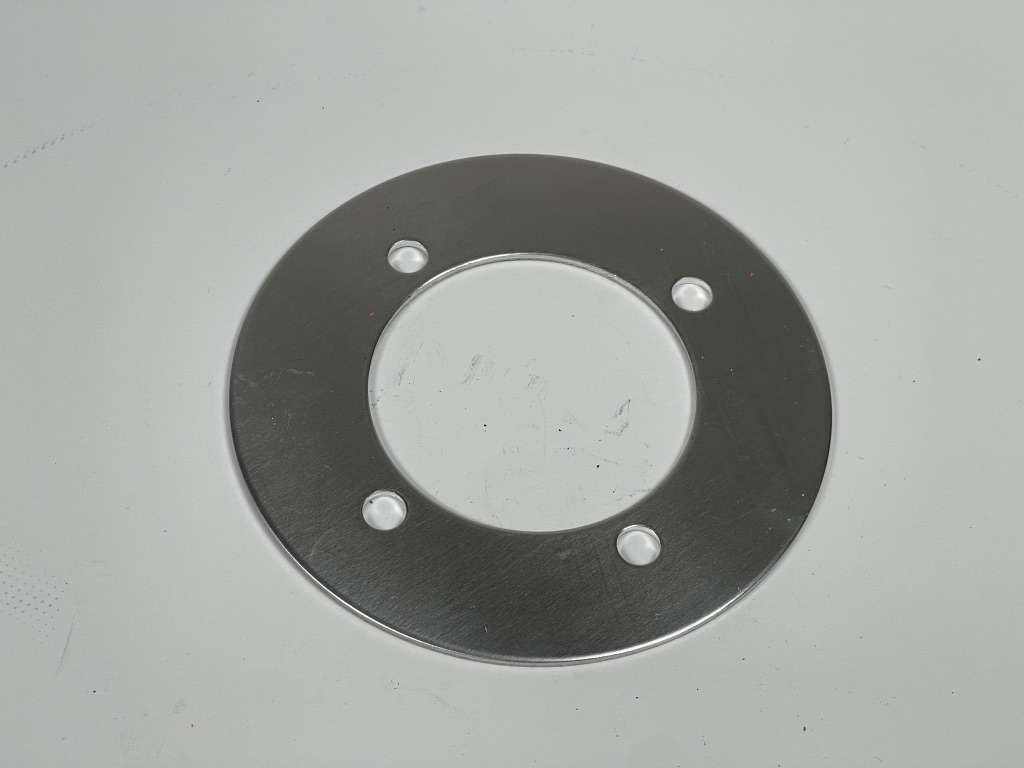
MB Dinner plate extra cooling alloy head gasket/packer
MB alloy TS1 packing plate

MB Copper TS1/RB exhaust gasket
MB Fibre exhaust gasket for oval ported cylinders, not 4 holes to suit the RT exhaust port, these can be used on a normal 2 stud cylinder
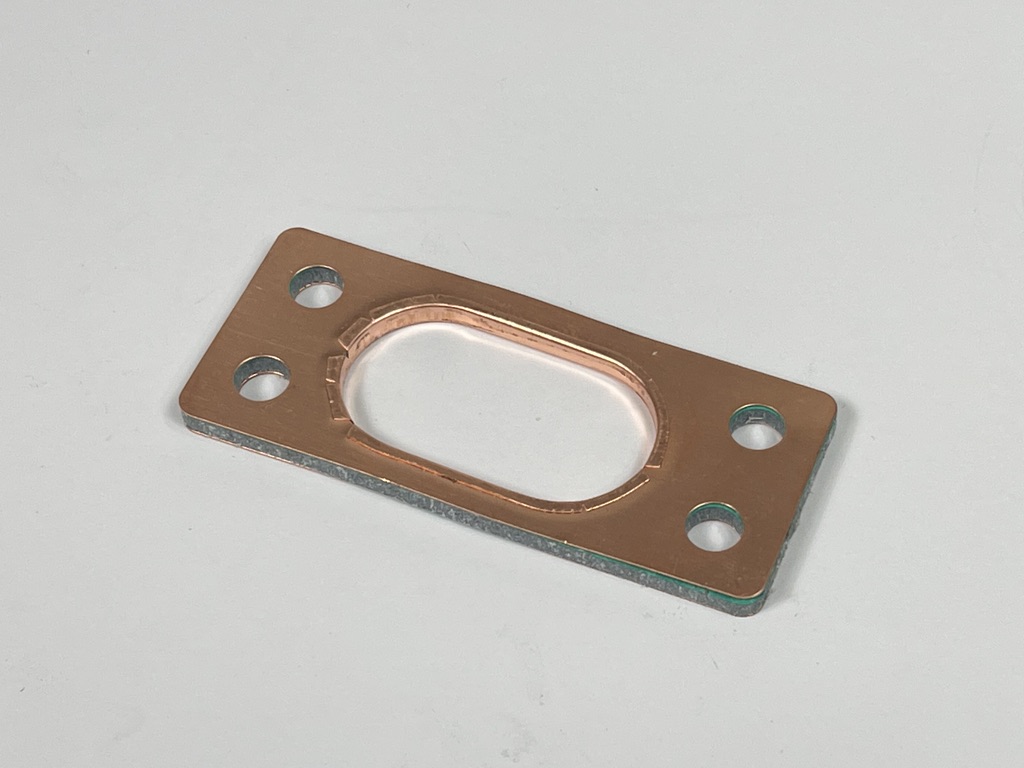
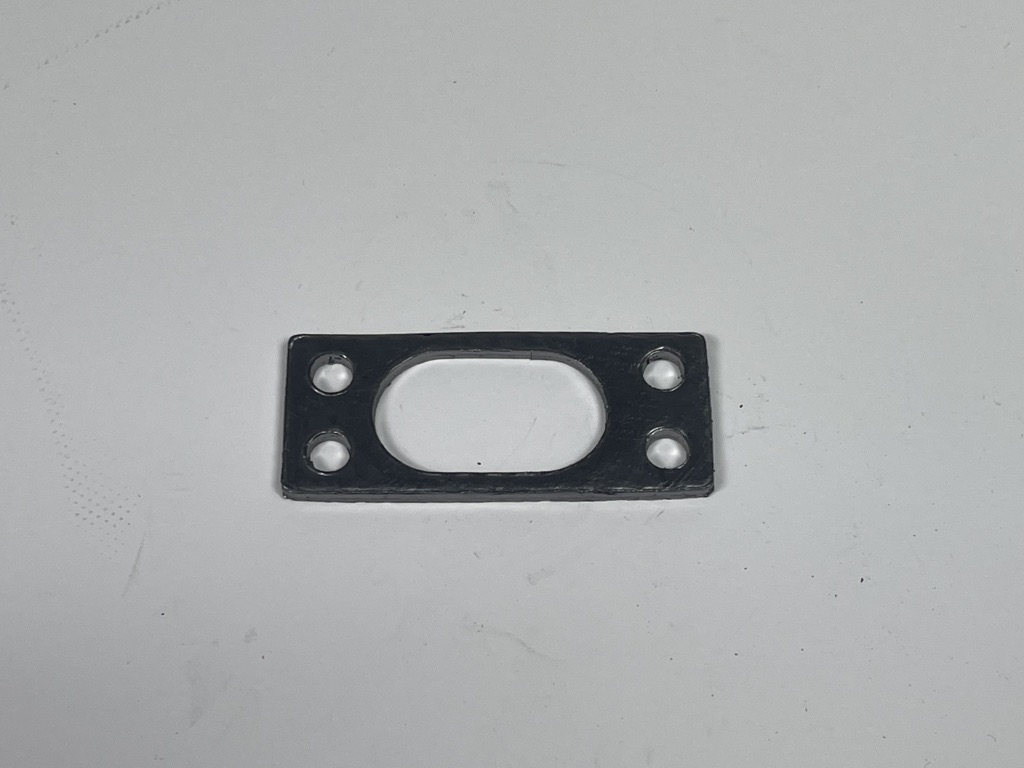
Latest MB Exhaust gasket, fibre with copper covering, the strongest yet
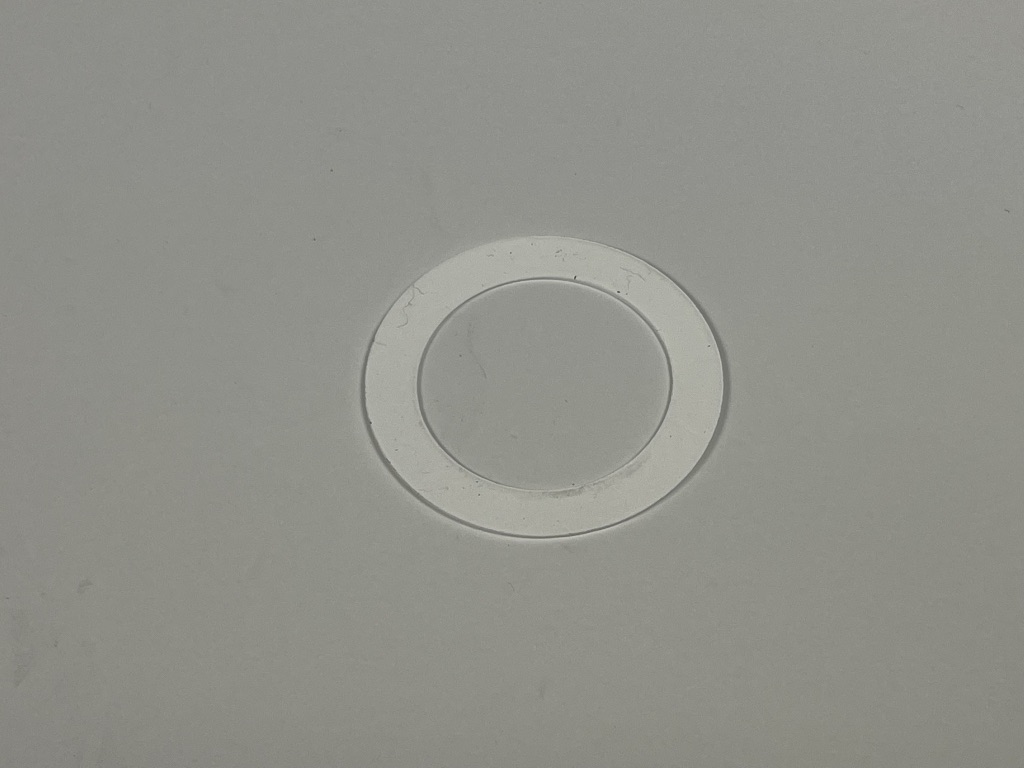
The best drive gasket on the market, totally resistant to fuels
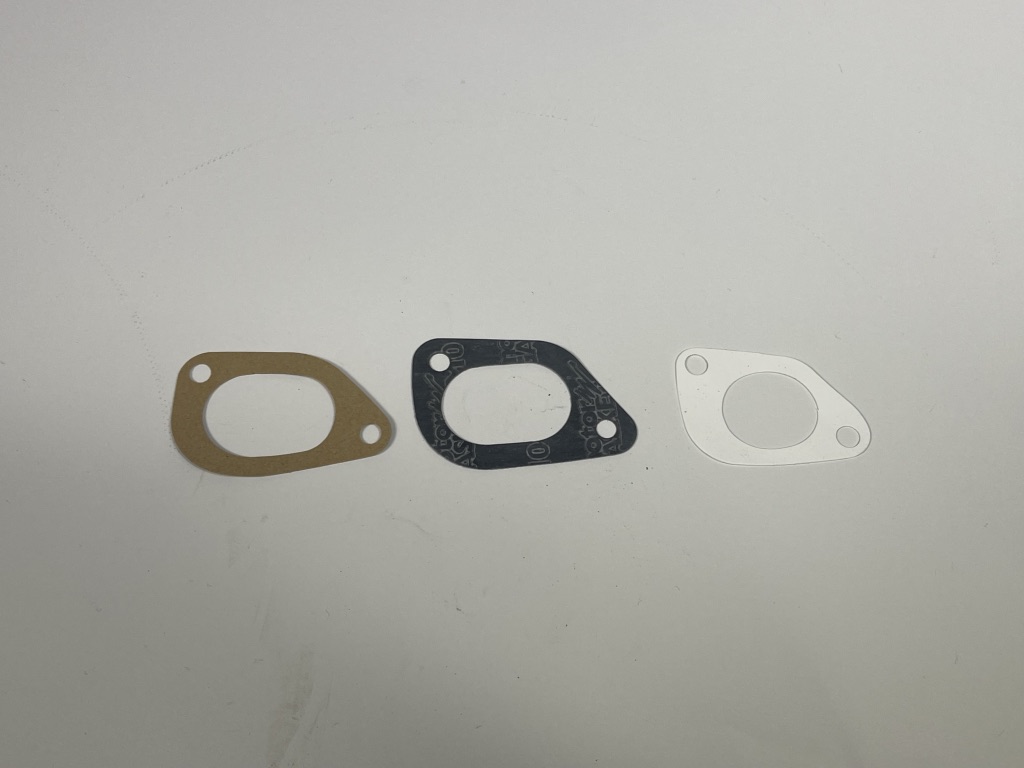
Various oil proof large block inlet gaskets, left and center large block, right small block MB white gasket the best
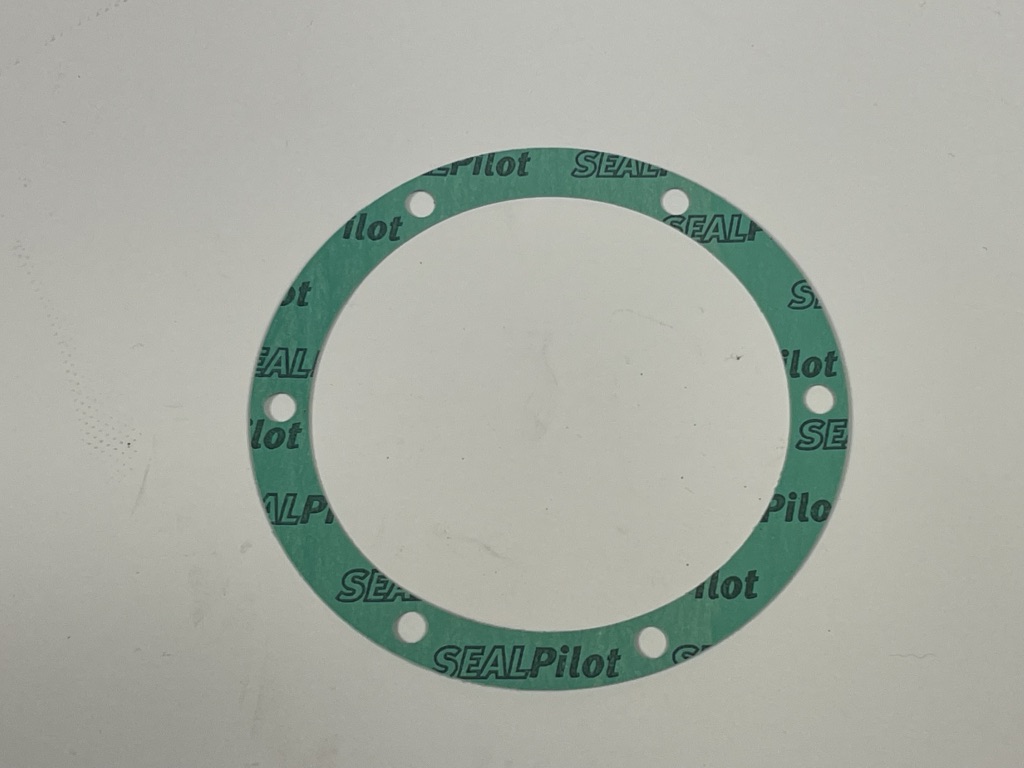
Standard MB mag housing gasket, comes in 0.5, 1, 1.5mm thicknesses
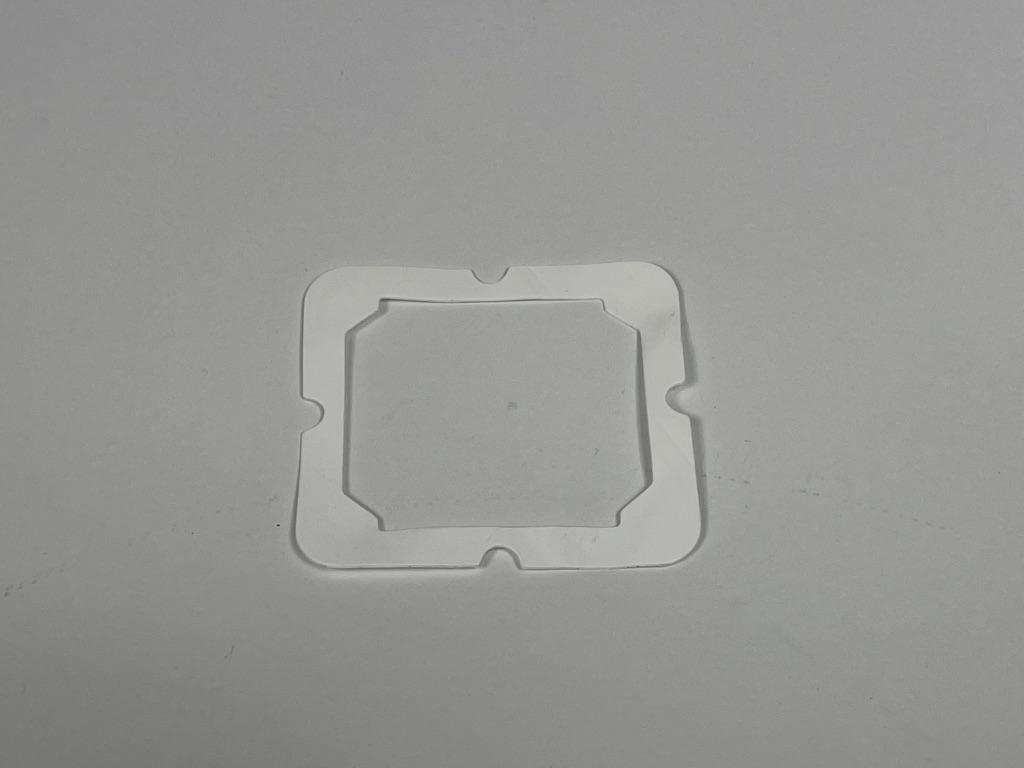
MB white TS1 inlet gasket
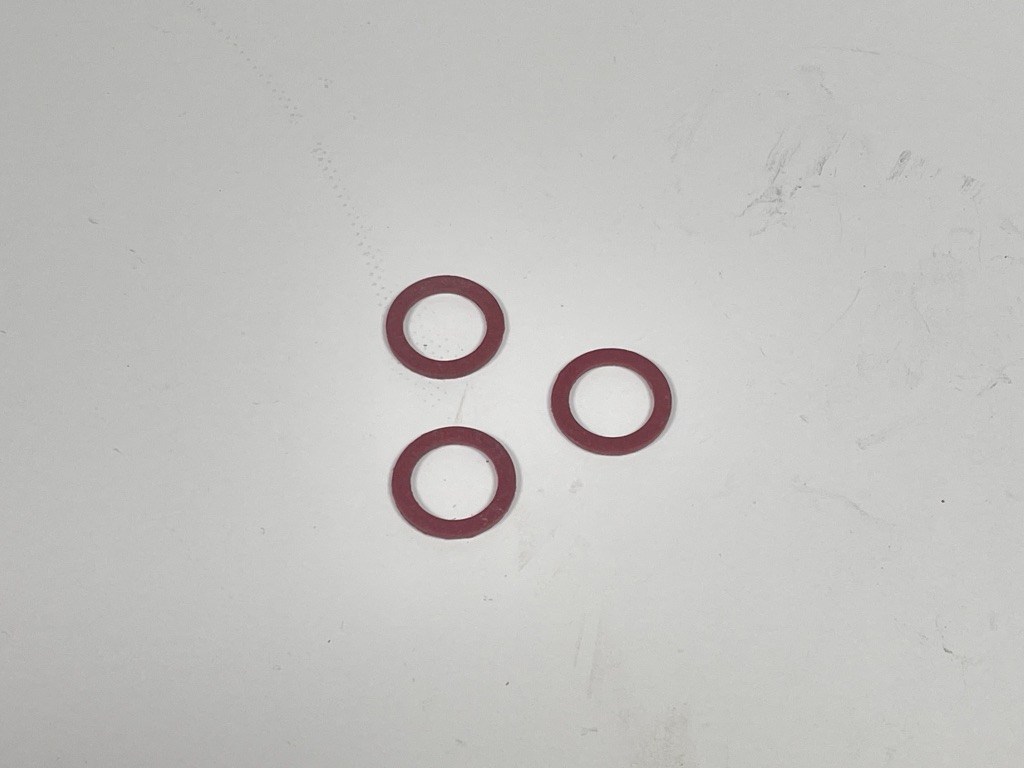
MB Fibre washers for the drain, level and filler caps
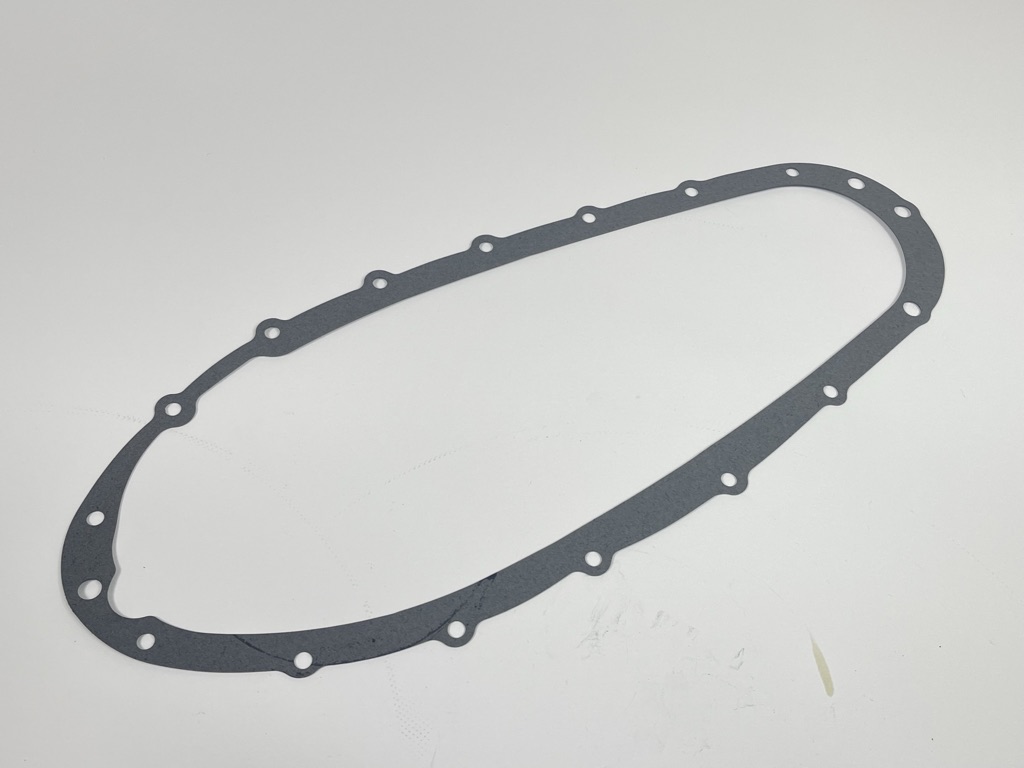
MB reusable crankcase side gasket comes in 0.8 and 1.2mm
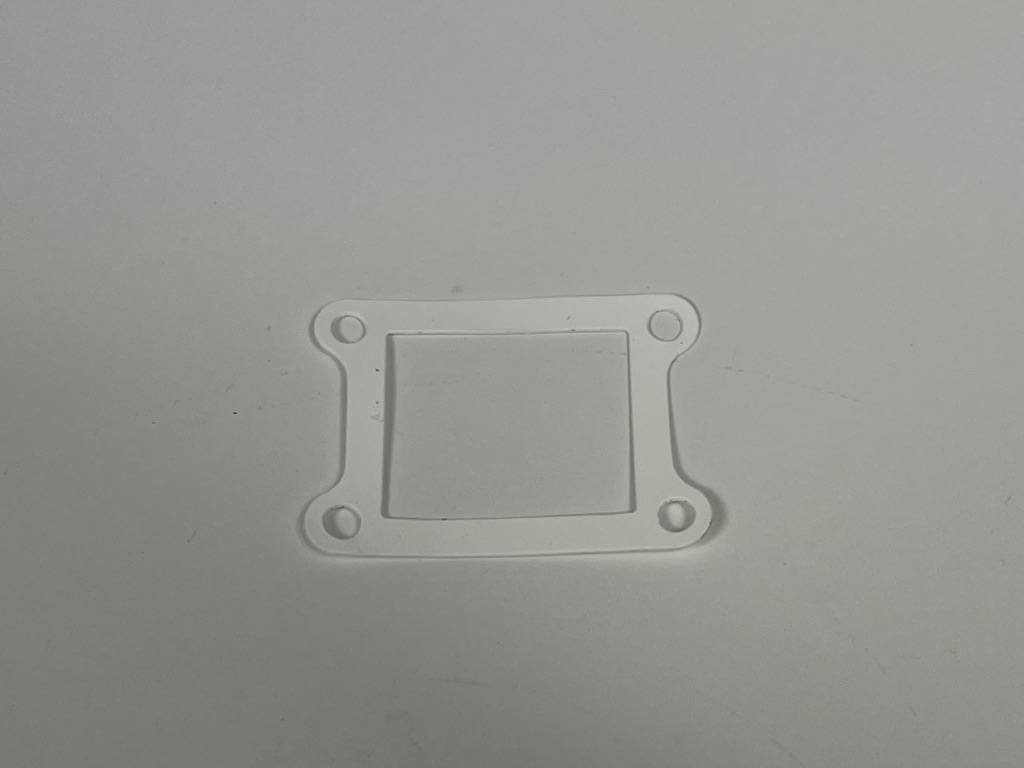
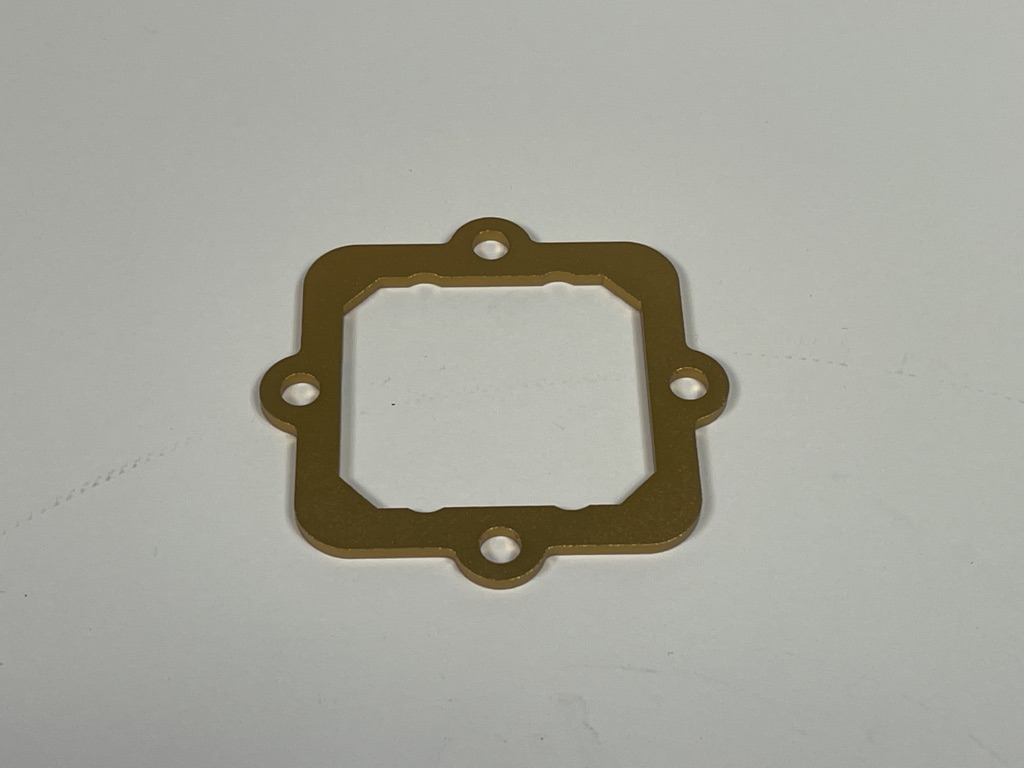
MB Shorty reed block gasket
MB Fibre TS1/RB exhaust gasket
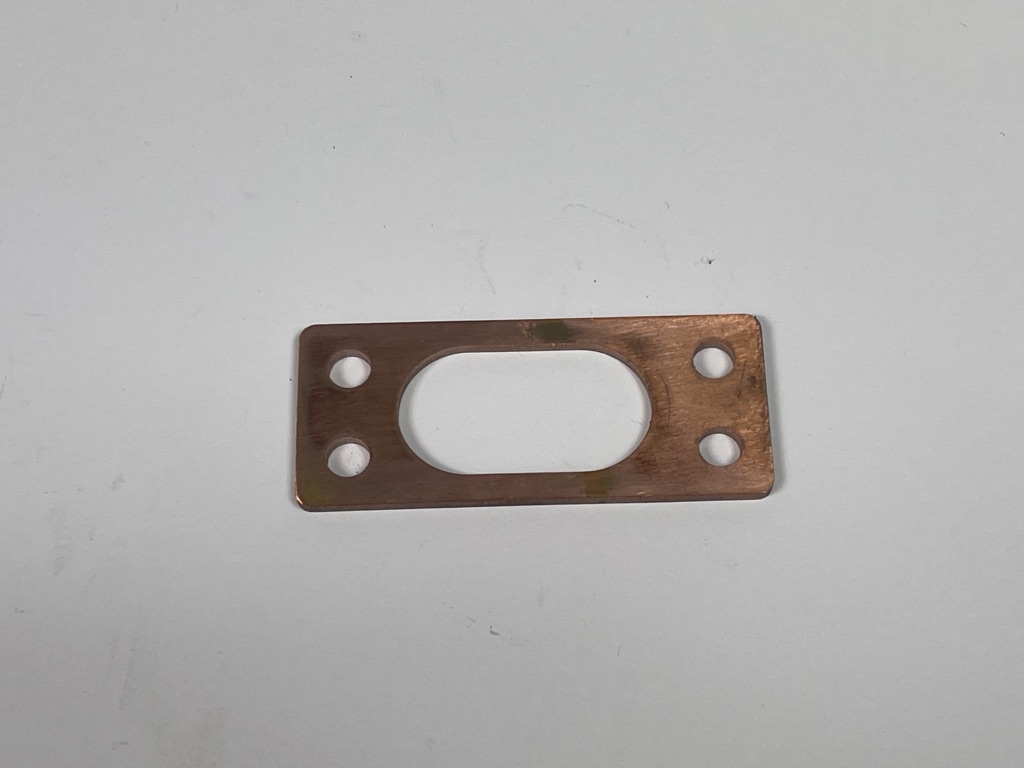
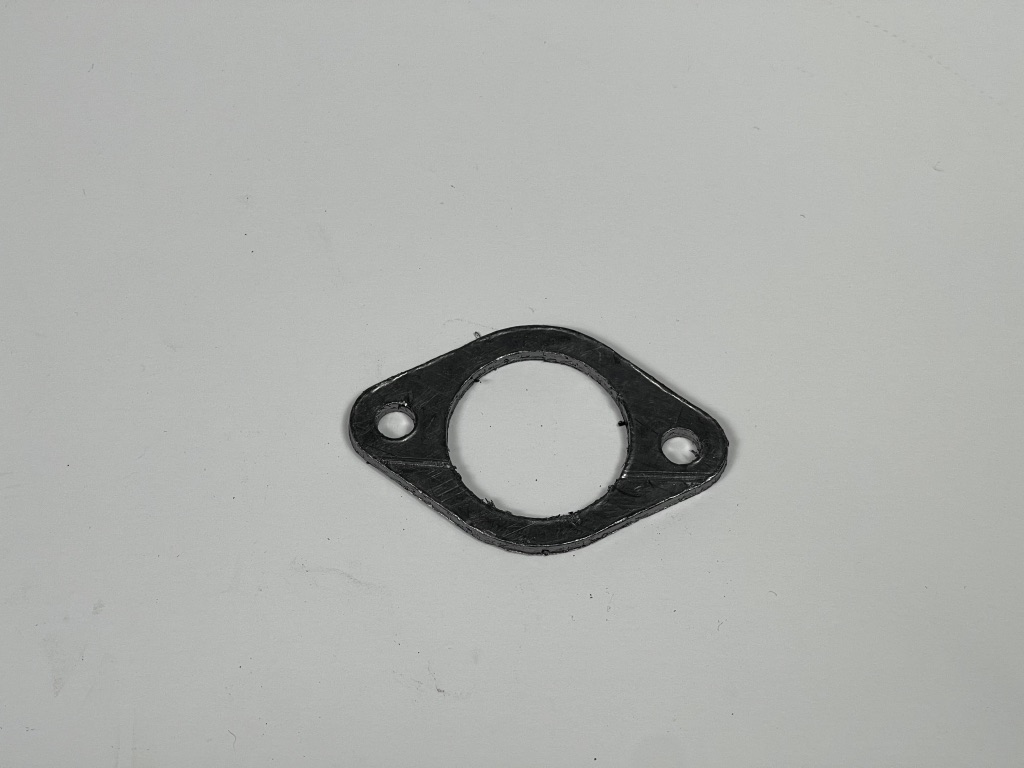
MB oval exhaust gasket in copper, note the gap positioning of the oval to the stud holes, these only fit one way
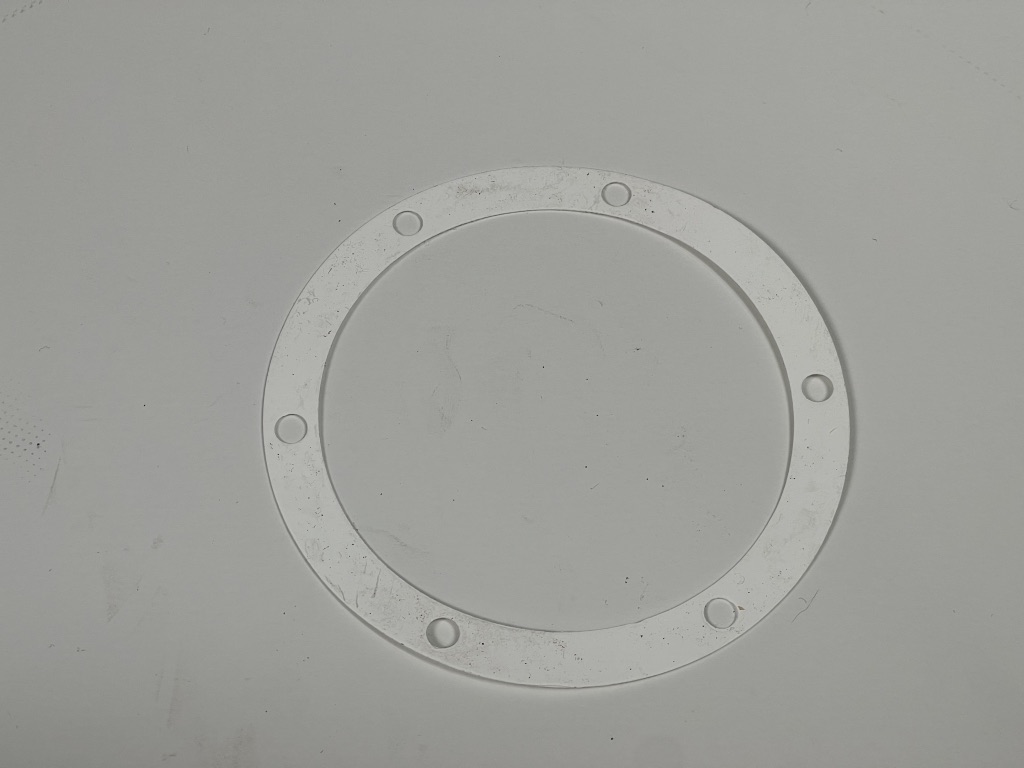
MB white mag gasket, comes in 0.3, 1, 1.5mm the best nearly un breakable
MB 1mm base gasket in fibre
MB round TS1 inlet in the white material
Mark Broadhurst, If you have a question please email Mark on mark@scooters.co.uk


