LARGE BLOCK TS1 200 – 225 CYLINDERS
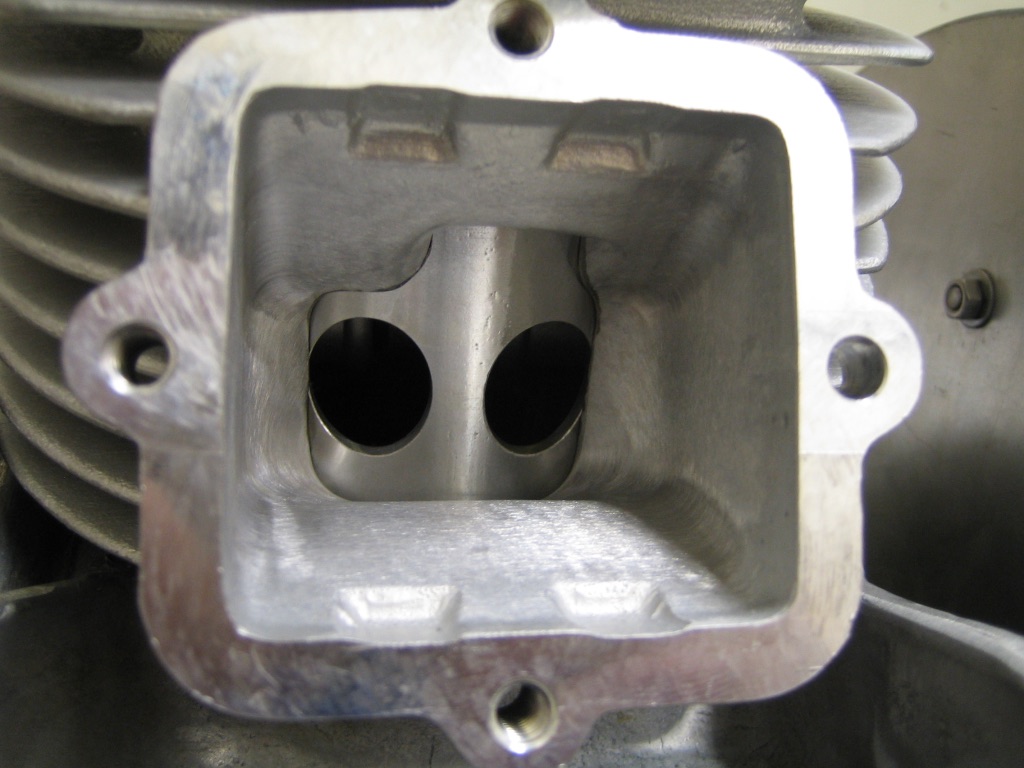
The basic standard cylinder kit offered by the manufacturer comprises of an aluminium Nicasil plated reed valved cylinder. This then has a larger inlet port than you would expect if you are used to seeing standard cylinders, the inlet port has an extra port above it, this is a boost port, part of the advantage of a reed valve engine. The inlet port is made larger to house a 4-petal reed valve, which requires a new inlet manifold and now the carb sits on the opposite side of the scooter. A special Asso piston is required that is pre machined to give a full 360 degrees inlet opening period, pistons are graded in A, B, C and D to match the cylinder which is stamped on the head gasket face. The transfer ports appear to be larger than a cast cylinder as they are now bridged to give four ports instead of two. The transfer passages now have larger feeds. The exhaust port is much larger in size and now has a new shaped round exhaust flange. The kit then requires a machined cylinder head.
The TS1 200 kit which is much rarer uses a 66mm piston and the TS1 225 kit uses a 70mm piston apart from that there is very little difference between the two.
PROS: In standard form the kit is very well thought out in its design. The TS1 cylinder should give more spread of power, better acceleration and better cooling! It will travel for longer with fewer hassles compared to a cast cylinder. The cylinder plating is harder wearing and longer lasting.
CONS: The kit requires a full expansion chamber to gain its full potential although a Clubman system can be used but restricts the power out put, whatever exhaust used a new exhaust flange needs fabricating which is not interchangeable with a Standard cylinder. The kit is designed to use an open bellmouth carb, because of the lack of room under the panel it is difficult to filter the air. Long term this will cause the piston and cylinder to wear out! We designed a flat panel filter to help this and also a cone filter which works on all large carbs.
ABOUT THE TS1
The Inlet manifold as standard was designed to use the Amal MK2 34mm carb and rubber. Amal offered carb sizes down to a 28mm or you could use a 30 or 32mm depending on what were available from the manufacturers at the time. Later on we used the improved Dellorto VHSA 30 and 32mm until these were stopped by Dellorto, later we used the Mikuni TMX 35mm which is a straight swap using the same rubber. Others used the over sized Dellorto VHSB 34mm which needed a different stepped rubber or one of MB’s inlet manifolds machined to suit.
(Using the Imola inlet manifold you could use carbs down to 24mm to no great advantage, as the physical size of the carb is too large to fit a filter, the smaller carb could work with low revving engines) Amal carbs foul on all side panels at the banjo fuel feed and requires a hole cutting in the panel. Amal carbs need their power jet blanking off and main jet increasing accordingly as it was possible to suck a carb dry of fuel when the power jet supply was needed. As Amal carbs dried out we introduced the larger but shallower Dellorto carb which fitted under the panel with a minor modification to the lower breather pipe. Using the larger 34 – 39mm carbs is usually over kill even on a stage 3 Road/Race tune as the cylinder doesn’t flow air quick enough for them to work perfectly. Dellorto carbs ideally need MB blue printing to increase fuel flow as a TS1 motor can use more juice than the carb can supply with the gravity from the low Lambretta tank.
A fast flow fuel tap is required on all TS1 engines as the TS1 can drink petrol when used in anger and can suck the carb dry! As the carb now exits the opposite side any battery tray would have to be removed and the fuel pipe requires extending and routing so it doesn’t get trapped.
The reed valve assembly was originally offered with no rubber sealing area which used to eat reed petals regularly. The later reed valve was an improvement but the rubber coating was more like plastic and tends to chip off causing even more problems to low down running and starting. To add to this when fitted into the cylinder the reed stops and reed petals block off the boost port therefore losing some advantage of the boost port.
In some cases the reed petals could touch the piston! The TS1 manifold has a tendency to touch the frame, especially using the longer series 2 or sports shock absorbers, this can be helped with the adjustable BGM rear shocker. The inlet manifold comes out at an angle that in some cases the carb in a vertical position fouls some toolboxes, toolboxes should be panel beaten to cure this problem. For most touring applications the cylinder port timings are a little too high as they were more set for racing, this can be easily cured (see later on).
The cylinder head that comes with the kit is usually reprofiled incorrectly which gives a false squish clearance and compression ratio, easily cured with a new cut head. The factory setting usually uses a 0.5mm head gasket, some supplied gaskets tend to blow and fail. Running a TS1 on a standard crankshaft and main bearings will result in a failure. A failed crankshaft could terminally damage the cylinder, as there are no rebores! The only porting mod required with a standard cylinder is having the casing transfer feeds matched to the kit. Early 200cc 66mm pistons are not strengthened and tend to break! A TS1 tends to have more power output than a cast engine and also tends to vibrate more so no short cuts should be taken inside the engine, any weak links will be found they are not as forgiving as a cast engine. Power out put increases, most engines are 17 – 20 horse power and some are 22 – 24HP this is bordering on needing a 6-plate clutch to prevent clutch slip.
TS1 CYLINDER KITS BY MB
We have looked at the disadvantages over the years and improved upon them.
In the 1980’s MB looked at the reed valve problem and found a Yamaha one to fit, this is more reliable on its rubber coating and have never had a failure in. Yamaha reed valves are slightly longer so a 5mm-reed packer was made to fit between the reed valve and the cylinder therefore spacing it away from the boost port. This then created a problem as the standard inlet manifold hit the frame before the shocker was fitted. To get around this MB remanufactured a new inlet manifold and reshaped it for improved gas flow, altered to improve clearance from the frame and repositioned so the carbs cleared the toolbox. By fluke after tuning a 350 Banchee we found an improved Yamaha racing reed block and was an improvement over the standard early item as it came with fibre reeds compared to standard stainless petals. A larger variety of reed petals are also available, MB recommend the two stage Boyesen reed petals to give the best advantage over the fibre reeds or stainless steel.
To spread the power MB started to machine the base of the cylinder which lowered the port timings using a standard 107mm con rod, which then makes the scooter more ride-able and brings in power lower down. In the end we stopped this practice as our 110mm rod conversions became the norm. Another advantage of this conversion requires a 1.5mm head gasket, which is less prone for failure!
Apart from the special MB cylinder heads that we offer, we used to use the improved Indian or AF cylinder heads, these have less chance of distortion, with our machining techniques correct squish clearance and safe compression ratio is gained for maximum speed with reliability. In later years we stopped using these heads in favour of the much improved MBgm CNC head.
MB have dynoed lots of the oppositions expansion chambers many times, we found some offered bottom end power with loss of horsepower and revs, others offer lack of bottom end power with a gain in top end power and revs.
We developed our own bottom end pipes and top end pipes beating the opposition as we did it. We then came to the conclusion that given the road conditions, fuel used and the majority of uses of a TS1 Engine, i.e. fast road touring and motor way use. We developed a mid range pipe called the Dev-tour to cruise at 70 mph (approximately 7000rpm) with useable power below that and then having accelerating and overtaking power giving the best of all worlds. The pipe was good around town and was good one up or two up! Also building in the advantages of ungroundability, easy fitting whatever cylinder used, machined or with packing plates, using 4 or 6 plate clutches. Many pipes have come and gone from other suppliers and our selves.
TS1 200 / 225 TUNES
MB tune TS1 cylinders slightly different compared to cast iron cylinders this is the nature of the cylinders design. TS1 cylinders are already tuned as standard. This doesn’t mean they can not be improved upon and tuned further.
STAGE 1. TS1 ROAD (TOURING) TUNE
Cylinder ports are flowed and polished, exhaust port is widened. The casings require matching to the standard cylinder transfer feeds. The cylinder base could be machined to lower port heights this then spreads power output, when this is done a 1.5mm cylinder head gasket is required, this is also an improvement as standard 0.5mm head gaskets tend to blow. Or using a crank with 110mm rods saves machining the base, as in recent times Indian casings are the basis of a TS1 rebuild, base faces vary in machine heights which makes a crank with a 110mm rod an added improvement and is our preferred style crank on all tunes.
STAGE 2. TS1 ROAD / RACE TUNE
The Inlet port is flowed and polished, boost port is widened and the exhaust port is widened and raised, transfer ports are matched. The casings require matching to the standard cylinder transfer feeds. The rest applies as per Stage 1.
STAGE 3. TS1 RACE TUNE
The Inlet port is opened, flowed and polished. The boost port is widened. The exhaust port is widened, raised and opened up to race porting spec.
The transfers are widened and feeds are opened to the maximum safe limit. The casings need to be opened to the larger transfer feed size. Some times it is an advantage to weld the casings to strengthen around the transfer area.
RACE-TOUR TUNE or upgrade tune
In recent times with many months of dyno testing we found an improved tune which mixed stage 1, 2 and 3 tunes which we named the TS1 Race-Tour tune. This tune can be set with small carbs and exhausts for touring or can be set up as a fast Road/Race tune and can see over 30 horse power!
Parts required for the RT tune
- Tune
Extras depending on requirements
- MBgm CNC head
- MBgm flywheel
Various carbs, manifolds and exhausts are available depending on rev range and power required
STAGE 4 AND 5. TS1 SPECIAL ROAD AND RACE TUNES
MB have offered a wide variety of tunes and conversions to TS1 cylinders using alloy welding, Iron liners, re-nicasiling or ceramic plating. Improved quality pistons can then be used with the benefit of one, two or three boost ports. Various con rod / piston combinations are available to make stronger, longer lasting, higher powered increased capacity conversions. Conversions could include longer 60, 61, 62, 63, 64 or 65mm stroked crankshafts. Some alloy welding around the transfer area could be used as an advantage to these race spec cylinders and occasionally extra inlet feeds into the casings are used also. Cylinders of this type have been known to reach 40-horse power. Depending on how you look at it, this tunes can be considered over tuned as we have seen just short of 40bhp with no welding on casings.
CASING TUNES FOR TS1 CYLINDERS
The TS1 cylinder as standard comes with larger than standard transfer feeds, that’s the port entries where the base gasket goes. Luckily they were not over sized like the old style Stage 6 / Group 4, 5, 6 where the racers and tuners opened out the casings and cylinders to the maximum (without welding) Some pushed the size of these ports too far with 1mm to seal the base gasket, this was too thin and gaskets would blow out as there’s no strength. Even if these engines were built with no gaskets and assembled with sealer, they could leak but we also saw the casing distorting and cracking through, the limits of the casing had been found.
Obviously you can fit a cylinder with larger ports than the casing, it will work no problem, but I’ve always been a believer in matching and flowing joints and porting to help flow. This keep engines power consistent from one engine to another.
We offer 2 basic services, 1) matching the casings to the cylinder and 2) opening the casing to a tuned cylinder.
- Stage 1 and 2 cylinder tune casing matched
- Stage 3 and RT tune matched
We also offer welding, machining and tuning services to TS1 cylinders where they have had the transfers welded, or Monza, Imola or RB’s where the cylinder is already beefed up and the tuner can open ports well beyond the max!
REED VALVES/BLOCKS
The basis behind the TS1 engine is, it is a Reed Valve type cylinder. The reed controls what air/fuel goes into the engine. Where as all Lambretta cylinders previous to the TS1 were the piston ported type. Meaning the piston controlled the air/fuel charge on each stroke. Reed Valve engines help stop fuel spit back out of the carb and make an engine more tractable.
There’s Pros and Cons for the Reed design, lets say it’s very good done right in a Lambretta.
Reed valves come in all shapes and sizes. The AF block resembles the YPVS 350 valve but it’s a little larger with more surface area.
AF have used two reed blocks. 1) all alloy 2) alloy with a rubber face.
AF petals have been changed over the years, in the early days there were a few different types with different colours, different sized and came in different thickness.
The later block has settled down and only uses black Carbon fibre reed petals. The reeds on a AF block are different to a Yamaha item and not interchangeable. Carbon Reeds do work well when we have compared reeds and petals on the dyno. But Carbon reeds do feather and wear on the edges. Once this starts it become terminal but not major they do not destroy the piston or cylinder.
Other reed blocks are available as explained, we started using the original 350 YPVS reed block which came with Stainless Steel petals which limits revs, so we used Hi Tec reed petals which worked really well.
We also swapped petals to the two stage Boyesen type which have proved to be perfect over the years.
We moved away from the standard block to the Yamaha Banchee type which came with reeds similar to the well proven HiTec reeds. We have also squeezed in larger Yamaha TZR and Honda blocks, but for the hassle the Banchee was the best.
We also introduced the V-Force reed block which is a different design and out of all the blocks we have tested these are the best for a full spread of power…… but the reeds are carbon and do break and also the block which is plastic also wears so we now only recommend them in hi maintenance race type engines.
With our involvement with BGM we now use a new reed block based on the Banchee which looks the same, uses similar reed petals but has the advantage of been shorter, you can if you want swap petals to Boyesens. Now you only need a 3mm reed packer to suit the BGM reed block where as the genuine Yamaha reed block needed a 5mm packer. After many years of testing, we’ve phased out the Boyesens reeds and made our own Carbon reeds, which we supply separately or if you buy a bgm reed block we add as spares.
TS1 REPLATING AND REPAIR SERVICES
NICASIL PLATING
Nicasil plating is the original plating process used by Gilardoni who manufacture the TS1 cylinder. It is excellent for reliability and hard wearing. If your cylinder is damaged Gilardoni won’t repair your cylinder.
There is a company in the UK that offers the service but we find it wears out quicker than the original or even cast iron and because of this we do not use it so we only recommend Ceramic plating.
CERAMIC PLATING
Ceramic plating is used on F1 engines so it’s good enough for us. It’s harder wearing with less friction and works really well but is expensive! We have used it for years with not one comeback. The coating resembles chrome rather than the white finish you would think, and by eye you can not tell the difference between Ceramic and Nicasil.
It can be used as a replating service to repair damaged or a worn out TS1 cylinder (or any alloy kit) or could be used when choosing an improved piston / con rod set up (this usually requires some welding and retuning to the inlet port).
It is ideal for long lasting cylinder kits. Full race spec cylinders or kits already done that may be worn out and on its last rebore therefore repairing the bore.
For cylinder kits requiring extra cylinder height and modified ports to suit long stroke cranks we recommend Iron liner conversions or welded and added top fin.
Some of the most common work we’ve done – is to repair and bore out TS1 cylinders to larger 39mm crown height 71mm pistons or the short crown height 32mm 71mm version. To do this we have to strip the bore so we can rebore the cylinder to the larger piston and then prepare the cylinder for plating afterwards. Of course we offer all the tunes, cylinder heads, inlet manifolds and reed set ups to suit the kit been made.
IRON LINERS
Iron liners are ideal to repair or modify a TS1 cylinder. Iron liners allow oversized rebores. Iron liners are good to repair broken spigots on very badly damaged alloy cylinders. By using iron liners, ports and cylinder heights can be moved to accommodate different pistons other than standard.
To our knowledge there is not a Japanese style piston that goes straight into a standard TS1 cylinder that is worth using. These pistons have different compression heights and smaller ring peg spacings. MB don’t re-peg or slot piston rings they go wrong! Using a standard TS1 piston in an iron liner conversion used to be a waste of time as there are no oversizes available, when we introduced our MB RT piston we designed it with loads of rebores so is good to use in linered kits! The piston used determines what needs to be done to the cylinder. There could be 2 ways to do liner conversions.
- MB SIMPLE WAY. Fit a liner to a standard TS1 cylinder. Use a MB RT piston. The piston and con rod would depend on what loose cylinder packing plate and head gasket is to be used
- MB JAP STYLE PISTON WAY. The original boost port is welded up as all other piston rings drop into the port. 1, 2 or 3 new boost ports are cut into the cylinder this depends on the ring peg spacing of the Jap style piston. The compression height of the piston and gudgeon pin size determines what con rod is required. Most conversions would require a loose cylinder packing plate or an oversize plate can be welded to the base of the cylinder then machined off afterwards, therefore no loose packing plates! Doing this usually means slightly larger transfer feeds can be used, this may require welding to the casings. To do away with any type of head gasket the iron liner would be extended and made into a spigot, the head would need machining to suit, this then gives the advantage of locating the head perfectly. Tuning to the cylinder can be done after the liner is fitted.
MB TS1 CYLINDER CONVERSIONS
MB have used over the years many piston and crankshaft stroke conversions, what are listed are what we have done before.
- a) TS1 200 – 205cc, 66mm, MB RT, standard Vertex or Asso pistons
PROS. Cheapest TS1 cylinder kit, vibrates less than a 225 kit.
CONS. Piston tends to fail with the older TS1 pistons, slightly down on power compared to a 225 kit.
- b) TS1 225 – 230cc, 70mm, MB RT, standard Vertex or Asso pistons
PROS. Second cheapest kit, has more power than a 200 kit, has a stronger piston kit.
CONS. Vibrates more than a 200 kit, standard piston tends to fail on 25HP + engines.
- c) TS1 200 – 205cc, 66mm, Yamaha IT 175
PROS. Excellent piston and rings either genuine or Wiseco, excellent Yamaha 115mm con rod conversion, doesn’t require boost port moving, possibly the smoothest running TS1 cylinder kit.
CONS. Expense, requires a Yamaha con rod swap. UPDATE June 2001; we have found that both genuine and Wiseco pistons to fail regularly. Both rings can spin over or knock their ring pegs in! Causing terminal damage! We are in the process of repairing cylinders with the Prox type pistons, to date we think we have cured the problem.
- d) TS1 200 – 205cc, 66mm, Iron linered Yamaha IT 175
PROS. Similar to kit ‘C’ Easiest kit to do, no major machining required prior to linering. Oversized pistons available to 68mm when required, good conversion to repair damaged cylinders, excellent con rod conversion.
CONS. Expense, requires iron liner fitting, requires a Yamaha con rod conversion.
- e) TS1 225 – 240cc, Iron linered Yamaha YZ250 piston
PROS. Super light piston for race use, oversized pistons available to 71mm when required, excellent con rod conversion, good conversion to repair damaged cylinders, has produced some of MB’s highest horse powered engines 30 – 37 BHP.
CONS. Expense requires iron liner fitting, extra boost ports, cylinder packer welding on, requires a Rotax/Fantic or Yamaha con rod conversion, the Wiseco piston can create long term problems due to its light weight design, Genuine pistons ring pegs fall out!
- f) TS1 225 – 240cc, Linered Honda CR250 piston
PROS. Excellent piston and rings in genuine or Wiseco, oversized pistons available to 71mm when required, excellent con rod conversion, good conversion to repair damaged cylinders.
CONS. Expense requires iron liner fitting, extra boost ports, cylinder packer welding on, requires a Rotax/Fantic or Yamaha con rod conversion.
- g) TS1 200 – 210cc, Ceramic plated Yamaha IT 175 piston
PROS. Same as c and d. But can use oversized pistons to clean up damaged bores and can give up to 210cc.
CONS. Same as c and d. Requires ceramic plating and has no oversizes.
- h) TS1 225 – 240cc, Ceramic plated Yamaha YZ250 piston
PROS. Same as e. But can use oversized pistons to clean up damaged bores and can give up to 230cc.
CONS. Same as e. Requires ceramic plating and has no oversizes.
- i) TS1 225 – 240 cc, Ceramic plated Honda CR250 piston
PROS. Same as f. But can use oversized pistons to clean up damaged bores and can give up to 230cc.
CONS. Same as f. Requires ceramic plating and has no oversizes.
- j) TS1 230 – 240cc, Ceramic plated Kawasaki Jet Skis 440 big bore piston.
PROS. Uses an oversized piston to clean up damaged bores, uses maximum safe piston size giving largest cc’s.
CONS. Expense, requires alloy welding and new boost ports, requires ceramic plating and has no oversizes, requires a Yamaha 115mm con rod conversion.
- k) TS1 225 – 240cc, Ceramic plate, replate or iron liner KX250 piston
PROS. Its a very good piston with oversizes available in genuine or Wiseco
CONS. The piston is machined on the outer edge of the dome, which means finding the crown height is hard to work with and this machined lip increases transfer and exhaust timings by a large amount and there is nothing can done to help and ruins the TS1 set up, so we do not do this conversion at all.
We have used or seen many other piston conversions, what’s listed has been done many times and over the years have proved themselves, others have not. Today there are new pistons which have become available from BGM, Ron Moss, Harry Barlow and Hi Level which have yet to prove themselves!
THE MB TS1 CYLINDER PACKAGE
For many years MB have used the TS1 cylinder and have had excellent service from them making road engines from 20 – 30bhp+ up to 40bhp in Race motors! Today we regular see 25 – 30bhp from road engines! We have found what works and what doesn’t and we have tweaked many hundreds of engines. As we have tweaked these engines we have offered various packages to suit the customer. This has varied as the years have gone by depending on what parts have been available, this has totally depended on if the cylinder is available! Which, over this time there has been many years when the basis of the kit the CYLINDER has been out of stock! So when the cylinder is in stock we have offered packages to suit the customer. Today some of these TS1 cylinders are over 20 years old so we are now repairing many cylinders and replating to suit the customer, mainly based around our simple RT pistons.
Rather than listing all the packages it would be easy to list what we can offer, then if you are not sure get in touch tell us what you want, what you have and what you expect and we can steer you where we know you will be happy. Get the package right and your happy, get it wrong and it will cost you hundreds of pounds and you will get fed up!
It’s the same if you miss match a package, there are and have been so many dealers offering TS1 tuning services. The typical scenario is; you buy the basics of the kit; cylinder, ignition, carb, exhaust or gearing from different people, when it doesn’t run right for the simplest of reason who should you go to for advice? Then you wonder why some dealers seem to either know not as much as you thought or can’t be bothered to help! Buy the parts from one place with the full package and you would expect a full back up service which we offer.
So over this long period of time we have offered these services + more
- Stage 1 tune
- Stage 2 tune
- Stage 1/2 casing tune
- Stage 3 casing tune
- Stage Race-Tour tuned
- CNC MBgm head
- Center plug head with cowls
- Center plug head without cowls
- Center plug head Liquid cooled
- TS1 RT pistons, lots short crown height std crown height
- Cylinders machined
- Crankshafts
- Inlet manifolds
- Reed block
- Reed packers
- Welding
- Replating
- Re sleeving
- Carburation
- Electronic ignitions
- Exhausts
- Bearings
LONG STROKE CRANKSHAFT OPTIONS FOR TS1 ENGINES
The beauty of the Lambretta engine using a cylinder kit is; you can offer a longer stroke crankshaft to gain cc’s and usually more power and torque if done correctly, unheard of in the 2-stroke world! If you know what you are doing, wangling a long stroke crank into a Lambretta engine and making a cylinder work can really help the Lambretta rider. This really needs to be understood from the tuner/engine builder. We have used every crank available because we have made most of the cranks and set the standards!
We have used these long stroke crankshafts, baring in mind a standard Lambretta crankshaft has a stroke of 58mm
- 60mm
- 61mm
- 62mm
- 63mm
- 64mm
- 65mm
Take into account each crankshaft will need to use a con rod which will need to be used with the piston used, expect to see crankshaft con rods in different lengths and sizes. Complicated it may seem but we invented this system, which has totally opened up the potential of the Lambretta engine and pushed limits that was only a low 20bhp when MSC was the main leading Lambretta shop. To – today’s Lambrettas which are hitting 40bhp all because Mark looked at ‘What is the week link of a Lambretta engine?’ and developed each section inside the engine for Mark to hit the 40bhp for the first time in the mid 90’s!
Con rods (connecting rods) vary, depending on what engine we nicked, sorry borrowed them from or just got hold of and used them, depending on which sized big end or small end was available or required.
So you may see con rods with these center line dimensions.
- 105mm
- 106mm
- 107mm
- 108mm
- 110mm
- 115mm
- 116mm
- 118mm
- 120mm
- 125mm
You may see small end bearing sizes of
- 16/20mm
- 16/21mm
- 18/22mm
- 18/23mm
And you may see crankshafts big end pins at
- 19.9mm
- 20mm
- 22mm
- 22.9mm
- 24mm
- 25mm
And con rod bearing widths of
- 12+mm
- 15mm
- 16mm
- 17mm
- 18mm
- 20mm
As you can see, mixing any of the above crankshaft strokes with varying rod dimensions, mixed with a piston to suit, and suddenly you have improved the basic 3 ring piston standard engine that was normal until the TS1 came along. We had already started to improve the Lambretta engine because we were finding weak links that needed curing as power was increased throughout the 80’s and 90’s. Know how to mix any of the above and you know a Lambretta engine.
PROS. Using a longer stroke crankshaft will increase the cc of the engine, this then done correctly should increase the engines torque, pulling power and speed!
CONS. Longer stroke increases vibrations. Fitting these crankshafts usually require some of the casing removing to allow the con rod to clear. In some extreme cases welding is required at the back of the casing for added strength.
To say we have been there and done it with the TS1 cylinder here are a few photos showing the type of work we can do.
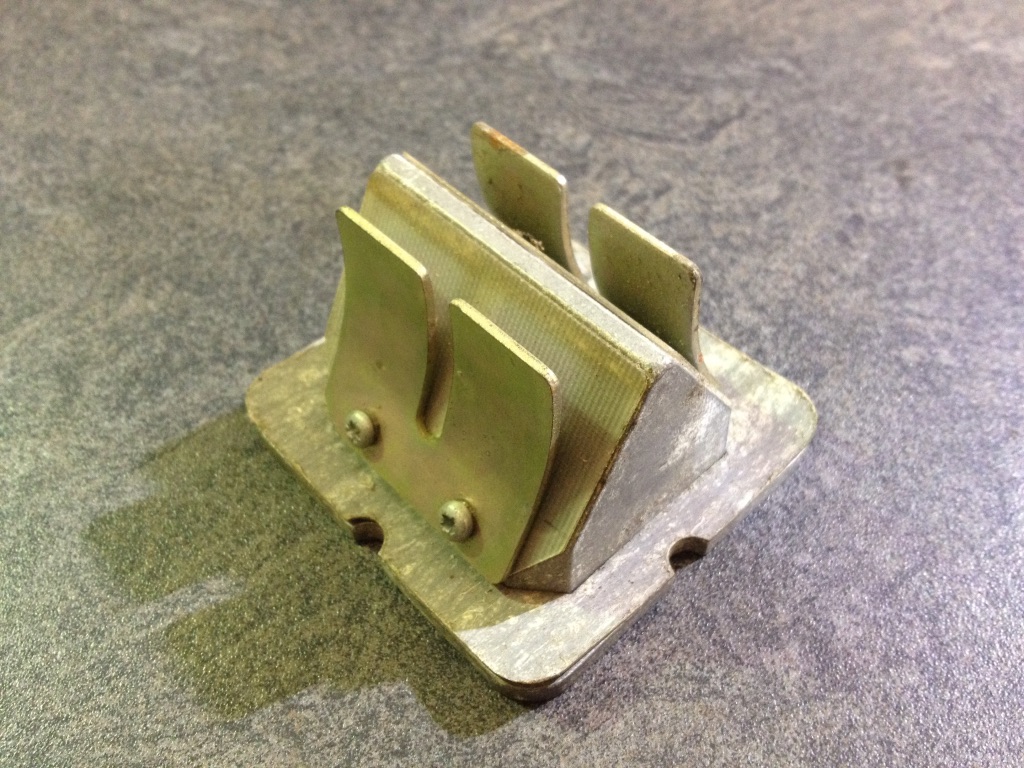
The first AF TS1 reed assembly, these used to break reeds so a rubber backed one replaced it
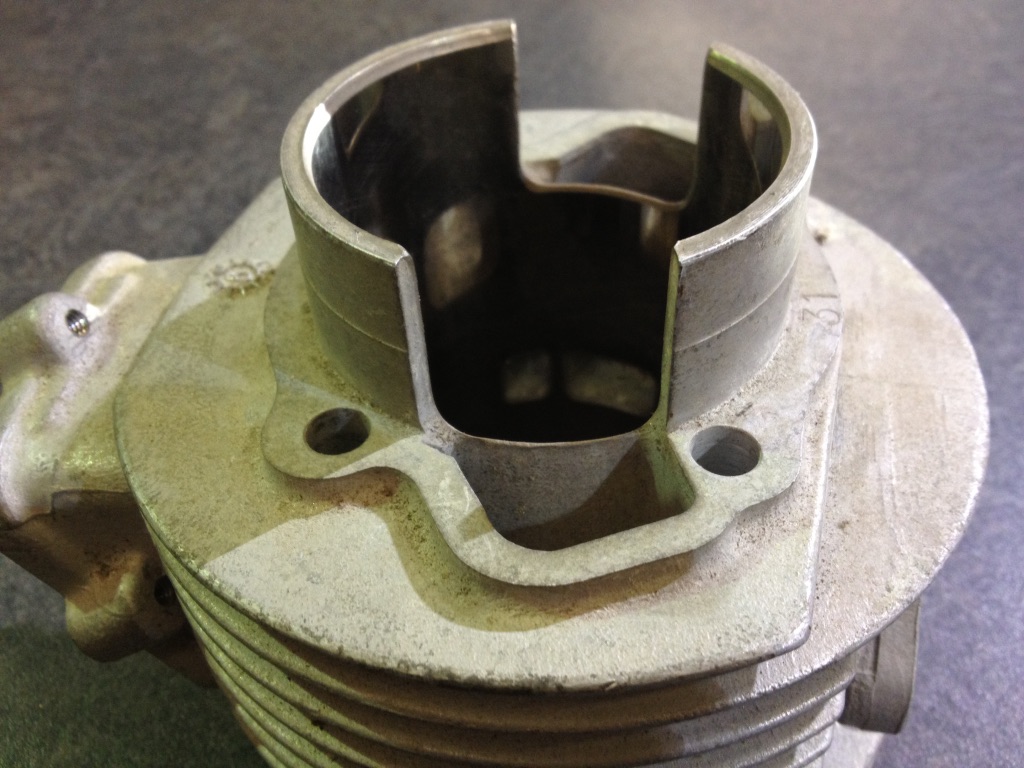
A rare unused TS1 200 that came into the shop 30 years later

AF inlet manifold, which never changed but others did make manifolds
Various pistons have been used over the years, this is an early MB forged version
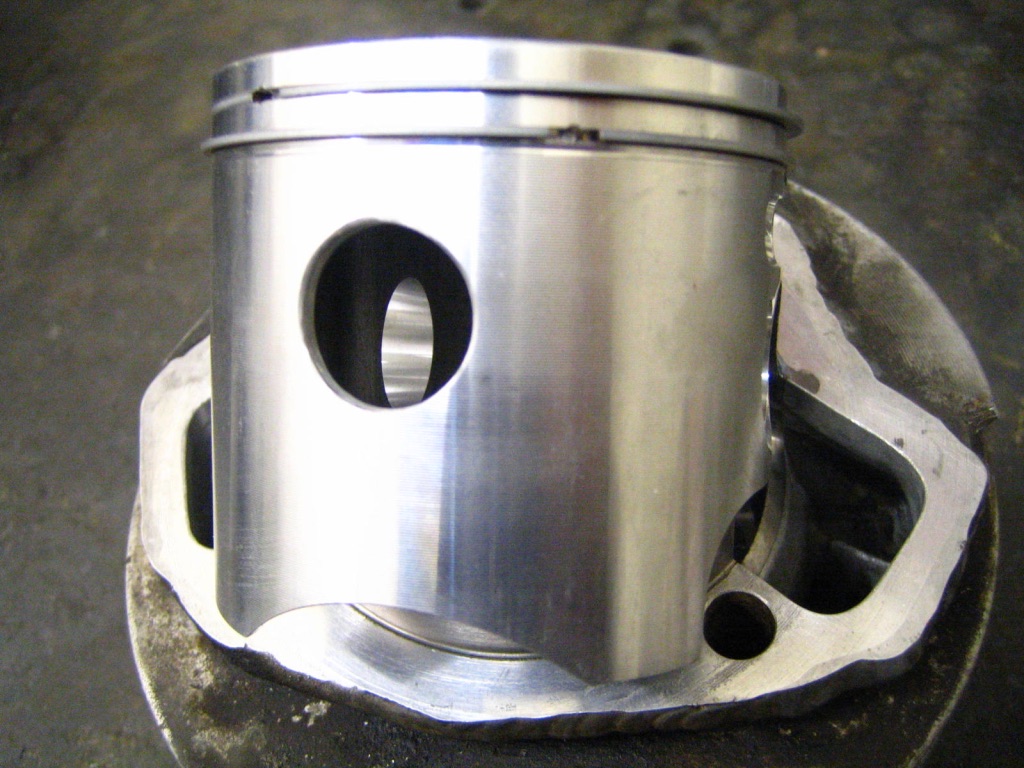
Different holes of all shapes have been used
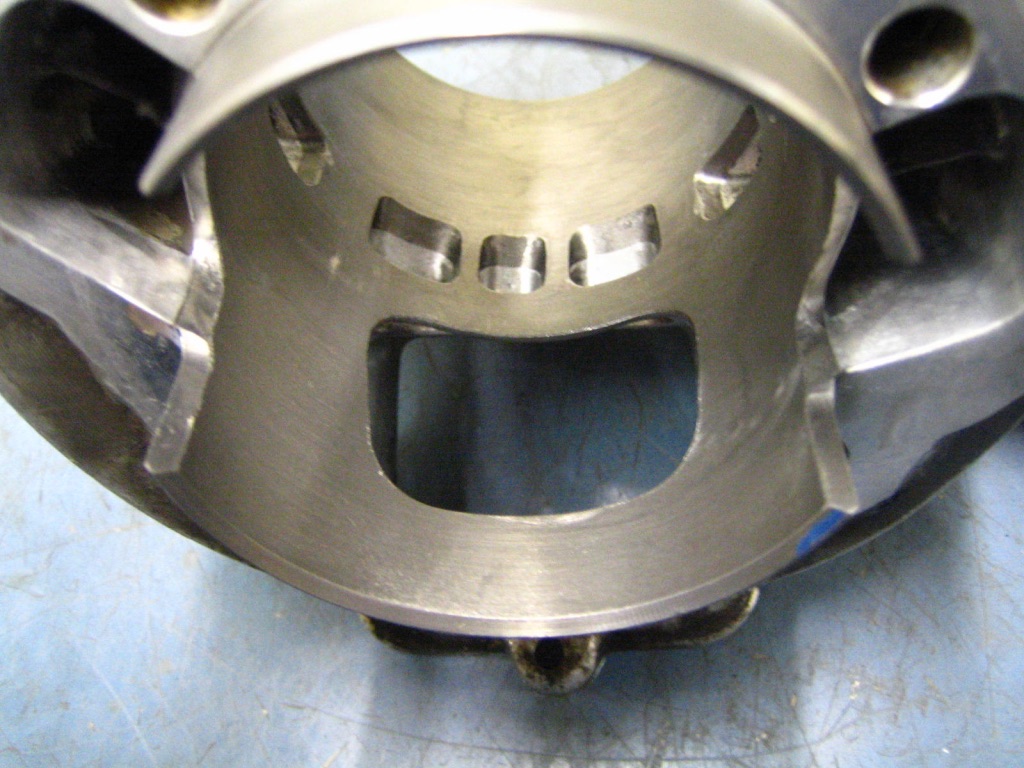
With Iron liners you can remake more ports, here shows 3 instead of one boost port and has a strengthening bridge

Its easy to use loose packers these days, now we have a big selection, in the old days we welded packers on

Another style reed piston this is a Yamaha version
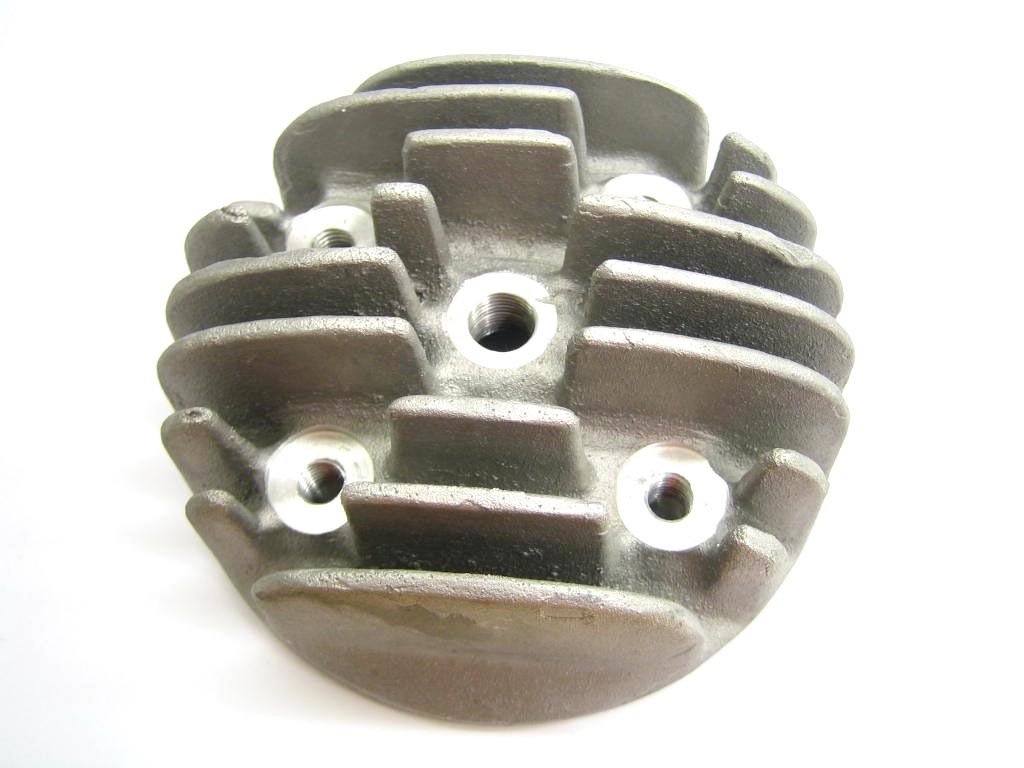
Various heads have been used over the years this is a MB center plug to use cowlings, it was based on the Austisa 125 head
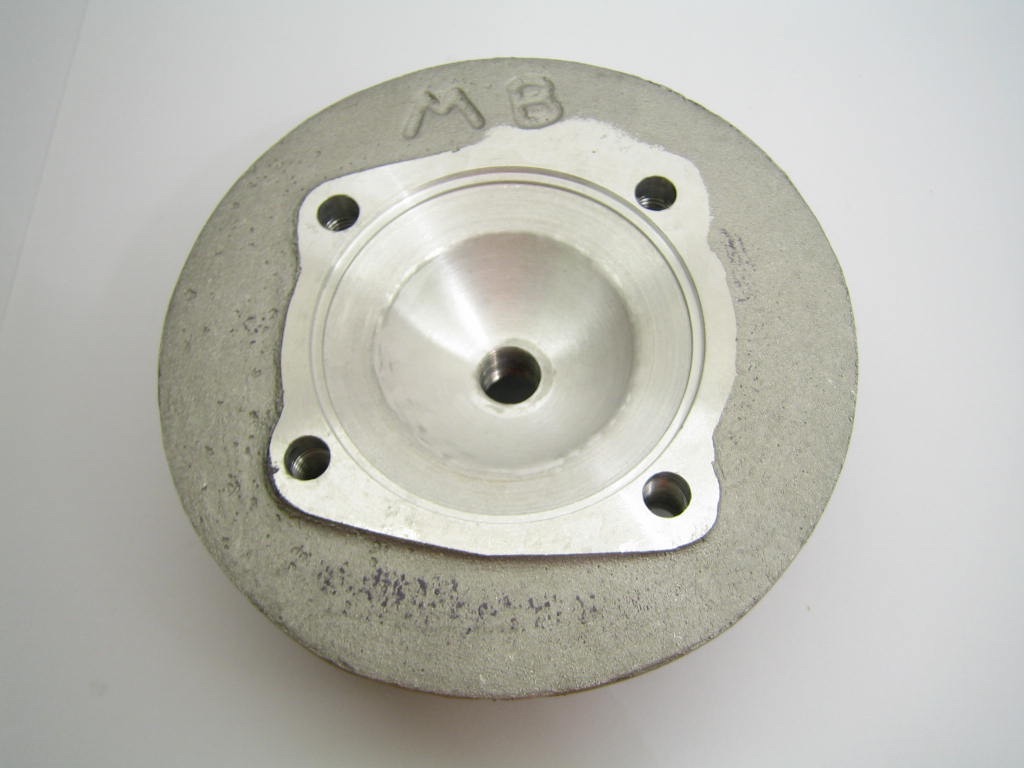
Head design is unlimited, get the design right and it makes fast reliable motors, get it wrong and you have a dead engine
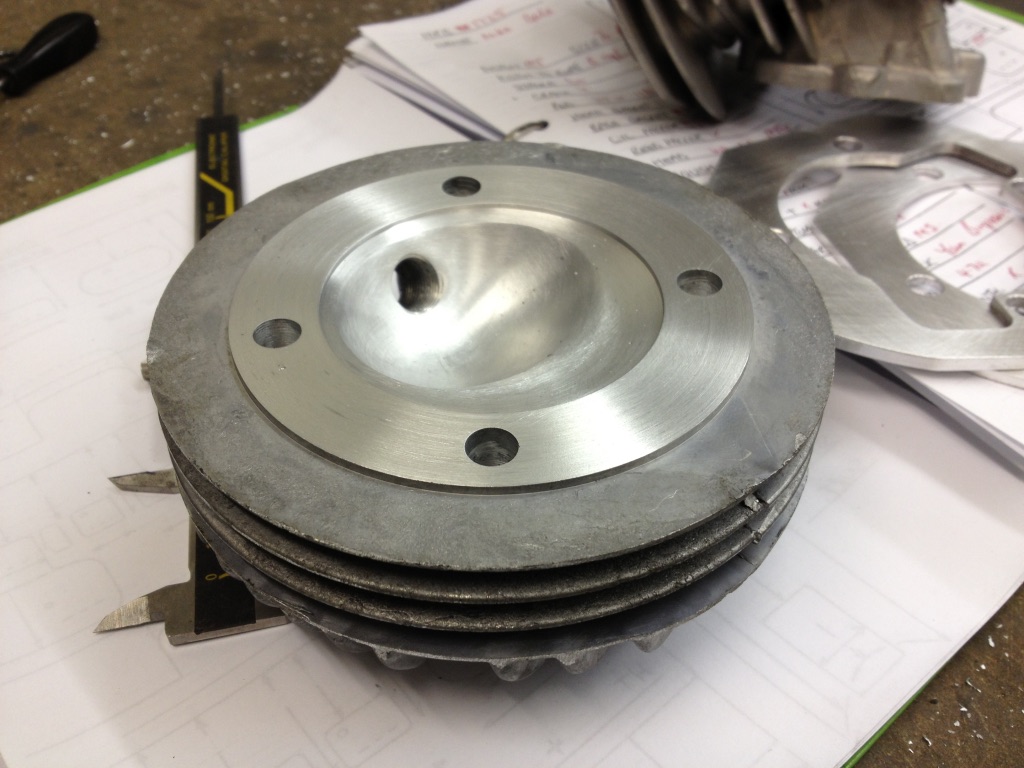
This is a remade 200 head modified for a Ts1 using a 60mm
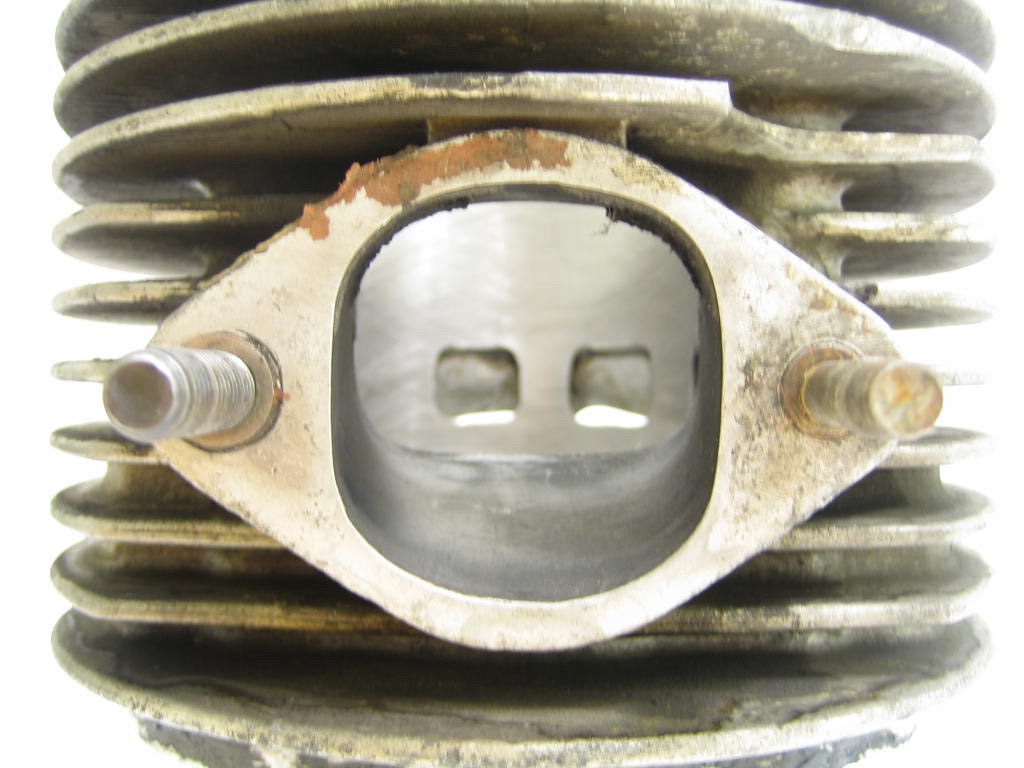
MB have tuned hundreds of Ts1 cylinders in many shapes and forms, this has a strange exhaust port using 2 boost ports, it was clocked at 105mph on the road
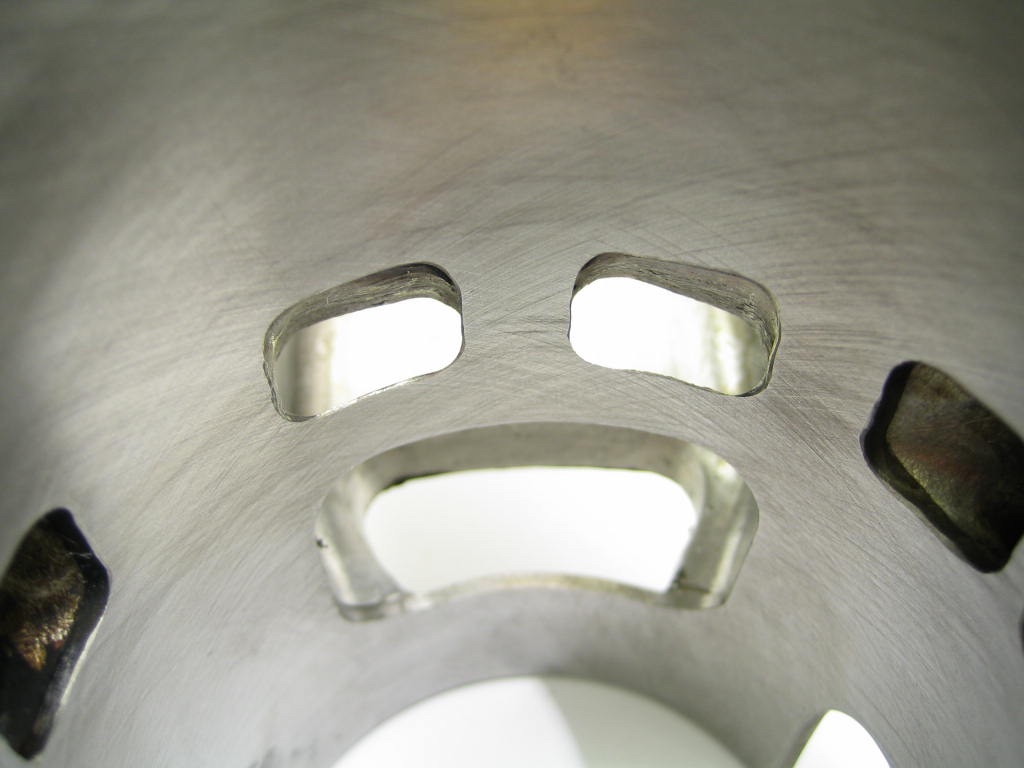
Standard a Ts1 has one boost port, with lots of work you can do 2 or 3
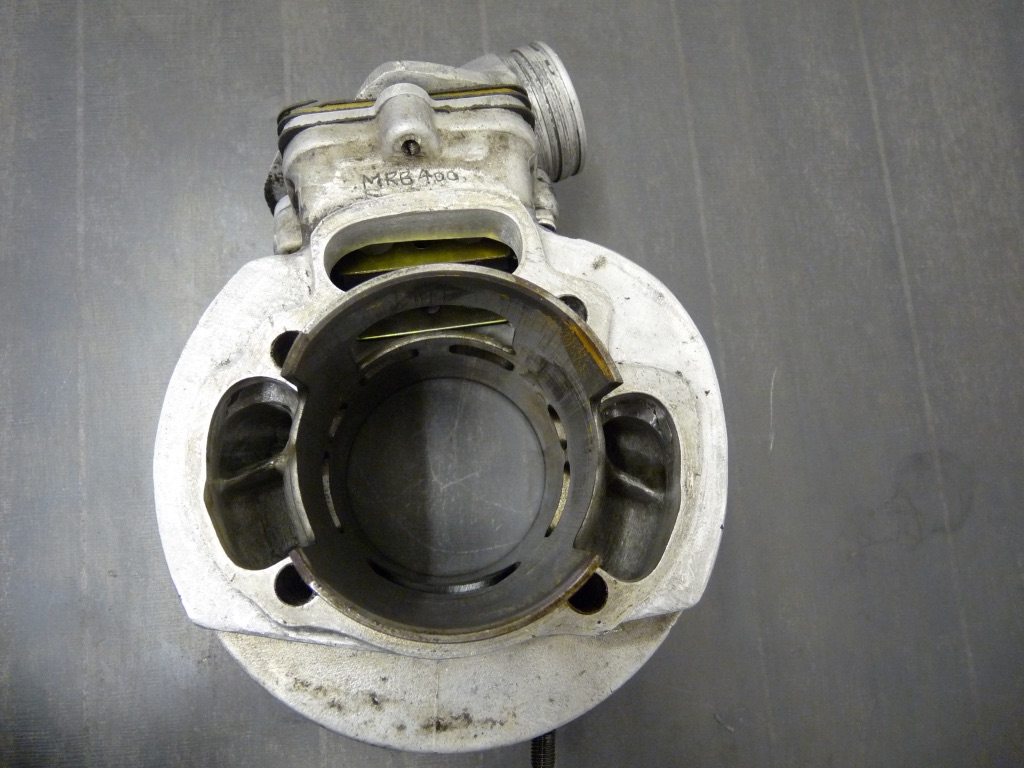
MRB400 A heavily modified Ts1 air cooled, 28bhp over 3000 rpm power spread
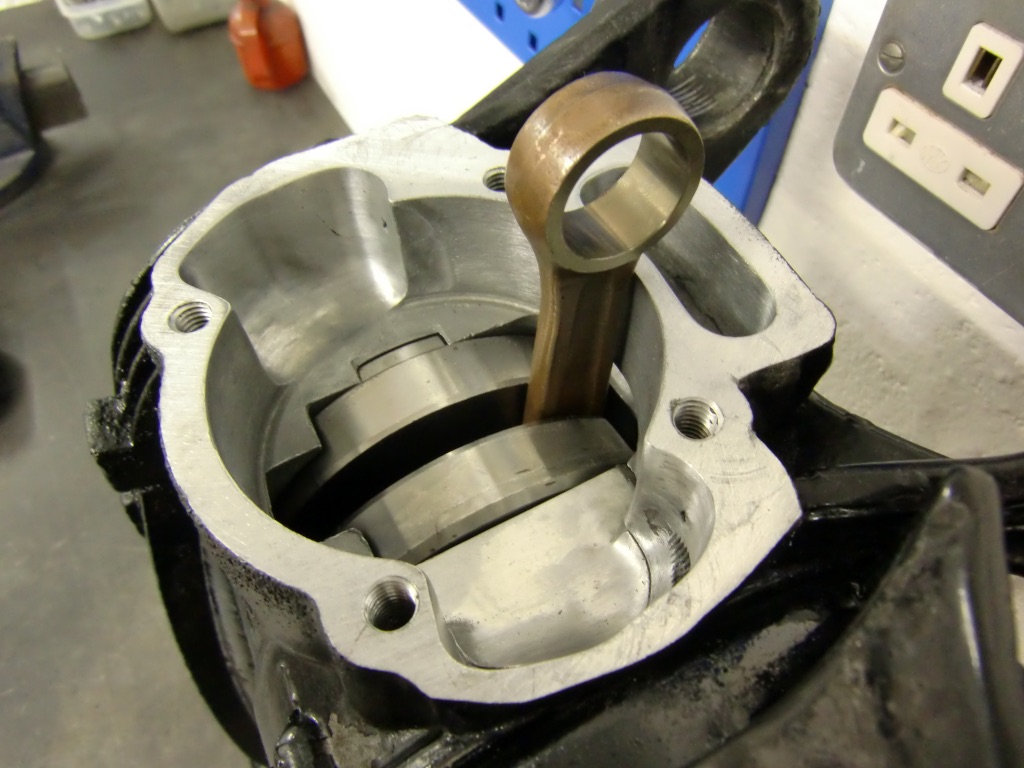
If you modified the cylinder you have to do the casing as well
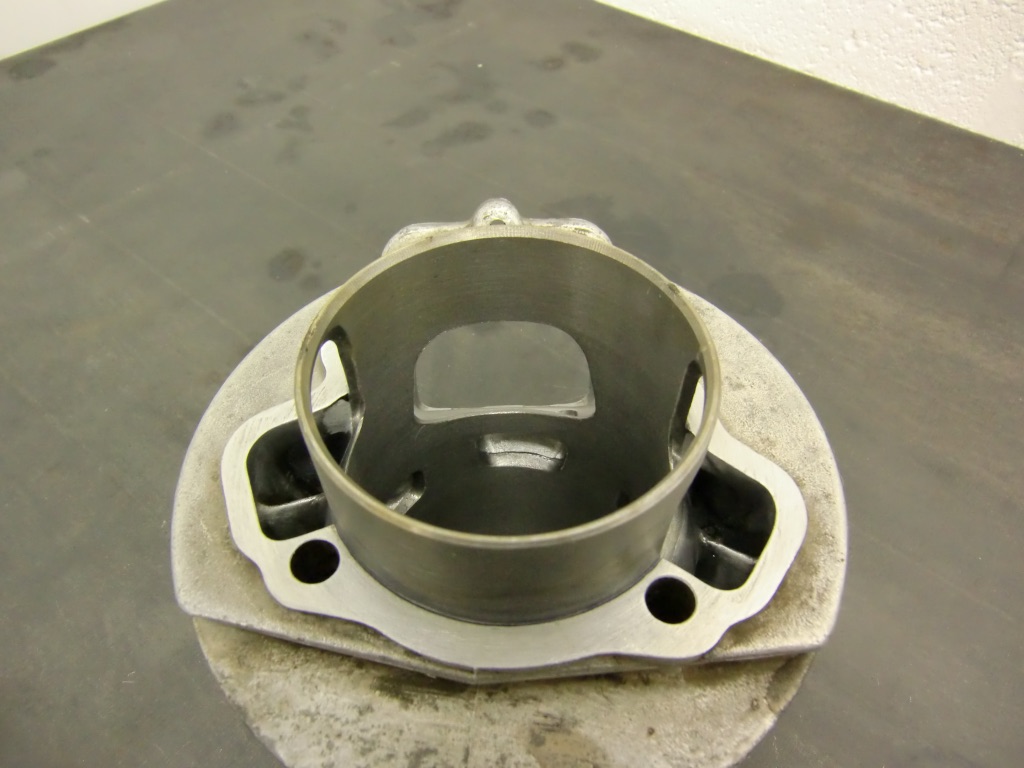
We’ve iron lined more than 300 cylinders all been a special with lots of work.
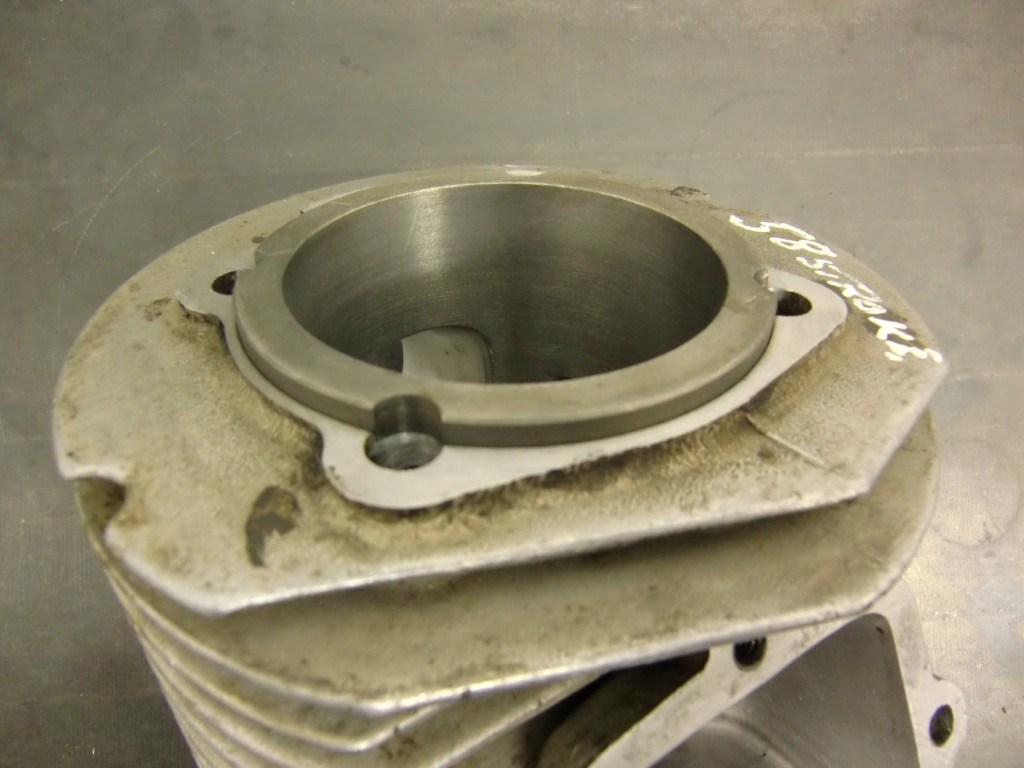
By fitting an iron liner you can raise the top of the cylinder, this has a top hat shape as well to locate the head and not use a gasket

When a liner is fitted you need lots of tuning tools to match the ports
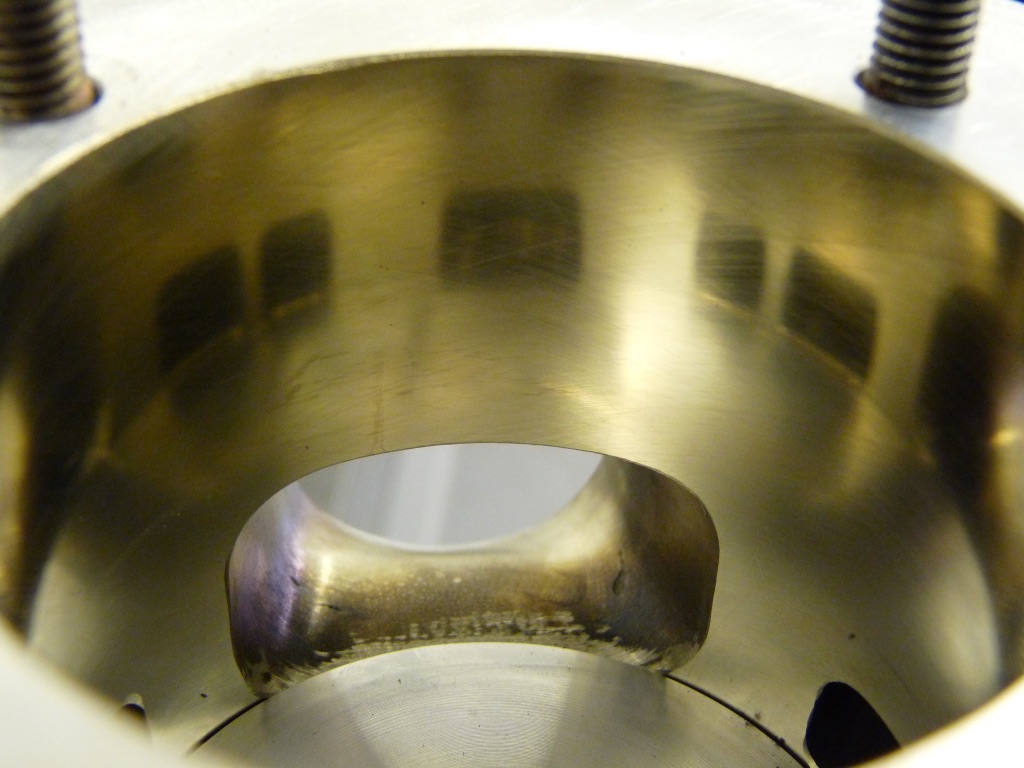
You can tune the exhaust port as much as you want but you need to know how or you can break through

Early sand cast inlet flowed and machined to suit an Amal carb

bgm style reed assembly faced off and modified to fit the TS1
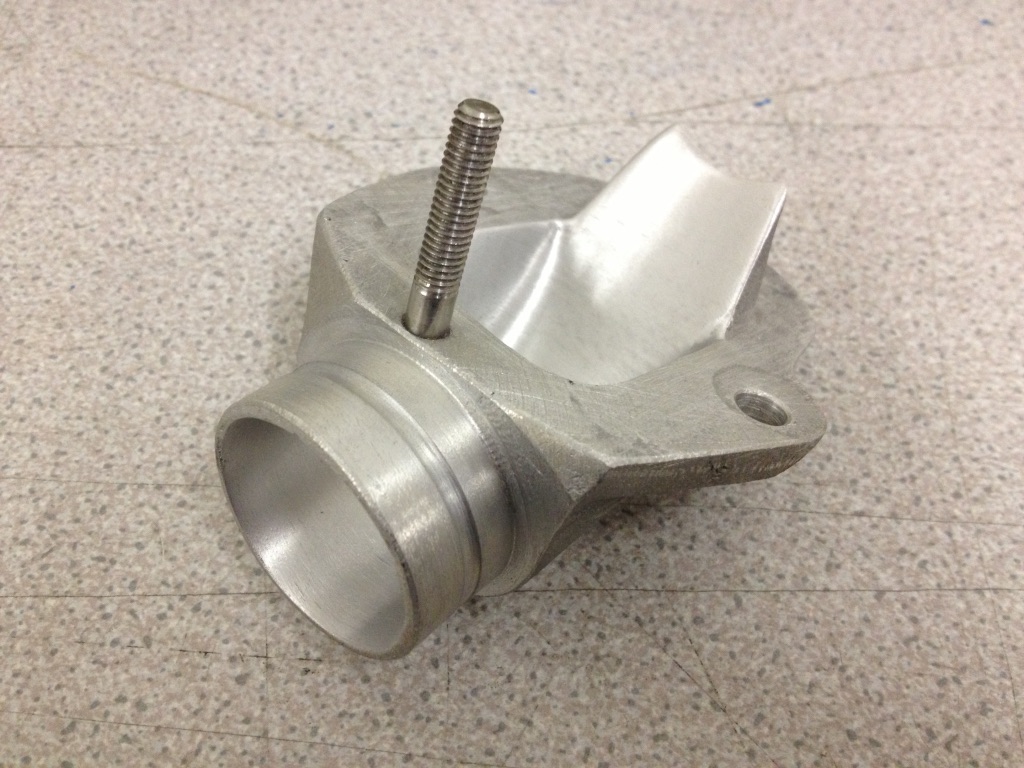
Also flowed showing the half inlet stuffer
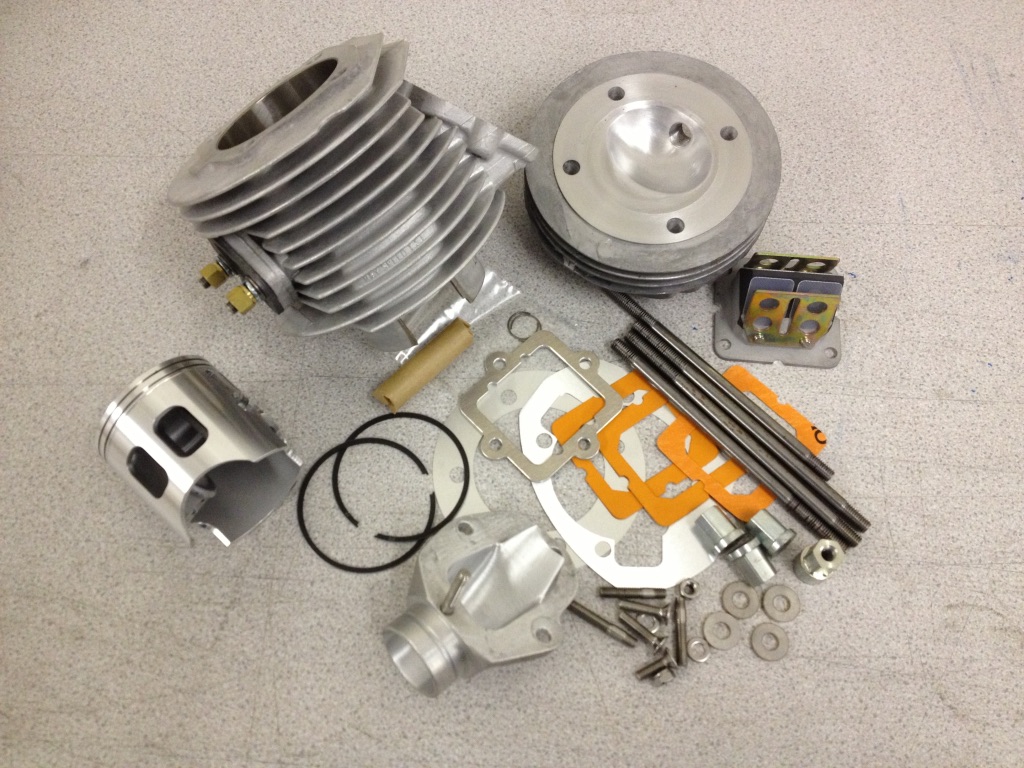
A complete tuned MB package
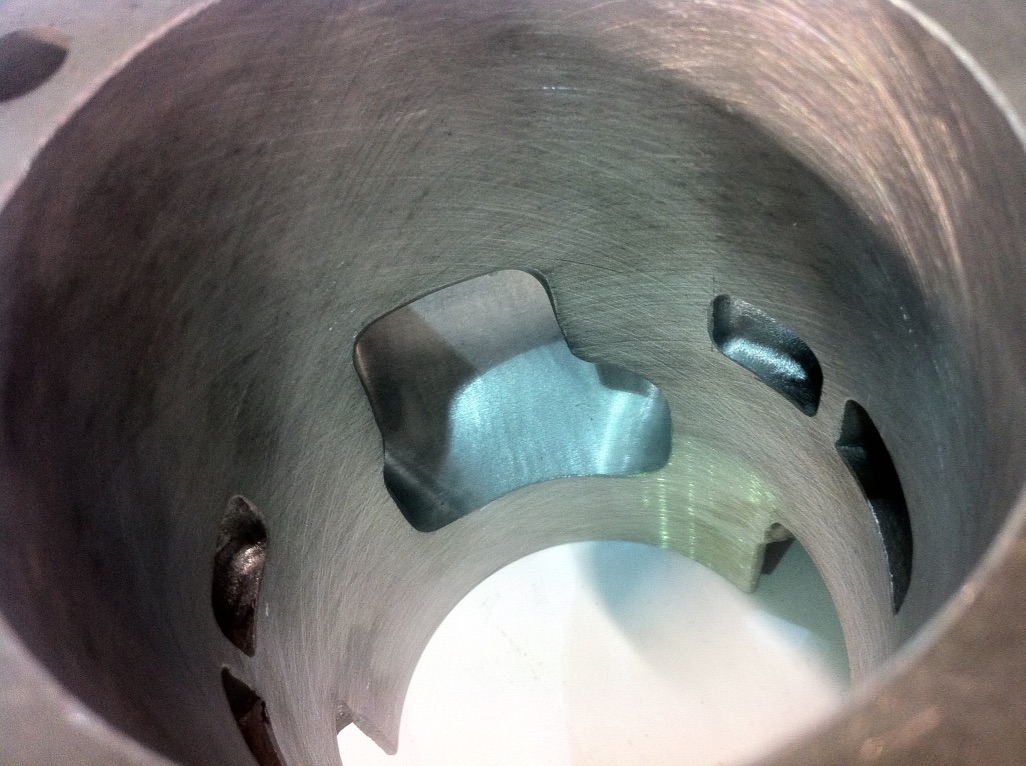
Ts1 Stage 2 porting
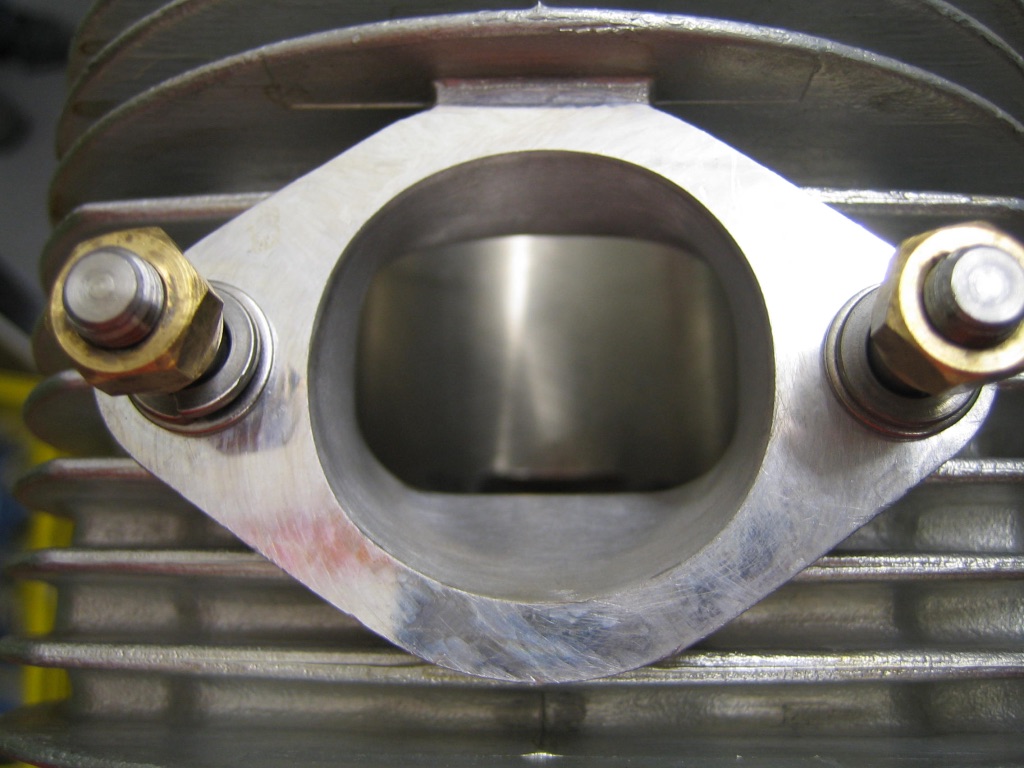
Theres many shapes to a Ts1 exhaust tune
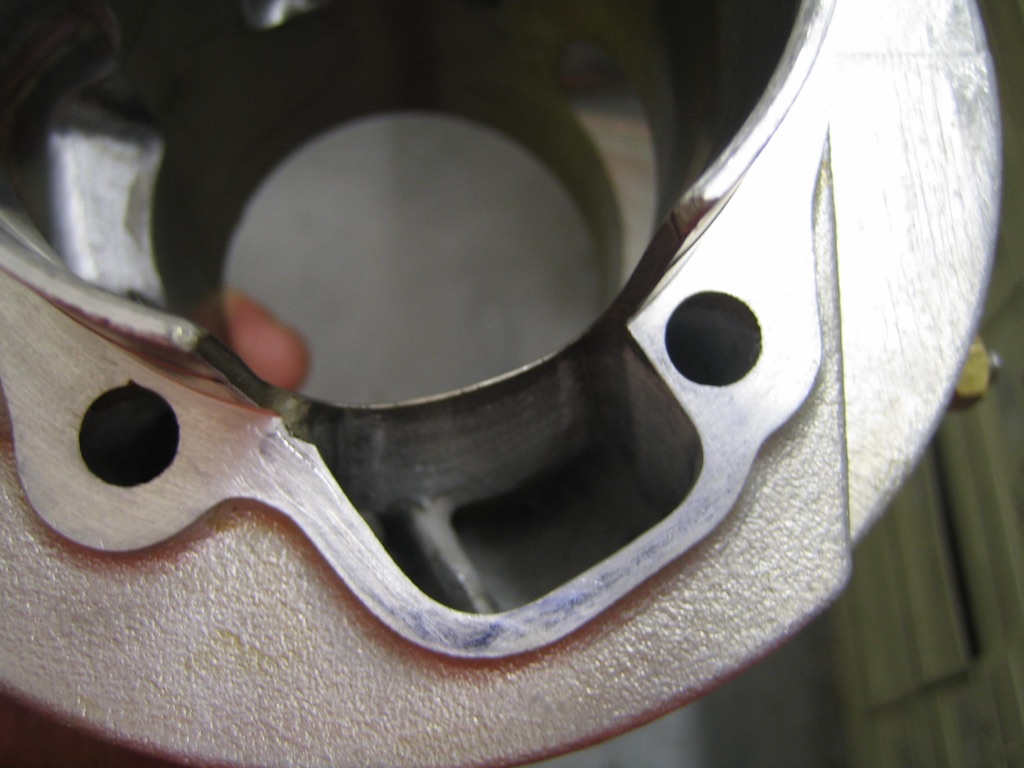
What we called the stage 3 tune where we opened the casing to the maximum
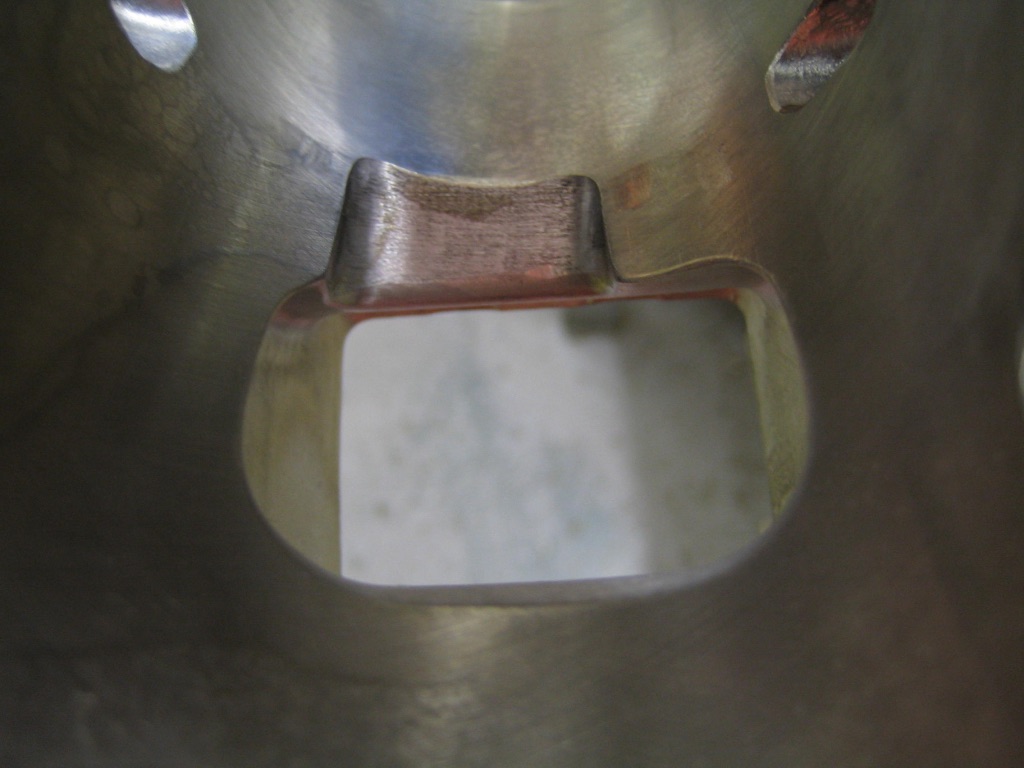
Standard type Ts1 inlet and boost port

So many heads, this is or big finned motorcycle head conversion

A big head with center combustion chamber

The TS1 is ripe to do a liquid cooled cylinder
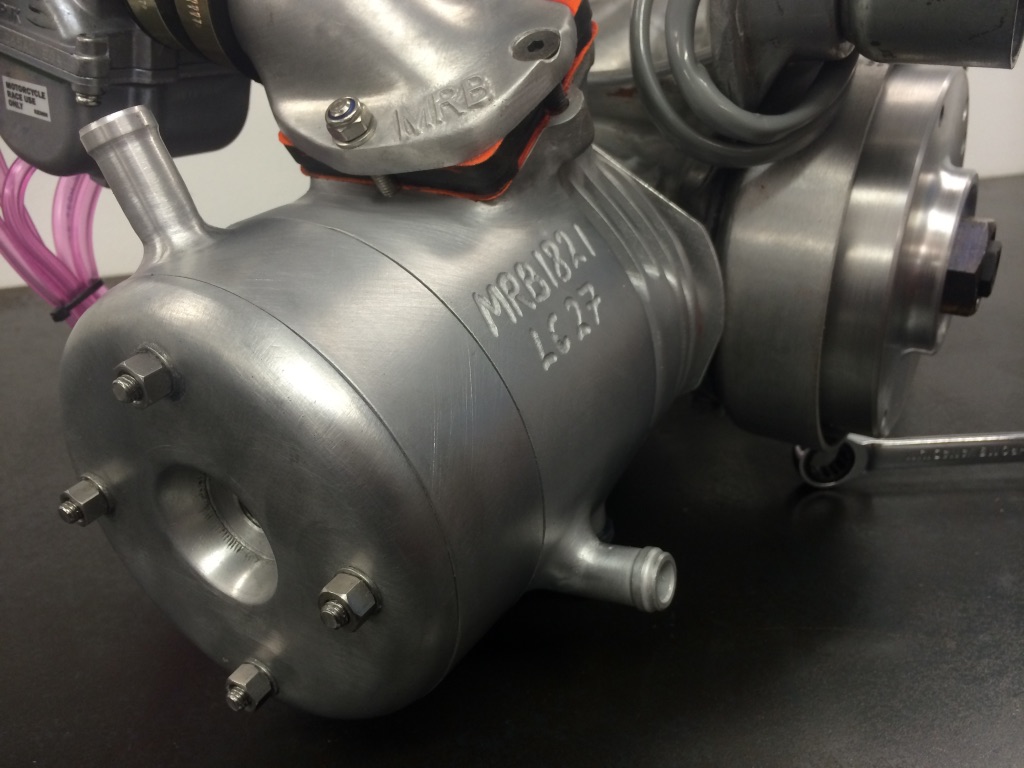
Once done right you can’t tell its not as it should be

Ts1 air cooled welded and modified for extra ports

Ive even done a power valved version
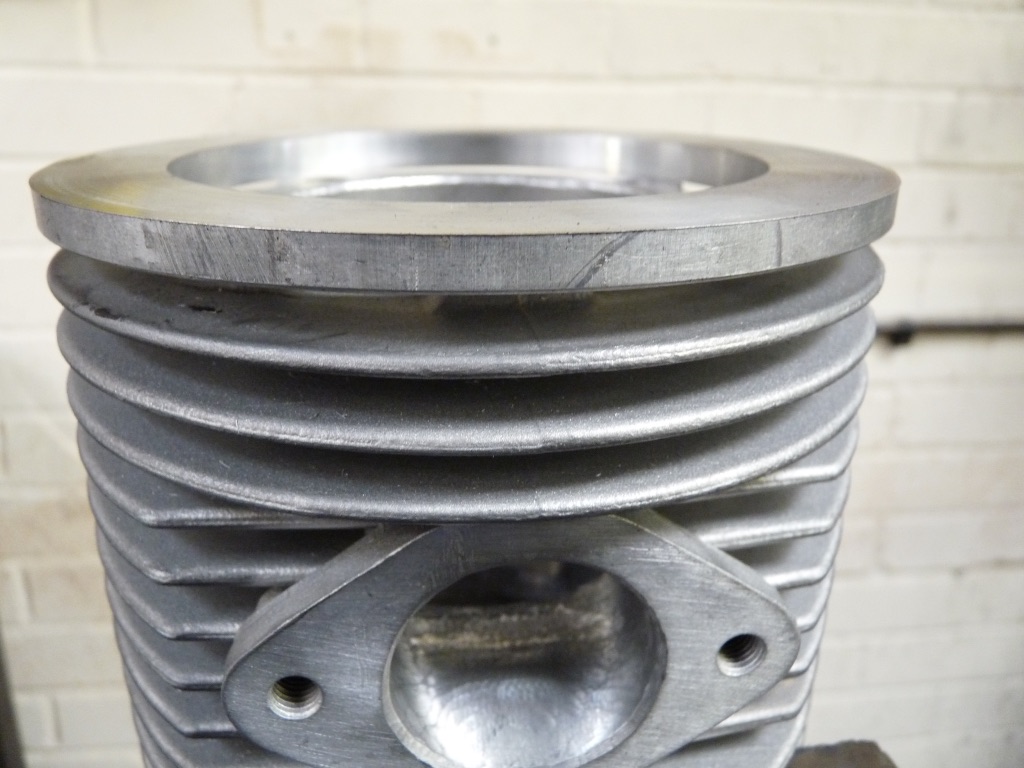
With long stroke cranks, sometimes you need to weld an extra fin on top
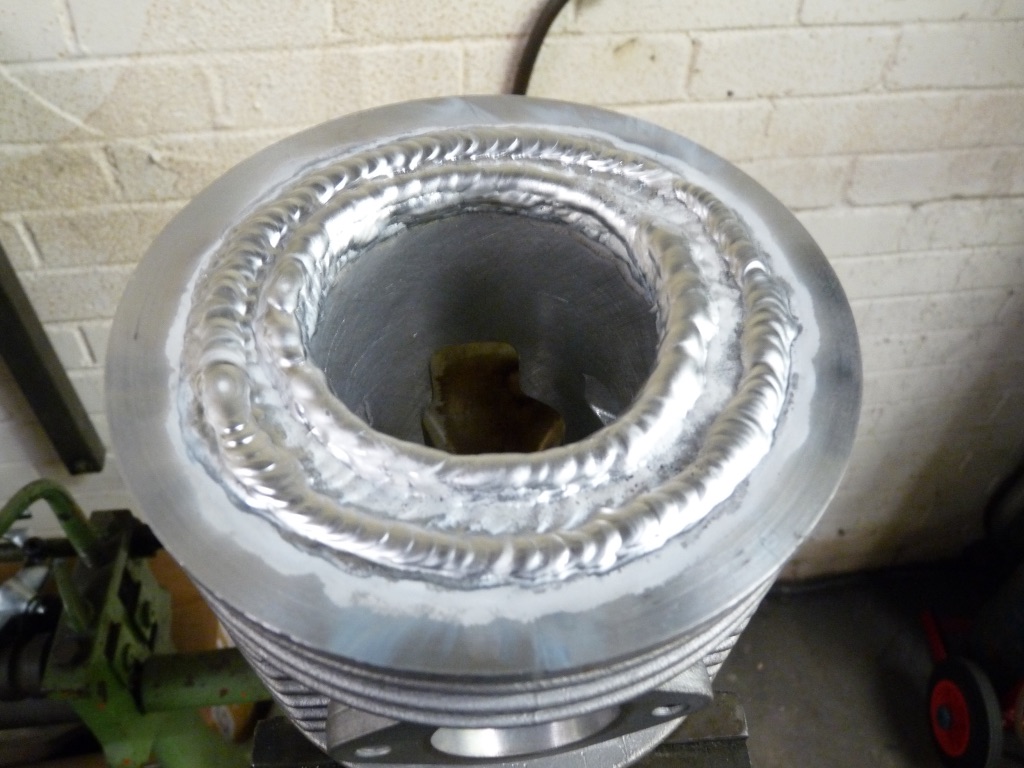
Once welded in needs machining
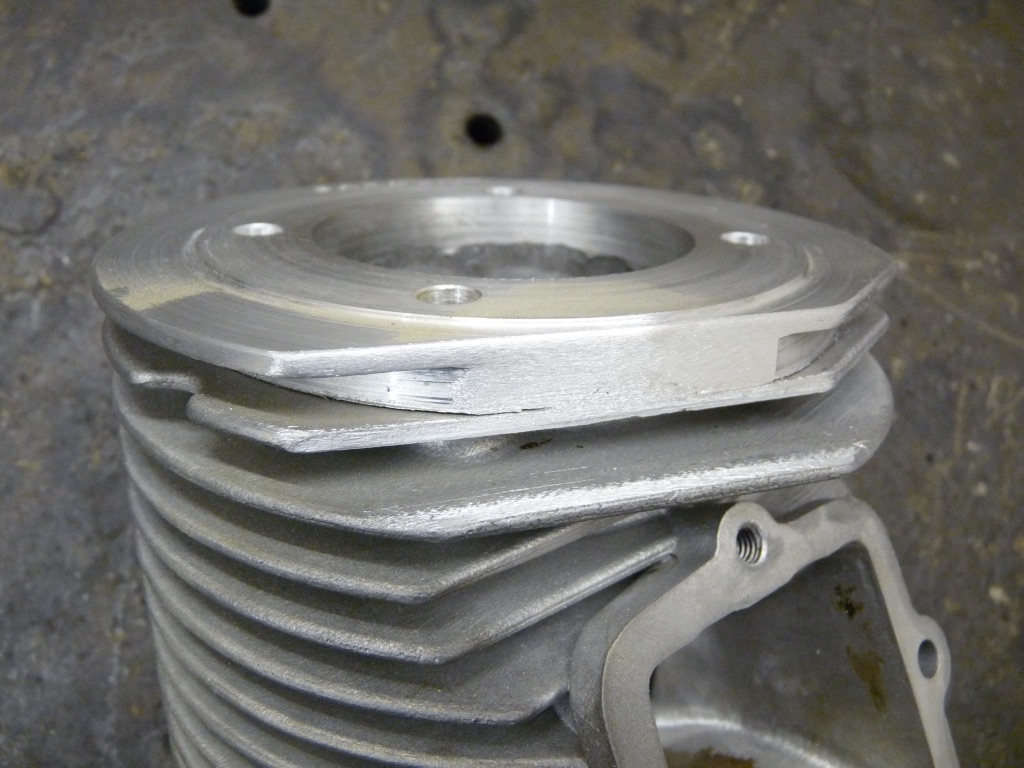
Then machined

Helps by extending the bore for longer strokes and no head gaskets, then you can drop the head into the bore like the RT kit

This is a 35bhp Ts1 230 with large head and fan cooled to the cylinder
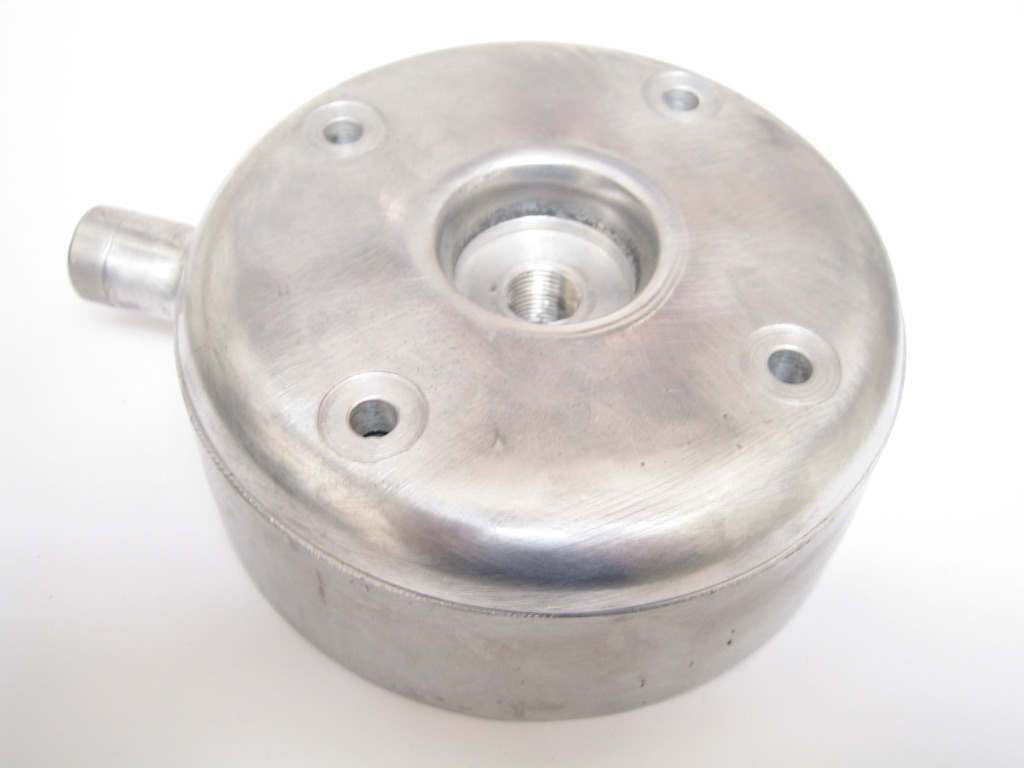
We’ve done Ts1’s as an air cooled cylinder and a Liquid cooled head
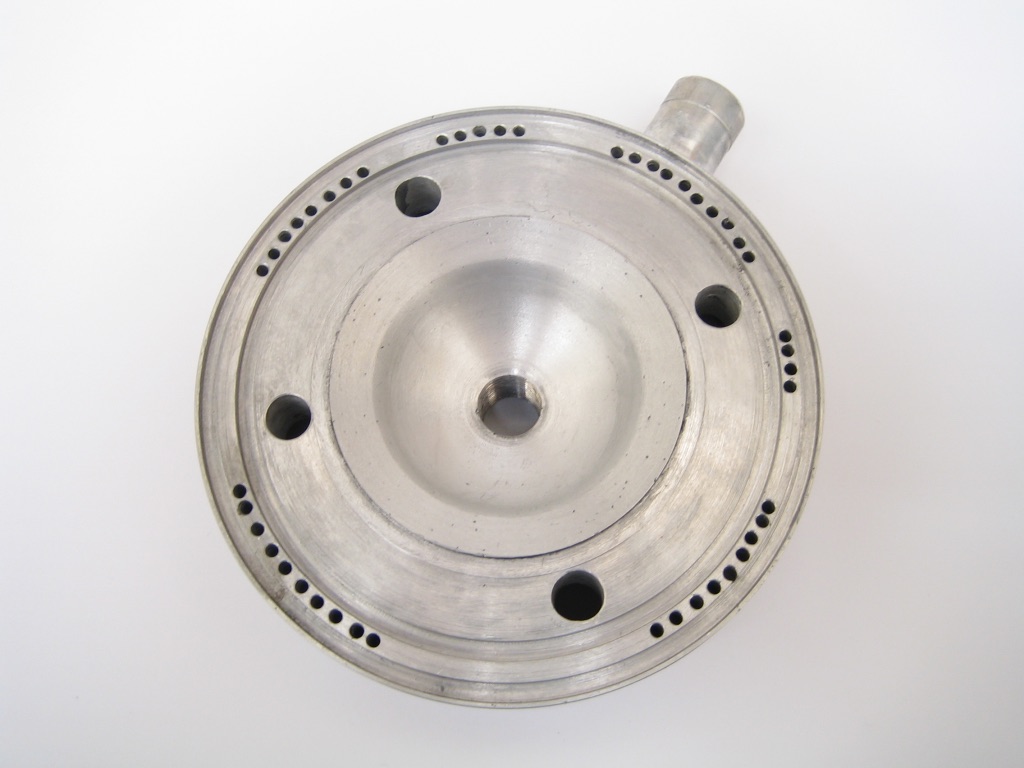
And we’ve done them as a full LC motor

MB LC heads need O rings to seal the cylinder to the head
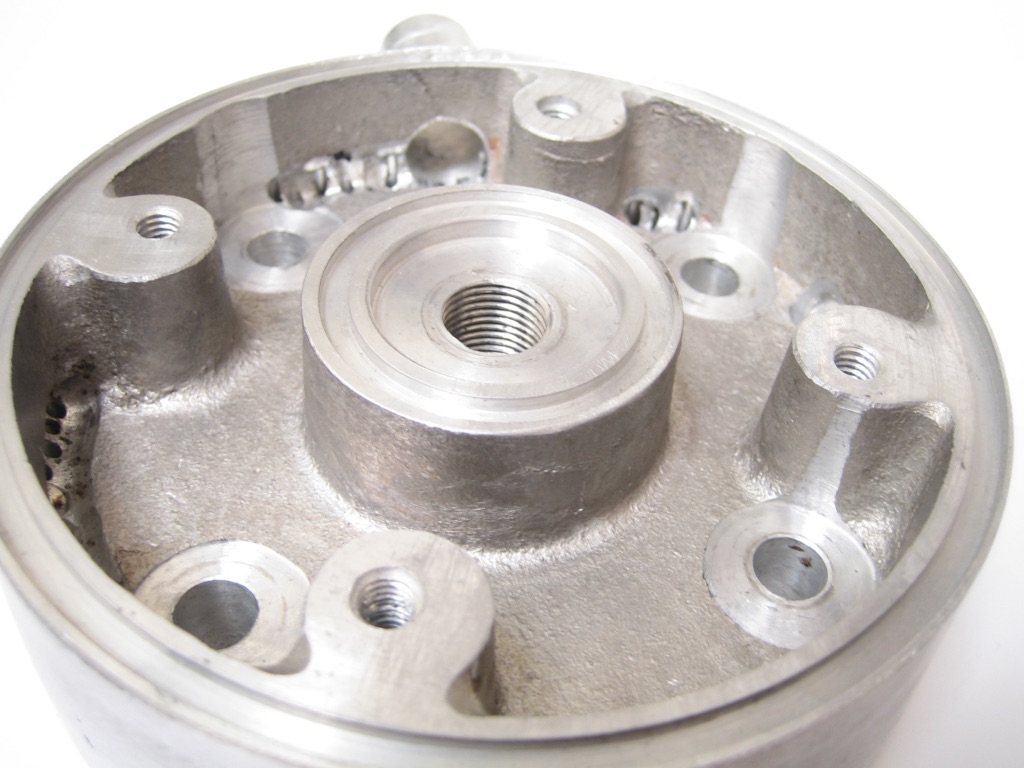
These are sand cast, heat treated, then machined to spec in house
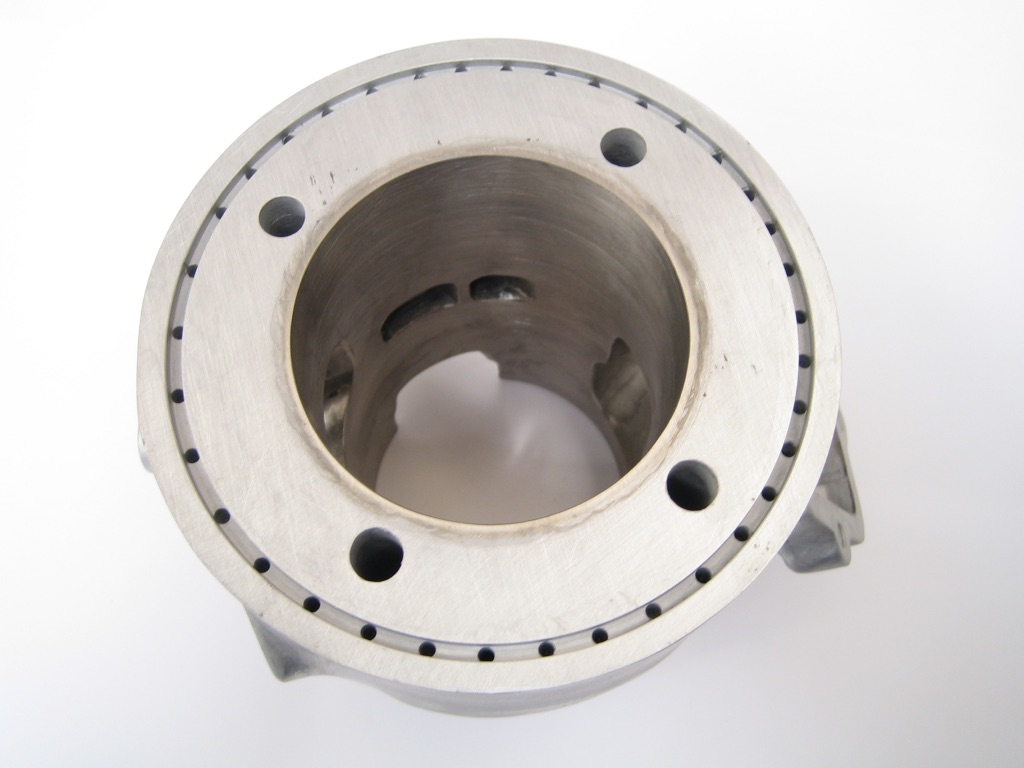
Liquid cooled cylinder with groove and holes to flow water
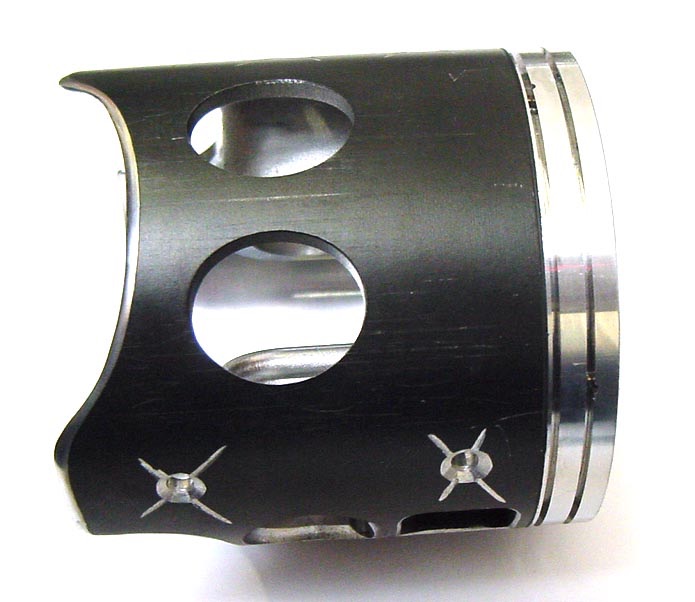
We’ve used so many pistons, this is a MB forged, Teflon coated ceramic doomed version
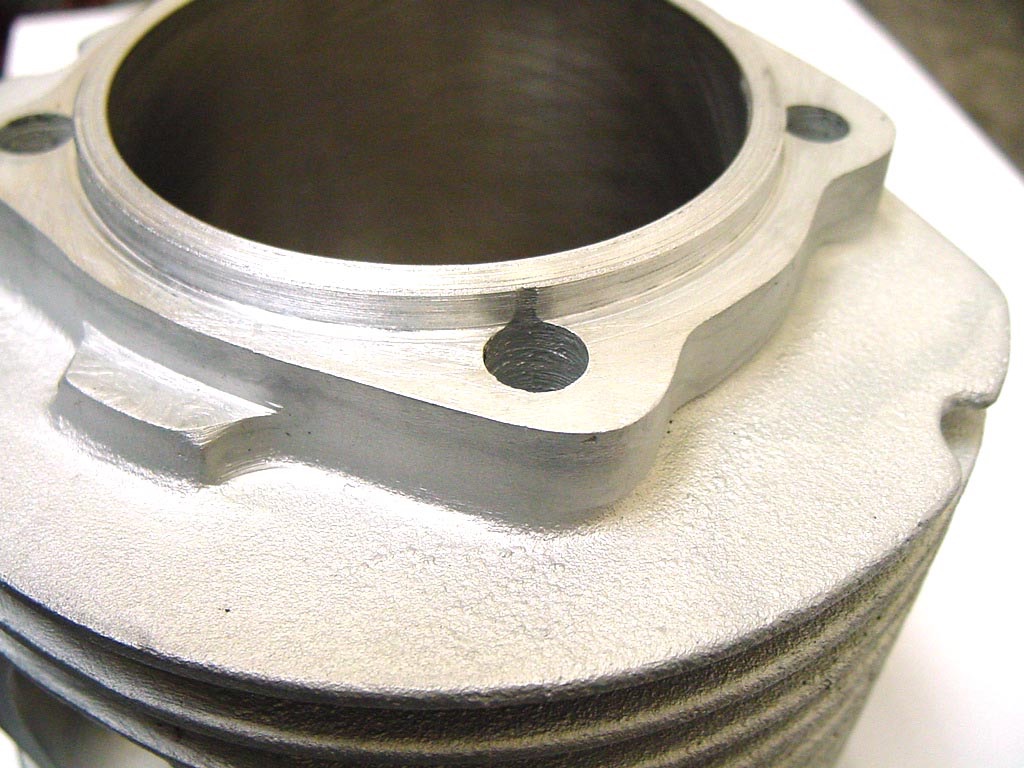
Some cylinders have been welded on the top, then machined with a top head to locate the head true
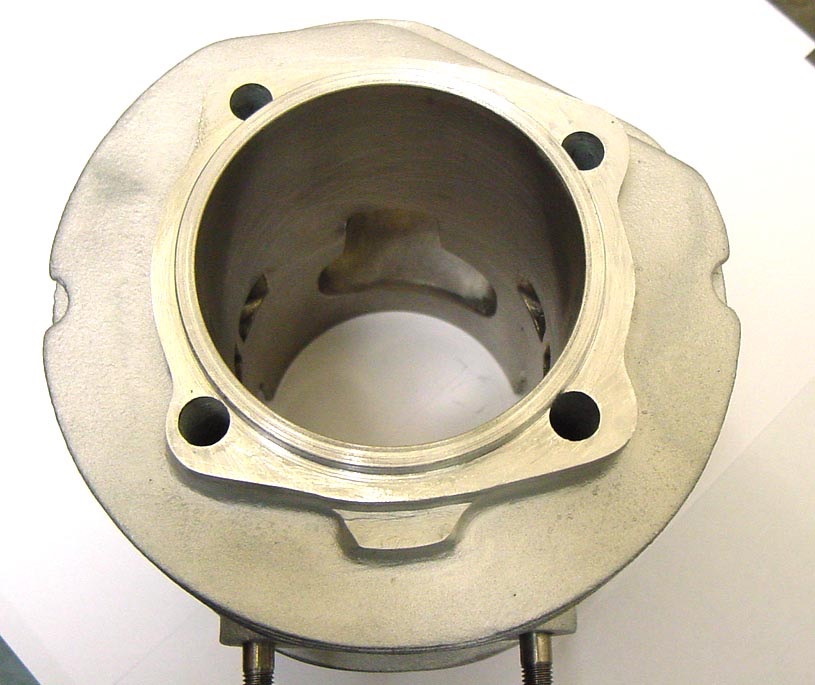
Different versions of top hat
If you have any questions please email Mark mark@mbscooters.co.uk


