


SMALL BLOCK IMOLA 186 – 190
The Imola cylinder has been around for a number of years, it has been modified over that time with many little tweaks to improve it. But the problem is the many little tweaks ad up to a lot from version 1 to the latest version.
Older cylinders used one boost port, later ones used two boost ports. Early cylinders had TS1 style transfer feeds, later ones had the feeds beefed up so tuners could make them larger along their length. Early cylinders had TS1 style exhaust ports which if over tuned can break through, later versions improved with more meat around the flange. Different boost ports mean ring pegs may not run true from the one boost port version to the two port version or one reed block may not be interchangeable. Early cylinders used a plain head gasket area, some used dowels where the cylinder studs come through and used different head gaskets, the latest ones have 3 – 4 extra head studs. Later cylinders had an extra casting below the inlet port so a inlet to casing port can be done, later cylinders are also higher and use different heads where they are dropped into the bore to centralise the head.
So always beaware of this when doing some work or repairing one. Keep an eye on pistons peg positions, head design and bolting and inlet manifold design.
THERE IS NO STANDARDISATION WITH IMOLA CYLINDERS IF YOU ARE MISS MATCHING PARTS.
CYLINDER
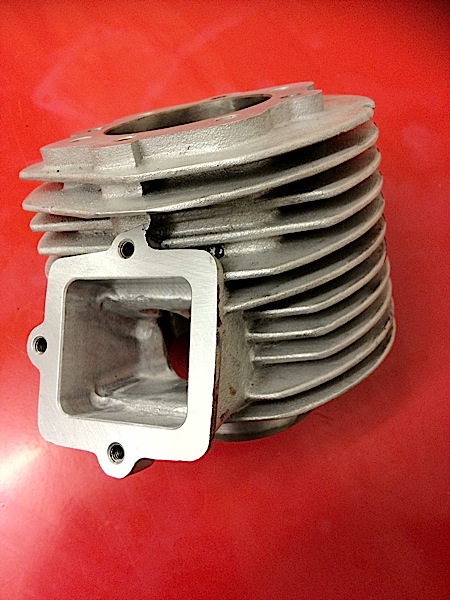
The Imola cylinder is basically to look at, a direct copy of the TS1 200 cylinder but uses a smaller piston of 64mm with some other small changes. It uses the same style of port designs as the TS1 i.e. reed valved inlet port, 4 transfer ports instead of two, a round exhaust port and new exhaust flange.
TRANSFERS
The transfer feeds have been reduced in size so they fit and seal on the 150-style engine casing (Apparently the very first cylinders used TS1 200 transfer feeds and were too big for 150 casings so they had to be reduced in size!). Inside the cylinder the transfer ports resemble the TS1. The Imola uses larger transfer ports compared to 125, 150, 175 cast cylinders. They are reduced in size by a bridge to support the rings but still has a larger transfer area. On early cylinders the ports are all at a different levels, some are higher than the others giving staggered port timings from one side of the cylinder to the other. At bottom dead center the lower edge of the transfer ports are 2mm higher than the piston! This means the transfer timings are too big and ideally the cylinder really needs looking at!
Basically it’s the main design fault of the cylinder, the timings are approximately 136 degrees, around 10 degrees too large! This has the effect of flooding the engine and kills the power output. 136 degrees suits a racing engine capable of revving to around 14,000 rpm, then in contrast it has a relatively small exhaust port of 175 degrees more suited to touring engines revving to around 8,000 rpm. This combination of ports seems to work when set up in conjunction with a 26/28mm carb and a restrictive Clubman exhaust. I would say that the exhaust is the controlling factor allowing the engine to work with in reason. Fit an expansion and you may find that the scooter then doesn’t work that well!
I have in the past I’ve done a handful of cylinders in this way and none of them ever worked correctly. Customers have informed us that the Imola cylinders do 70 mph set up correctly and that seems their limit, this is due to the transfer port timings, any more and you have been very lucky! Smaller transfer timings would allow more revs and power. Another way to help the cylinder – but in this instance wouldn’t work is to increase the exhaust port to near on 200 degrees as used by high revving motor bikes, but as Lambrettas have big heavy bodywork and only 4 gears this does not work (unless it was a track bike).
Later versions of the cylinder were improved in the casting process, transfer timings have been lowered which makes the kit more drive-able and powerfull lower down in the rev range. Later cylinders had the casting beefed up around the transfer feeds along their length. Early ones need casings matching as with a TS1. The later thicker type uses the same transfer feeds but tuners can now increase these along their length and if you want you can really increase these by welding the casing and opening up to the maximum. Some transfer feeds where too large and exposed air at the base joint, ideally these need welding to cure it or use a later Spanish or Indian engine casing with larger transfer feeds, or the use of a cylinder packer and a longer con rod.
INLET PORT
The inlet port of the Imola looks similar to the TS1 but is now much smaller, not trued up and has a horrible rough casting shape and requires one side to be tuned quite a lot to open the inlet feed on the piston. It uses a smaller reed valve than a TS1 and both reed blocks cannot be swapped without major modifications. Above the inlet port is a boost port similar to a TS1. The inlet port has more of a rounded shape compared to the TS1’s square shape. Later cylinders had an extra area cast below the inlet port, you could if you wanted weld the casing and make an extra inlet to casing port. Early versions used a single boost port, later ones used two ports above the inlet port, piston pegs varied to suit, so beware! Some of the later cylinders only use 3 mounting points to hold down the inlet port. The latest inlet port is now even larger to suit a Yamaha type reed block.
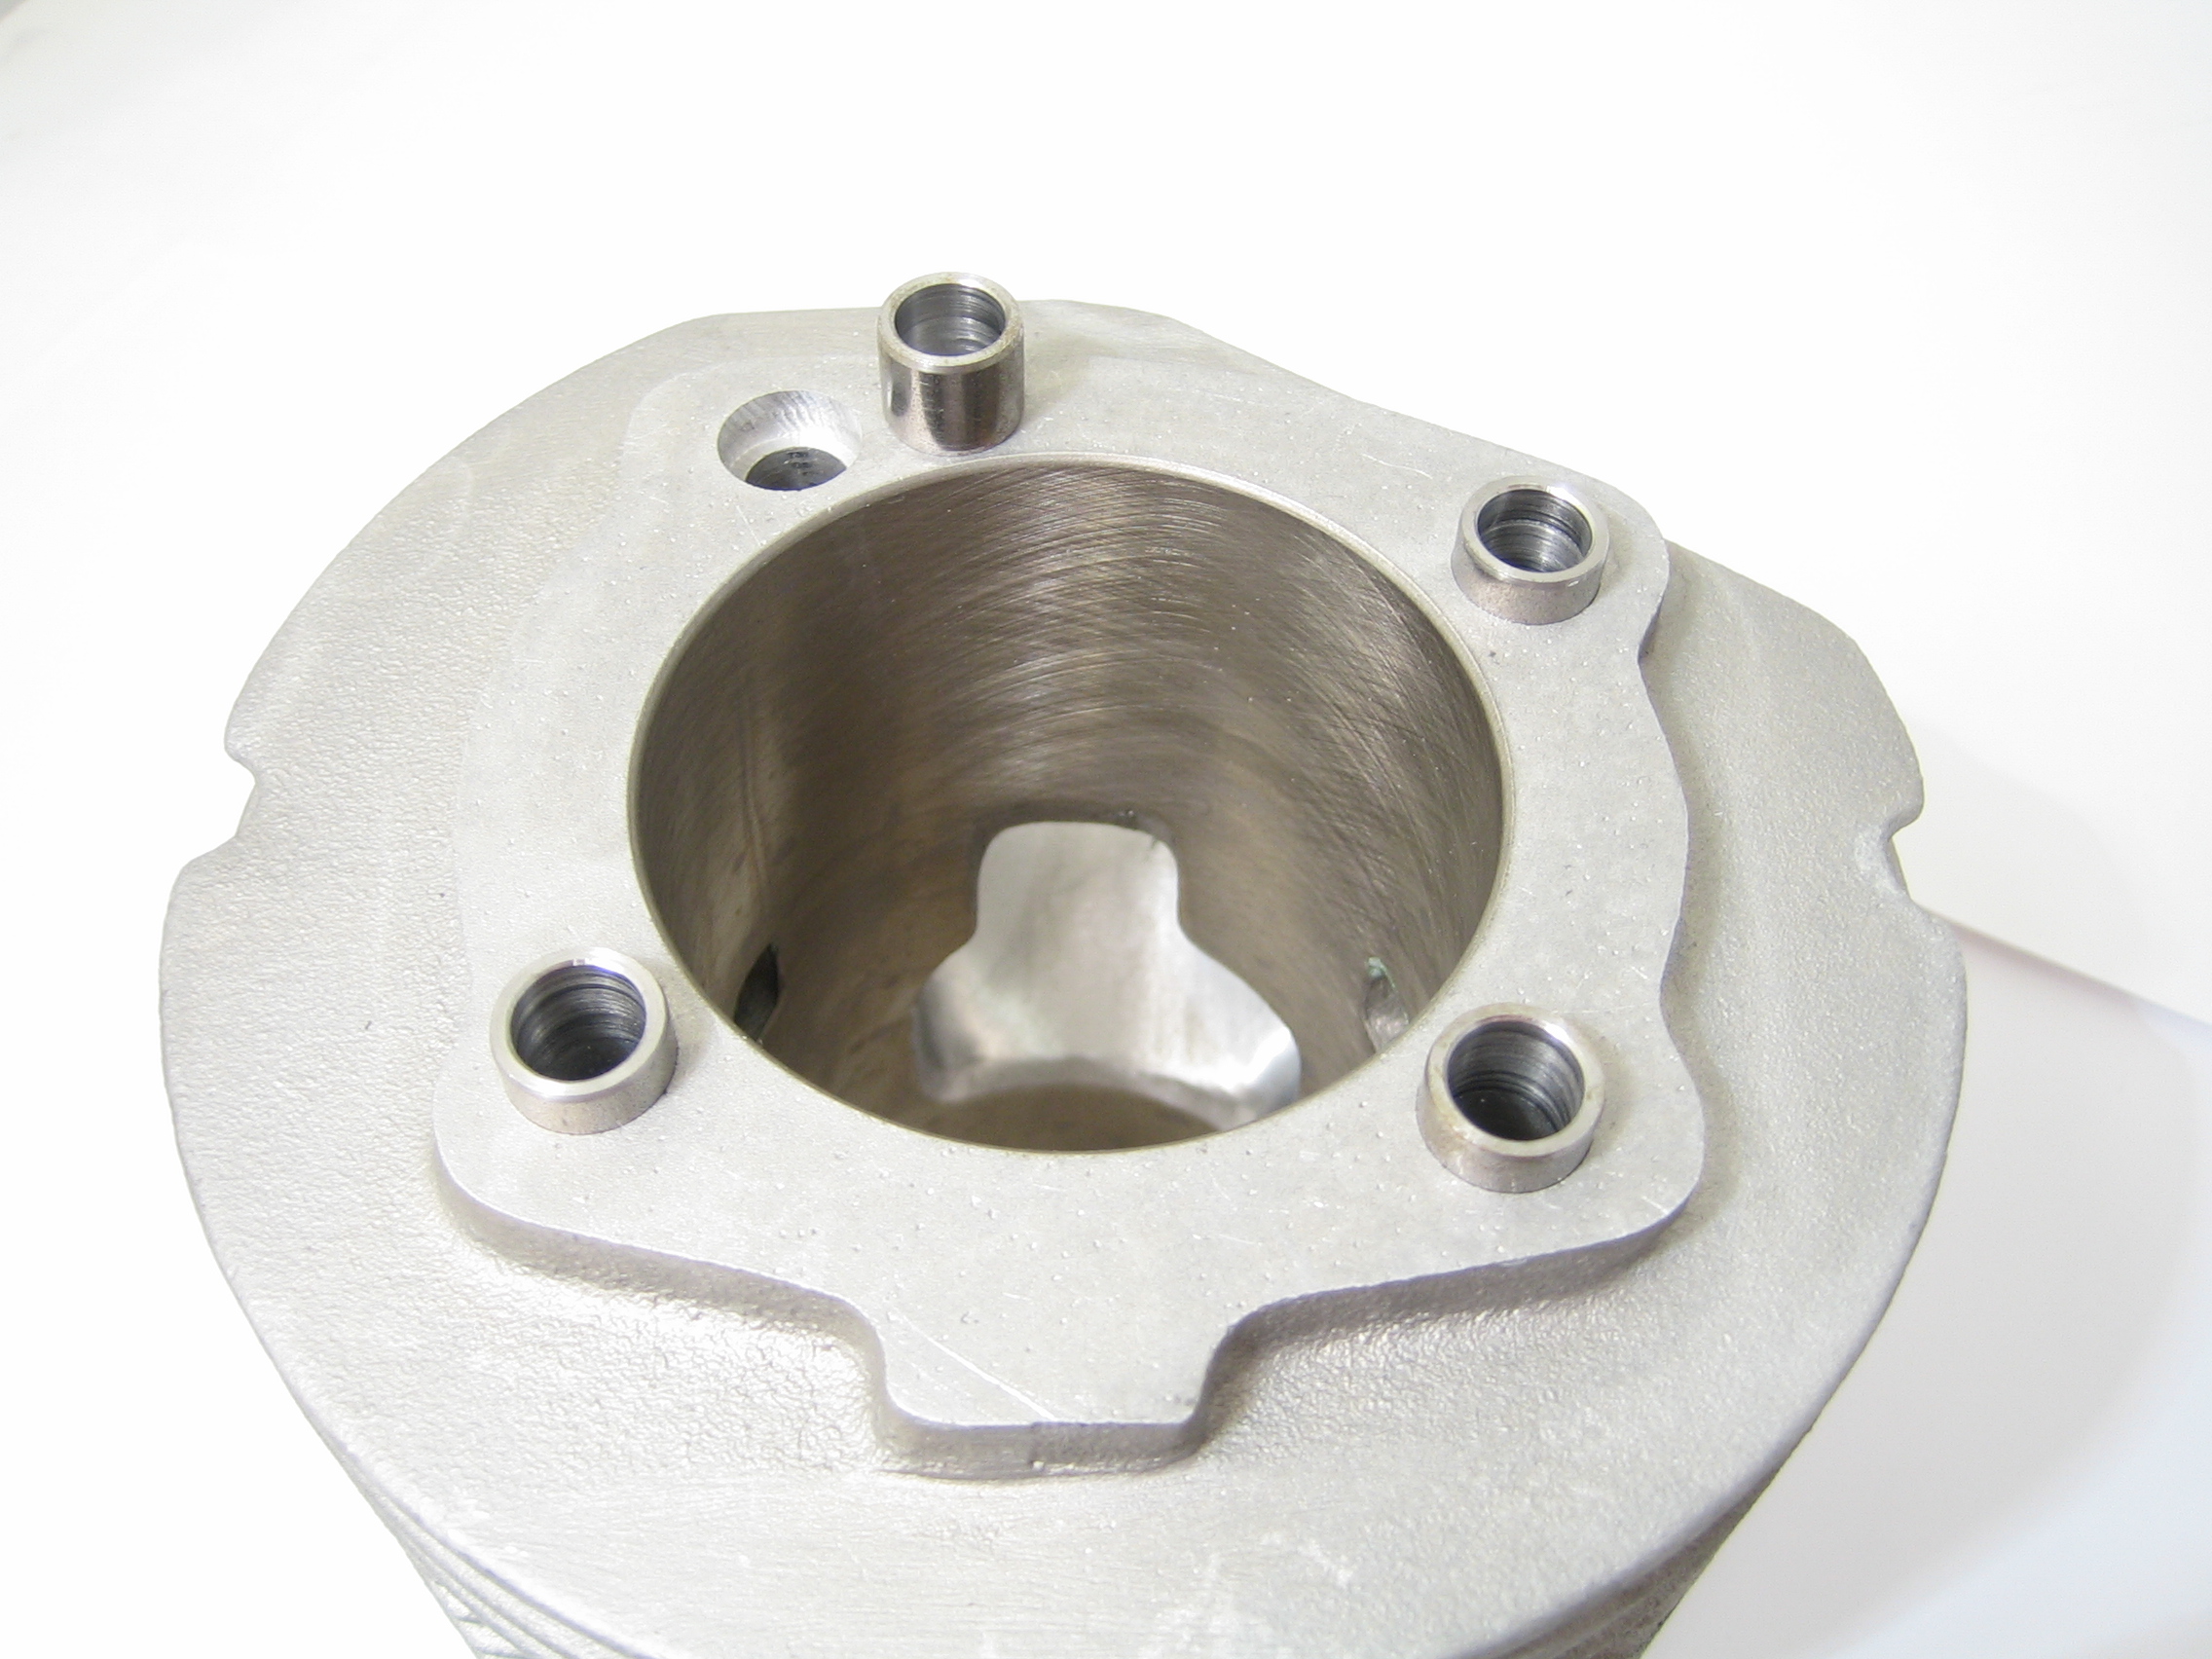
BOOST PORT
Early cylinders used a single boost port above the inlet port similar to a TS1, later cylinders used two ports, pegs can drop into these ports if you miss match a piston.
EXHAUST PORT
The exhaust as mentioned has a smaller exhaust port height giving 175 degrees compared to the TS1’s 185 degrees, also the diameter of it’s outlet is slightly smaller! These smaller port timings are ideal for a 190cc engine used for touring and suits a Lambrettas weight and size. To go much over this would loose the bottom end power that the Imola seems to have. Exhaust port width varies, most are 48mm wide which is on the limit, they should be ok with the thin rings but cast rings if used wouldn’t last long.
REED BLOCK
Early Imola’s use a different reed valve which is smaller than the TS1. This valve has similar petal sizes to a Yamaha item but the screw holes are different. This means the only reeds available are the standard ones, which are black carbon fibre. The reed block uses small reed stops compared to other TS1 styled reed blocks, if you push the valves open fully the petals will go further than the piston and hit but in practice this never happens to a running engine showing that the reeds never open that far! The inlet feed of the reed valve is much smaller – if using the MB inlet manifold the fingers would need trimming to fit in. If using the TS1 inlet manifold this modification isn’t required and fits straight on to the Imola cylinder, but be careful Inlet manifolds have changed over the years, some sit a reed block on top of a gasket face as per TS1, others have the casting machined so the reed block sits into the casting and the reed block has been machined to suit. And some have the reed block sit inside the manifold SO ALWAYS CHECK THIS OUT. Later Inlet ports are increased to suit the same Yamaha Reed block that MB found and have used in all TS1’s since the early 1990’s, the but the casting needs a little work to make the reed stops clear the casing. In fact nearly every cylinder we see has a different designed reed block assembly and inlet manifold, there is no standarisaton to the kit.
INLET MANIFOLD
There are various versions of the Imola inlet manifold. The early one uses a hybrid copy of a TS1 and an MB manifold. Externally the manifold looks like a standard TS1 type but has been modified to use a smaller carb, the manufacturer recommends a 26, 28 or 30mm PHBH carb. By swapping the Imola manifold with a MB TS1 item you could use carbs up to 39mm if needed. Some of the Imola’s reed blocks don’t seal with a flange as with the TS1 cylinder, the flange has been cut down so it seats into a recess with in the cylinder or later versions are recessed into the manifold. Some early cylinders used a rubber manifold design, these split and were altered back to alloy design. Mid production flanges are smaller and the inside area has been reduced to suit the smaller carbs, in doing this two alloy fingers now go inside the reed valve similar to our own inlet manifold, the later ones have no fingers! The MB inlet only uses one finger but the larger size of carb manifold could not allow for us to use two. This idea is very good and should promote low down pulling power! It is possible to fit either the TS1 or MB Yamaha reed block into the Imola cylinder, but its a lot of grinding for this to happen and is probably not worth doing as we have seen 37bhp from the Imola reed block anyway. Later cylinders have been modified to use the MB Yamaha type Reed block which could be an advantage to use Boyesen reeds in these blocks.
There has been a number of different inlet manifolds from time to time from cast alloy to rubber and now back to alloy, all use different ways to mount the reed valve! You have been warned!
PISTON
The early pistons were made by GOL and were not strengthened and used to break! The later piston with IMOLA and MP1625 cast into them have been strengthened around the round holes on the inlet side. Unfortunately the pistons have been made with the age-old design of sharp corners below the gudgeon pin, this is the weak point of the piston and failures occur when the skirt falls off! The piston rings are 1mm thick and are very high up towards the piston crown, these rings are the same as rings used by MB, Wiseco and others! The piston is designed to use piston shims to guide the con rod on standard crankshafts or if using a race crank you would need to use a Yamaha DT175 small end bearing. MB consider the older piston to be the weak point, we believe that it will fail and customers have already told us this. Later pistons have a new manufacturer and are altered again and have been improved and we have not heard of any problems.
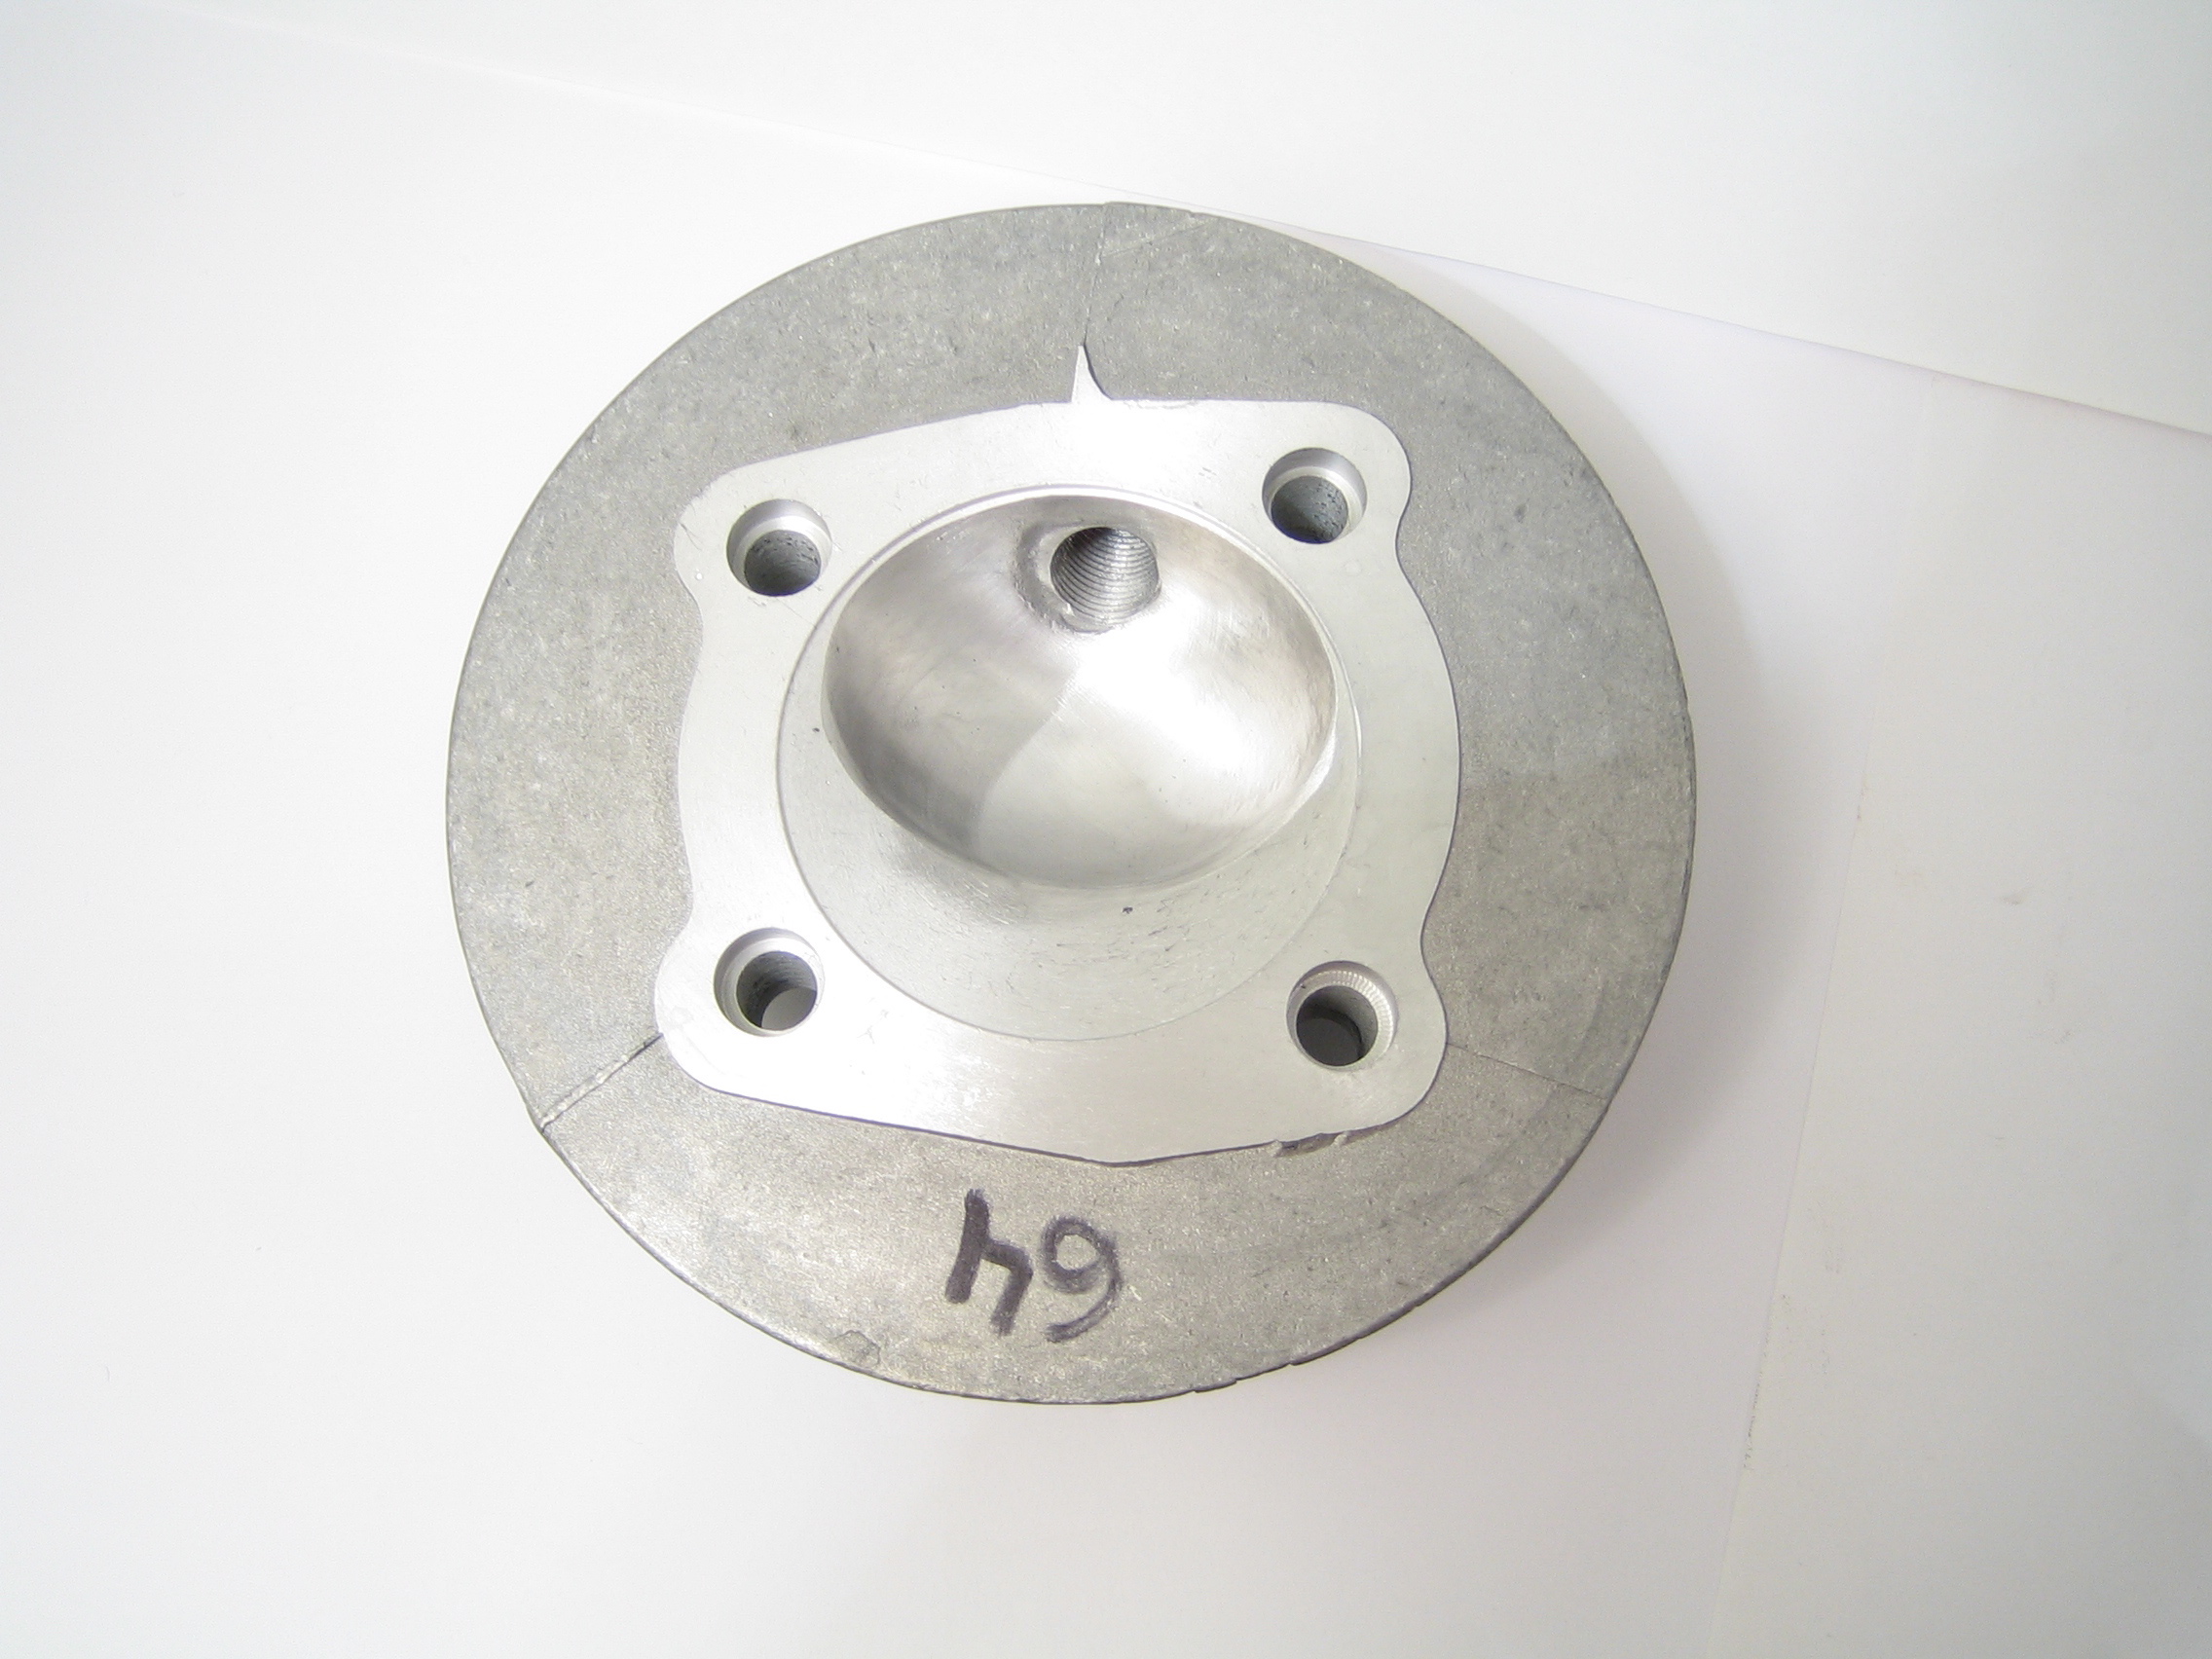
CYLINDER HEAD
The early Imola kit didn’t come with its own cylinder head, your head needed machining to suit. Beware we have seen some very badly machined cylinder heads made for the Imola kit. Now later kits do come with heads and again there are various types, it could be ones to suit the dowel cylinder type or the ones with extra mounting points in an effort to stop head gaskets blowing, but as far as I’m aware this is not a problem anyway. We have seen the updated heads with extra castings not even machined to accept the extra stud holes! We see various types of head made for the Imola, compression ratios alter from really too low to really too high and is a big reason why Imola’s are known to blow holes in pistons. If you do put a hole in a piston have the head compression checked out. Some heads can be side combustion types or the center combustion types.
SET UP
To set up the Imola cylinder you would need to fit a standard 150 cylinder base gasket, this needs cutting to suit the larger than standard transfer feeds. Some kits came with purpose made and different thickness head and base gaskets. Ideally your casings need tuning to match them to the kit. Most cylinders, depending on the casing height, would not need a cylinder head gasket this should give a squish clearance of approximately 1mm – perfect! BUT ALWAYS CHECK some cylinders are different heights and used a drop head like what we did on our RT kits.
The Imola kit could be considered the top of the range kit for the small block 125 / 150 / 175 stud patterned engine, if modified and put together correctly.
PROS: Alloy cylinder good heat dissipation. Has the potential to be tuned for much higher horsepower compared to cast cylinders.
CONS: Expensive! (Consider buying a 200 casing and converting to a 200 / 225 / TS1) Long term early pistons failed. Requires a larger carb fitted on the offside of the scooter (a Battery tray may need removing) a new or modified exhaust is required. Although the manufacturer recommends standard Li / Sx crankshafts and ignitions MB recommend converting to GP race crankshafts and electronic ignitions. We have known plating to come off, especially if tuning as it can chip away. We have know castings to be weak and deform in use causing head and base gaskets faces to leak. Cylinders and heads vary from kit to kit so much so we can not keep up with them, so send in your full kit if you want work doing.
WHAT CAN BE DONE TO AN IMOLA KIT?
Well there’s lots that can be done all depending on many reasons.
- Does it need tuning?
- Does it need repairing?
- Does it need boring out to repair the bore?
- etc
The cylinder could be fitted with an iron liner then a variety of pistons could be used or can be bored out and use a larger piston to 65 – 66mm. The cylinder can be modified to use a bullet proof Yamaha 65mm piston kit, then re-ceramic plate it. This can be done by swapping the con rod to Yamaha (110mm) which requires no machining. On early cylinders MB recommends machining the cylinder base, this lowers the transfer timings to a good working timing. The Imola piston has a very high top piston ring so the top ring comes out of the cylinder, use a base gasket to prevent this, then machine a recess into the cylinder head to give a correct squish clearance. Then centralise the head with dowels! Today our own MB Race-Tour pistons have been modified so one piston fits both types of cylinder with 1 or 2 boost ports. There’s lots of improvement if the ports are cleaned up, squared off and flowed. Some of the exhaust ports are wide, don’t go much further, inlets can be reshaped and widened, boost ports usually need raising and the secondary transfers can be widened. Cylinders always need checking for port timings and squish clearances which again can improve the cylinder to well over 20bhp. Mods can be done to set a cylinder up for Touring or Road Racing, always check head compressions as these vary.
As a kit over the phone these are a utter and complete nightmare to deal with! This has to be the worst kit on the market for lack of standardisation in machining, with developments done by a blind man who doesn’t have a clue about 2 stroke engines! Add to the fact different pistons were used and inlet manifolds and reed blocks.
All we can do, is say ‘send the full kit for us to look at’ and work from there! If you take each individual kit on it’s own merits and have them upgraded and modenised then they can be great and we like working with them to our MB specs, but this can be expensive and now there are others kits which could be better suited.
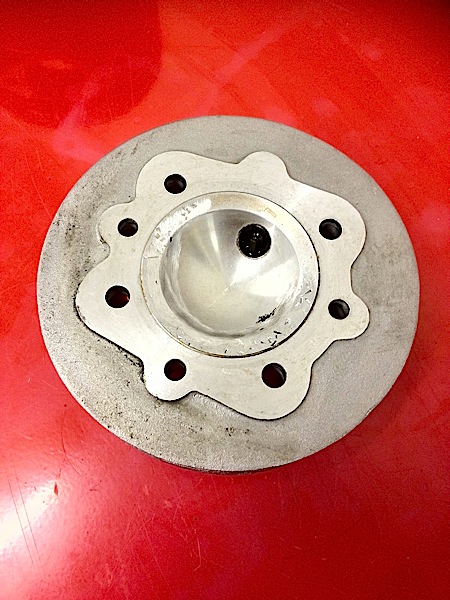
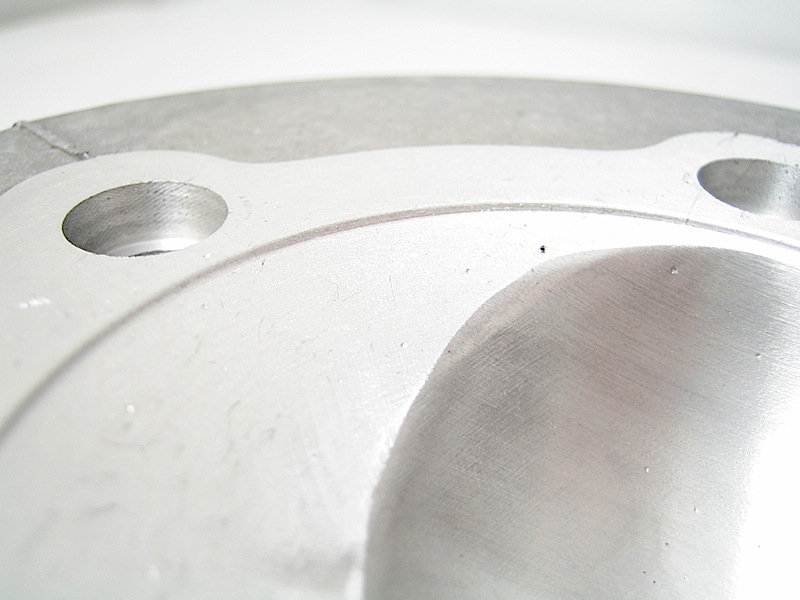
Some early versions used dowels in the head to locate the bore true, shame the head wasn’t machined to the bore true
This V1 version used dowels, but we came across some where the dowels were not machined down far enough and the head didn’t seat
.JPG)
The Imola casting is not as nice as a TS1, even after tuning its hard to really clean up the inlet port
.JPG)
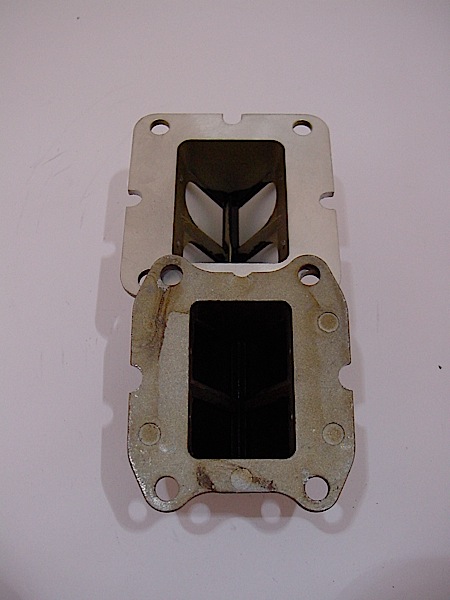
Single boost port on the V1 Imola version
Early Imola pistons had marks in side the piston
Later Imolas with two boost ports above the inlet
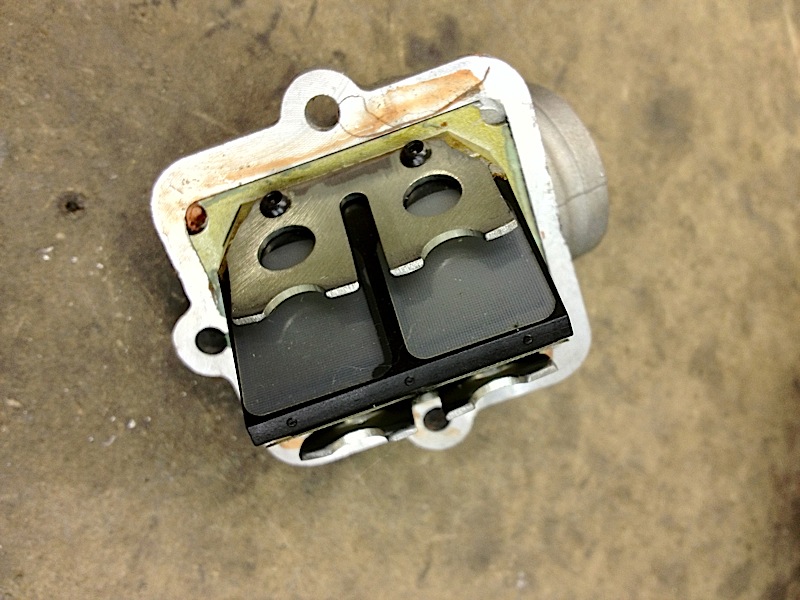
Imola V2 uses a smaller reed block than TS1’s and is milled out different

Exhaust port matched to a JL pipe
New type Imola head, cleaned up after a big end failure, note 3 extra bolt holes using 7mm studs and note the drop into the bore
The MB 30mm TS1 inlet manifold machined to suit 30mm Dellorto and PWK mounting rubbers
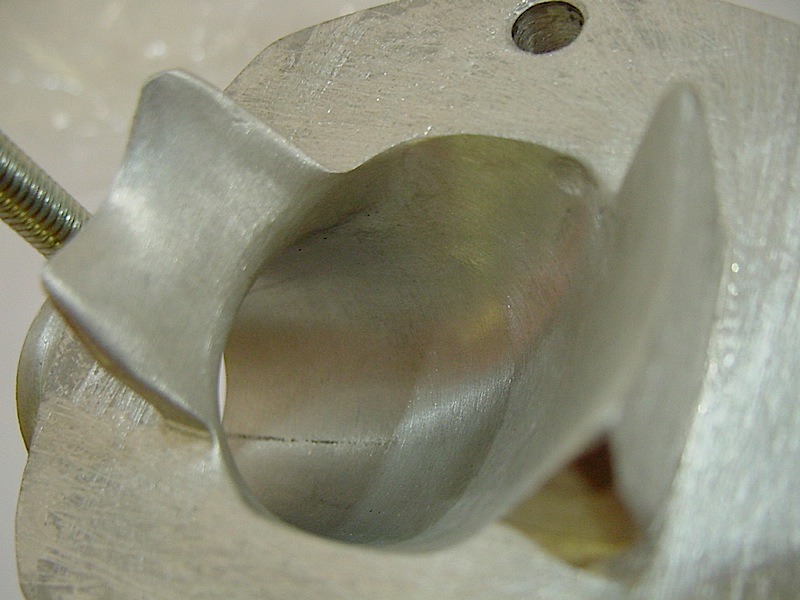
Cut flowed and shaped to suit the older reed block
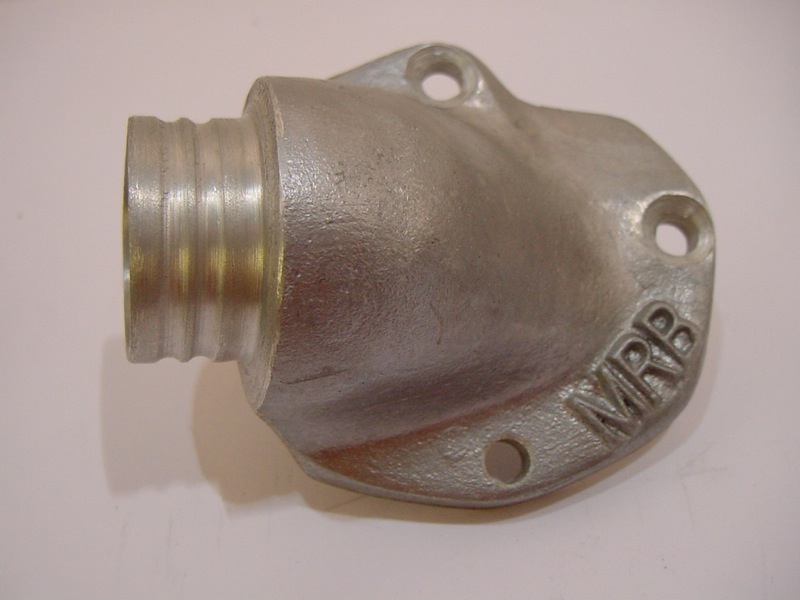
An MB inlet modified and thinned off around the area that fits into the small Honda Reed block of early Imola versions

Later Imolas with 3 stud holes on the inlet manifold face with either 3 or 4 extra bolt holes for the head
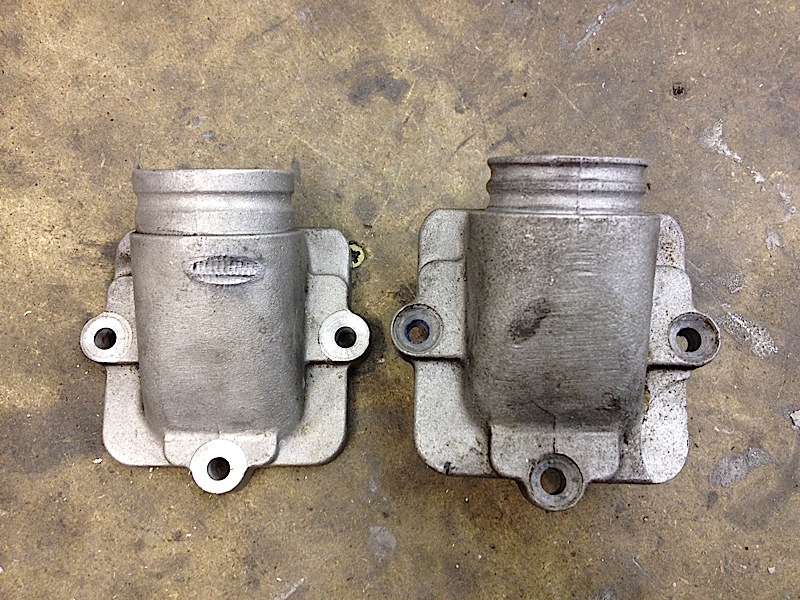
Two versions of the Imola inlet manifold, not including the MB versions there was also another two types!
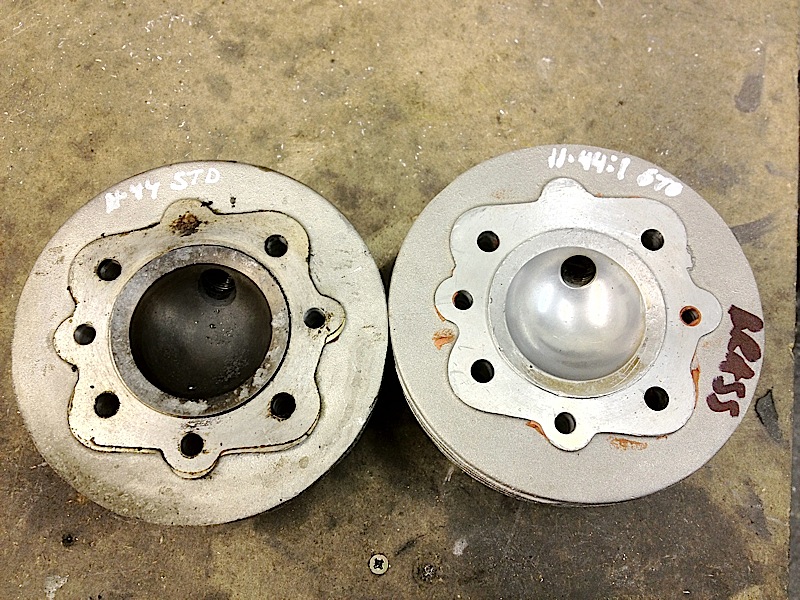
Just erring on the high compression side at 11.44:1 one version standard on the left and one on the right lowered to safer compression settings by MB
Some heads were side combustion chambers with a recess in!
.jpg)
Modified MB inlet to suit the Honda Imola reed block, there has been a number of different reed blocks used
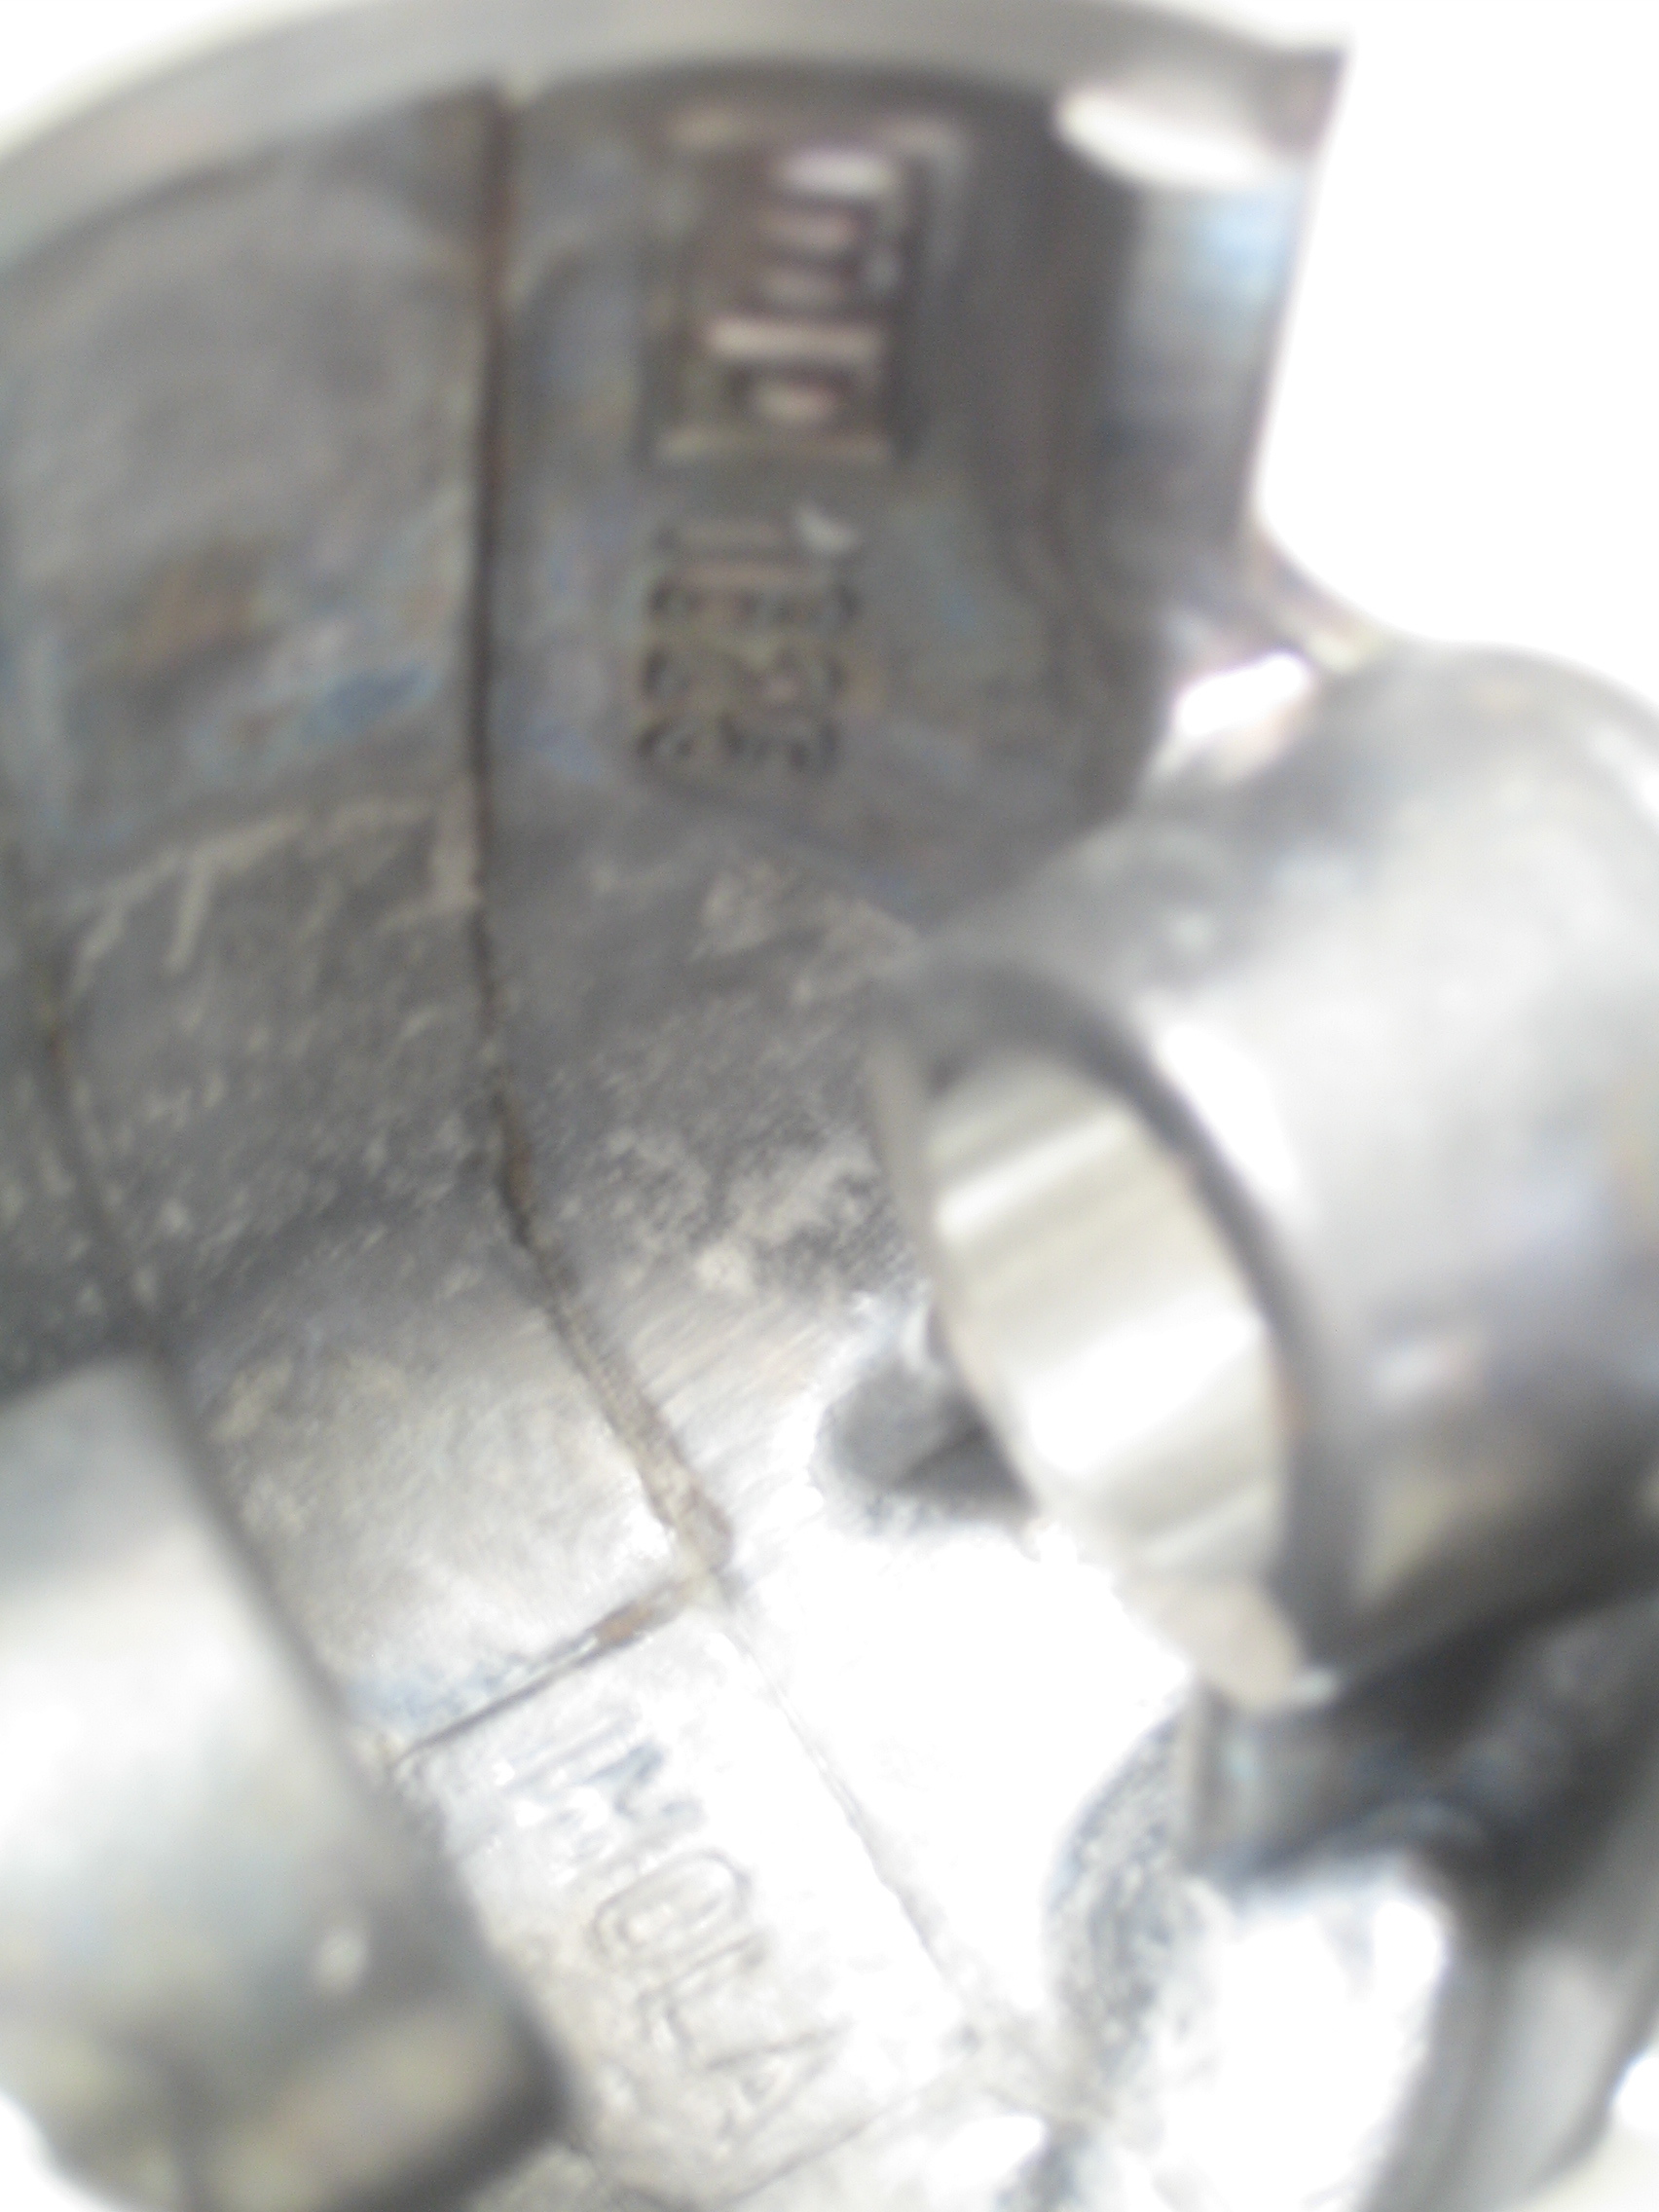
Honda lower Yamaha on the top used in later cylinders but modified
.jpg)
The latest Yamaha reed block modified in a modified inlet manifold, note the vibrating marks it was loose when it was stripped down
Again another different inlet manifold on a later version
A later modified Yamaha reed block
.jpg)
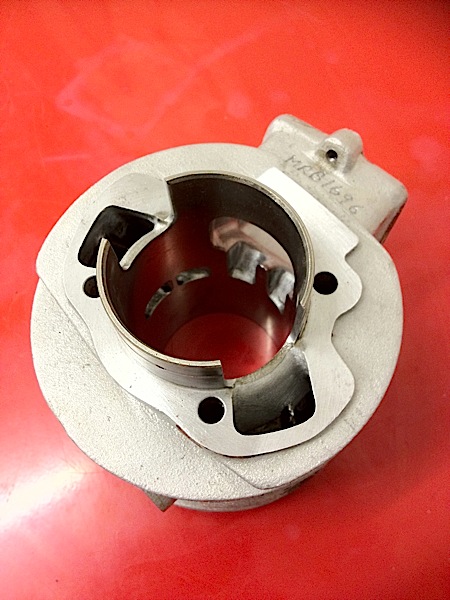
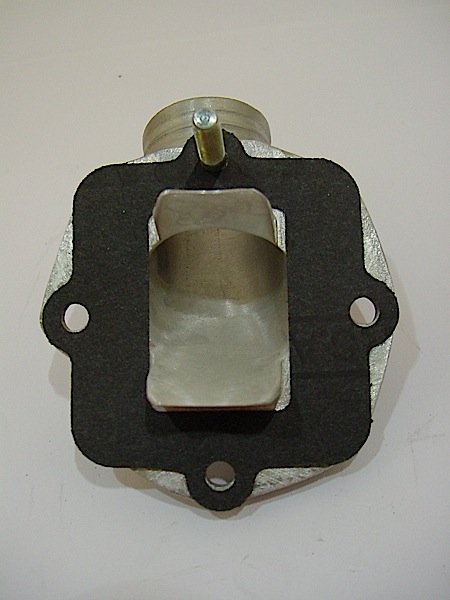
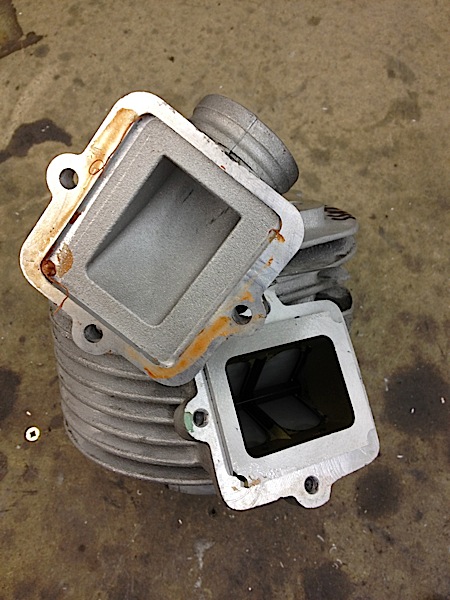
Some Imolas are so far out they can draw air through the casings as shown here
.jpg)
So close if you used the supplied fibre gaskets cut to suit and you would have a failure
.jpg)
It’s safer on this cylinder type to weld the face to seal the faces and this is a 200 version small block casing already with bigger transfers
.jpg)
All Imolas should have the casings tune to suit, this is a later cylinder where the transfers don’t need welding
If you have any questions please email mark@mbscooters.co.uk


