


Making your own control cables
Replacing one of the control cables on your motorcycle or scooter can be a pain. Even if you can find one that’s a perfect fit, ordering times can be long and when it arrives you may find it’s made of inferior materials or that someone customised your vehicle in the past (changed grips, changed control levers, missing parts) which means the ‘made for this bike’ cable still doesn’t fit properly.
So why not make your own? It’s not that hard it turns out. There is some work involved in finding the right bits, but once you have those you can make a new cable in about 10 minutes. That means back on the road the same day and having cables that will fit for sure the way you like them.
How do I know whether my setup is original?
Frankly, this can be hard to find out. Unless you look at original folders and flyers or 100% original examples, you just don’t know for sure. If you want to be 100% original, you’ll have to put the work in; otherwise, just look what’s on the bike now or if cables are missing, get the general measurements and go with what works.
Part 1 – What do I need?
Tools
You need to invest in some tooling, but you’ll earn that back after a few sets of cables if not in convenience.
A good wire cutter
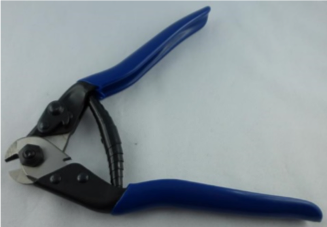
To cut the inner and outer cables you need a proper sit of shearing cutters specifically for steel cable. If you use a pair of nail pliers you will squash the inner cable and fray it; you’ll simply crush the outer cable. Shearing cutters have a cutting area that encloses the to be cut item, so don’t crush or squash. Here’s an example:
A soldering bath
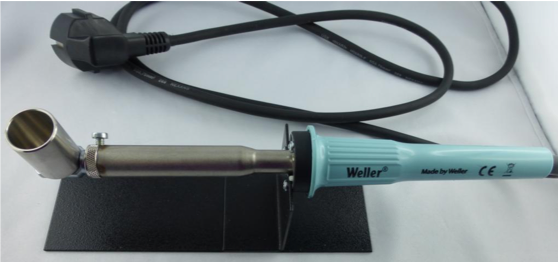
The ends of control cables will require a certain type of nipple to be soldered on. Because more than just capillary filling of solder is required, a soldering bath is a must have to ensure sufficient solder can attach to the cable end and nipple before it cools off too much.
The best type to use is a small bath like this:
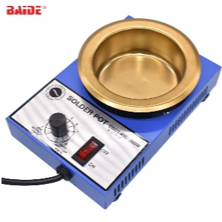
Weller dose a great one, but sadly comes in at about 150 GBP. You can also get a small soldering bath from AliExpress like the one on the right.
Just make sure that it can go up to 450 degrees Celsius and that you get the 220V version. You may need to attach a UK plug. Costs about 20 GBP and works fine. It does take more solder to be able to submerge the cable nipple.
Crimping Pliers
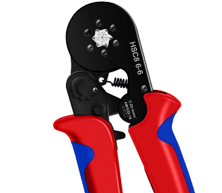
The final tool you can use (optional) is a pair of crimping pliers that can crimp the cable ends on the outer cable. This is a nice to have only.
Bird nest maker
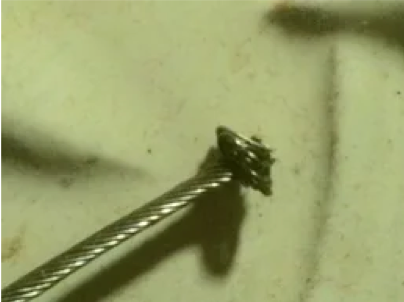
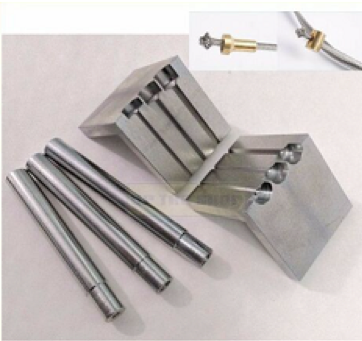
When you buy your cable nipples, you’ll find that on the side where the inner cable comes out, there is a recess or hollow. This is to hold the solder that keeps the inner cable in place, but also, and more importantly, to allow for a much stronger connection by squashing the cable end into a bird nest / birdcage form, or alternatively, if you don’t want to invest in the tooling, to hold frayed cable ends so the individual strands of metal wire are pulled apart so they can individually be covered in solder. If you keep the cable unfrayed, only the outer surface area of the inner cable is covered with solder and therefore the bond is much less strong and you’re at risk of simply pulling the inner cable out when force is applied. For the connector in the carburettor this is fine as very little force is applied, but for a brake cable this is not good enough.
An example of a birdcage / bird nest can be seen as well as the tooling to make it. The tool consists of a mold that holds 1.5, 2 or 2.5mm cables. Once inserted the molds are clamped in a vice and the punch is used to create the bird nest.
Materials
Next to tools you will need materials of course. You’ll need inner cable, outer cable and the various nipples and other parts. We will treat them in turn.
Inner cable
The inner cable tends to be steel with a zinc coating. There are a few things to take into account:
- – The number of strands of the cable; use 19 strands for cables that are used for applications where force is required; like brake cables or clutch cables. Use 7 strands for cables that transfer radial movement like gas handle movement
- – The thickness of the cable; there are standard thicknesses; 1.0mm cable for bicycles, 1.2mm for small mopeds, 1.5mm for mopeds and small motorcycles; 2.0mm for slightly larger bikes (like the Zündapp Bella) and 2.5mm for the largest bikes. Note that the gas handle cable can be thinner as there is hardly any strength conveyed; measure what diameter your twist grip can hold. I use 1.5mm thickness.
Outer cable
Here the colour can matter; black, grey, white etc.; whatever is best for your needs. You can buy it in various qualities, but the normal version works fine for the Bella. Just make sure it accommodates the thickness of the wire (so 2mm in the case of Bella).
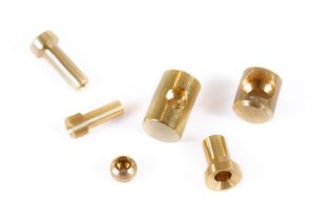
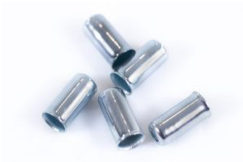
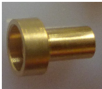
Nipples
You’ll need cable nipples that are to be soldered on at both ends. You can get screw on nipples as well, but they don’t work nearly as well, can bend or damage the inner cable and simply don’t look as neat. Generally, you have mushroom shaped nipples (usually in the handles), barrel shaped ones (usually in clutch levers) and hollow pipes (for example in the carburettor). They come in many shapes and sizes, so measure what you need. Here are some examples:
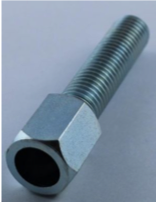
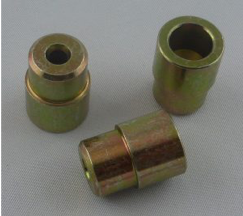
Tensioners
You’ll need a way to put the right tension on the cable so at minimum at one end you should put a tensioner. Usually these consist of a screw with counter nut that screw into the handles. You’ll always need this to mount them properly. Where the required length of the inner cable can change (e.g., through wear of brake pads) it can be useful to use a second tensioner at the other end of the cable.
End caps
These are used to protect the cable ends and can be crimped on.
Take ups
This is the trickiest part. Sometimes a special take up nipple is needed. It is usually a nipple which holds the cable end on one side and then fits into either a brake plate or a frame part on the other. Some of these are bespoke and may be hard to find. Here are some examples:

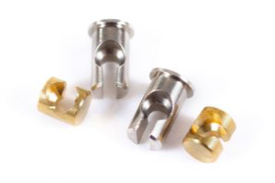
These are sometimes used for clutch take-up. Some have a slit down the side. They are also needed on the handle side of things. They go into the round holes in the handles and the mushroom shaped nipples fit into them:
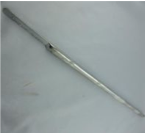
Solder
For zinc coated steel inner cable you’ll need Sn97Ag3. You can buy that in bars to then melt into you soldering bath. An example 0.2kg bar is shown on the side. You’ll need the appropriate liquid acid to prep the nipples and cable as well.
Part 2 – Making a cable
As an example, we’ll take a motorcycle that’s missing a front brake cable. Here are the steps to go through:
Check the diameter of the hole in the brake handle where the end of the brake cable goes. Let’s assume that the hole diameter is 8mm and that the handle is 14mm thick. Here we need a take up like this where the head is 10mm, the shaft is 8mm and the length is 14.5mm. Here’s a tip; the take up rotates in the handle when you pull it, that way the force is applied perpendicular to the movement and maximised. Sometimes screw on nipples being used directly which will make the handle harder to pull, wear the handle out very quick and create metal fatigue at the entry point of the inner cable which means they won’t last long.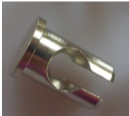
This particular take up has a 6mm large hole on one side partially drilled through. The remainder of the hole is 4mm and the slit in the nipple is 2mm. So, we’ll have to find a mushroom shaped nipple that hits these dimensions:
.
We’ll have to solder on some inner cable. It’s a brake cable so we choose 19 strand 2mm zinc coated inner cable that’s good for transferring the handles force to the brake shoes.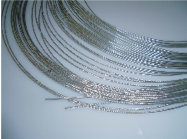
Now we’ve soldered on the end nipple we need to add a distancer. Measuring the brake handle shows that it will take a 6mm right thread distancer. We add it with a counter nut of course. This type allows for the inner cable to pass through. Remember to fully screw it into the brake handle to prevent too much play later on.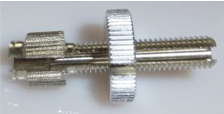
Next, we add an end cap and crimp it on the handle end of the outside cable. If you don’t have a crimping tool, you can simply take a center punch to put two dents into it to keep it in place. We do the same on the other side of the outer cable.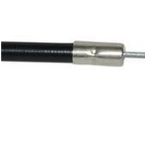
Because it’s a brake cable where the length of the inner cable that’s needed will increase over time because of brake pad wear we add another distancer on the other side; don’t forget the counter nut on it!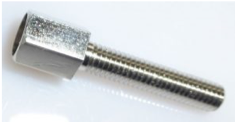
After measuring the brake hub, we find the required take on is quite small on the output side. The input side will take the M6 distancer. 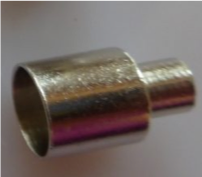
We then look at the brake lever. It has a connector that will take another mushroom shaped nipple. We need to take care that it fits into the receiver so ensure that the stem is not too long.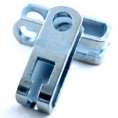
Before we finalise the cable, we check whether the length of the outer cable is good. To do so, route the outer cable in its final position and then add all the various bits. If too long, just cut a bit off. Then slide the final nipple on the inner cable and check how long the inner cable needs to be. The right length is so that the final nipple can just slip into place. The tensioners are used to then properly tension the cable.
To make the connection a bit fancy, we’ll add a rubber cover on the last end of the inner cable: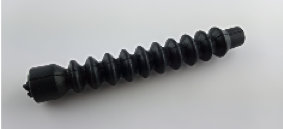
That’s it; all done.
How to solder
To solder the nipples onto the inner cable, cut the rod of solder into small pieces with nail pliers and add them to the soldering bath. Turn the bath on and wait until the Sn97Ag3 solder reaches about 200 degrees. It really helps to have an infrared point and measure thermometer to check as the temperature scale on the cheap AliExpress bath isn’t very precise.
Take the soldering fluid (acid) and coat the inner cable end as well as the nipple. Note that soldering paste is not the way to go here as it may prevent the proper flow of the solder, use the fluid kind.
Now the most important part; we need to ensure that the inner cable doesn’t pull out of the nipple when applying much force. We do this by fraying open the very end of the cable so the fray fits nicely into the hollow of the nipple. Do this by turning the very end of the cable against the direction it’s twisted in. This will ensure each strand is covered with solder which greatly increases the strength of the bond. Professionals use a tool for this to create a little knob of wire at the end that’s even better as described in the tooling section. You simply put the wire into a mold that’s clamped in a vice and give a tap using the punch to create one. It’s an expensive bit of kit though, but we are talking safety first when it comes to braking, so something to consider. That leads to an important observation, cables are sold in the market where a glob of solder is poured into a mold that holds the cable end. That means that the solder itself is shaped into the nipple. These connections are much less secure and not fit for motorcycle brakes in my view.
To apply the solder, check you have applied sufficient soldering fluid and hold the bottom end of the nipple including the fray or bird nest in the soldering bath. Through the capillary working of the solder, it will fill the nipple with solder. This takes about two to three seconds depending on the size of the nipple and thickness of the inner cable. Gently lift the nipple from the bath as the solder will remain liquid for about 10 to 20 seconds) and lay it down horizontally to cool. Do not put any force on it for the first 15 minutes.
Top tips
- – When you order the parts to make a cable, ensure you order a few extra nipples as you’re sure to make a mistake or two
- – Use old cables that came with a vehicle as samples to produce new ones, but check that they fit properly before you do! Sometimes ‘generic cables’ are used with screw on nipples and in such cases the cable length and routing may be completely off
- – Measure twice, but once. It’s easy to make a mistake. Luckily the individual parts are not that expensive.
- – Make an extra set so you have a replacement on hand. Sometimes parts get lost when a cable snaps mid-journey and that way you won’t miss out any parts.
Where to buy?
I can thoroughly recommend the website bowdenzug24.com. It’s a German site but they have an English language option. Post Brexit this may incur customs fees in the UK, but it’s a nice one stop shop. Other sources are venhill.co.uk
Article by Bert Zwiers ZBEC


