


NEW LAMBRETTA PRODUCT AND TECH-ARTICLE FROM MB SCOOTERS
This write up is a bit of a newish product and a bit of Tech-Article inspired by stripping a motor a dealer had previously built!
There’s Lambretta drive bearings and theres Lambretta drive bearings.
For 35 years I’ve used a single seal drive bearing. This came about through accident really. I would get bearings through work for my rebuilds before I went into business. It’s easier to get a bearing with 2 seals fitted as the manufacturers make more of these than bearings with no seals so are cheaper to buy.
Why? Well it’s easy to pick out a seal or two so one bearing covers lots of options on rebuilding anything using a bearing.
1) A bearing with no seal is as per Innocenti design, one side is lubricated by the gearbox oil and petrol oil mixture is separated by a drive seal in the drive plate.
2) A bearing with two seals is a bearing lubricated with only the grease fitted inside the two seals, usually used in industry say on an electric motor where there’s no oil to lubricate it.
3) A bearing with a single seal could be used in a hub where the seal is on the out side and two bearings fitted on an axle which has been greased from a grease nipple/gun on the inside.
A bearing with no seal is the same quality as a bearing with one or two seals fitted. These seals are more of a dust/grease seal, on their own the seal isn’t an oil seal as oil can pass through the seal.
Going back all those years, when I first set up in business. I would hear so many people saying their drive seal had gone. Which gave me an idea, if I used a bearing with one seal, fitted next to the drive seal then this would help take the pressure off the drive seal. I looked into it and how seals worked as we were selling seals by the hundreds and working closely with the suppliers.
What normally happens is the crankcase has a higher pressure compared to the gearbox, so a seal is needed to stop petrol/oil mixture leaking out into the gearbox, or if the seal fails, gear oil can leak into the crankcase making the engine smoke or worse not run right. The seal is designed with a spring facing the crank, as pressure increases the seal shut off onto the crank sealing face. Now the seal doesn’t actually rub dry on the steel face, the petrol/oil mix leaves a fine bead of lubrication which stops the seal lip wearing out, also the gear oil is there adding to this lubrication.
Whilst we at it, there are 2 drive seals used in Lambretta
1) a single lip type as originally used by Innocenti and
2) then there’s the later type you regularly see today with an extra seal on the other side of the spring. This extra seal isn’t an oil seal, it is a dust seal, commonly used in say a hub where the grease is internal of 2 seals, the dust seal helps stop the elements – dust, water, crap from getting to the main seal lip. It makes no difference at all if a single or double lipped seal is used in the drive side in a Lambretta.
So with this extra bearing and seal in mind, I thought if I use the seal next to the drive seal – it would take the pressure off the drive seal from the crank pressure and also from oil passing from the gearbox – especially if the drive seal was on the way out.
And I’ve been doing this ever since and is our biggest selling seal. The proof that it worked 30 years ago when I built Phil Slackers engine before he worked for me, he’d done thousands of miles, doing all the rallies and running around as you do when you’re young. The engine came back a year later for a strip and rebuild and hey presto I’d lipped the drive seal over, it was ruined. I asked Phil if it smoked or burnt gear oil and he said no – the proof was in the pudding it did work and I’ve used this system ever since.
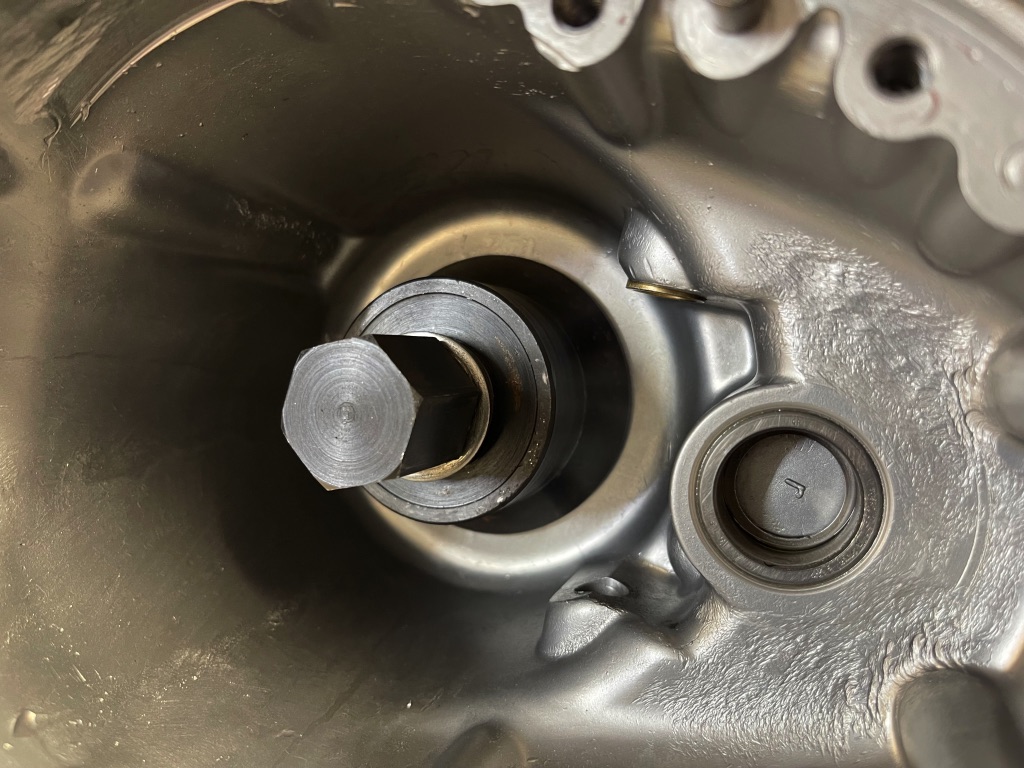
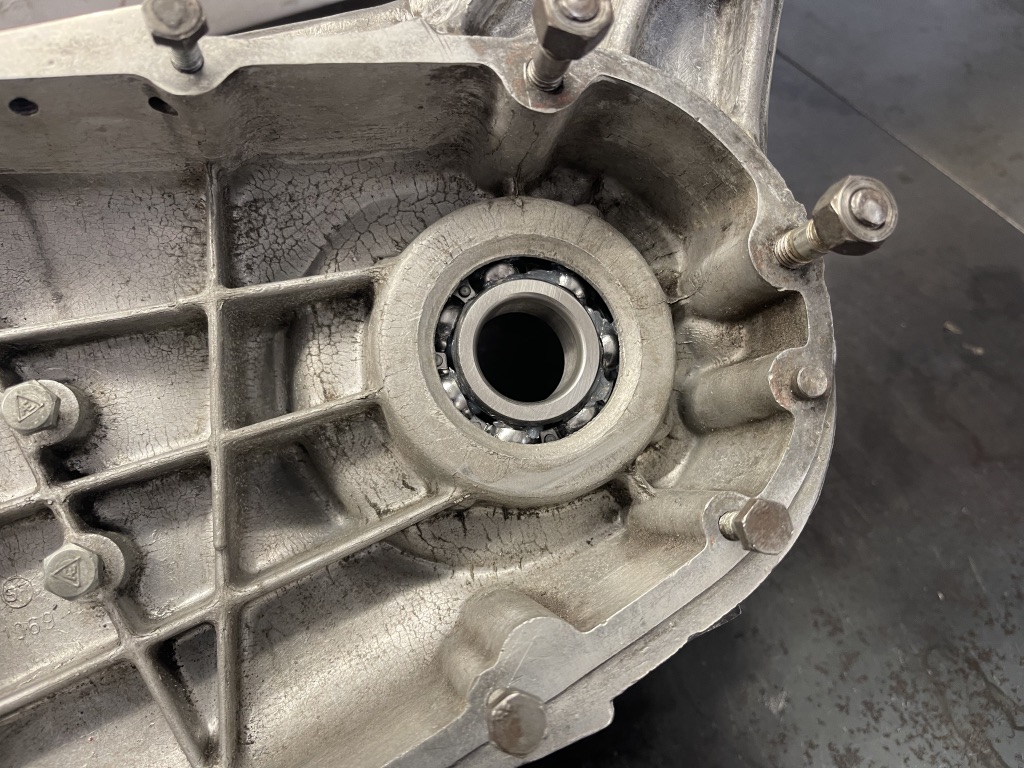
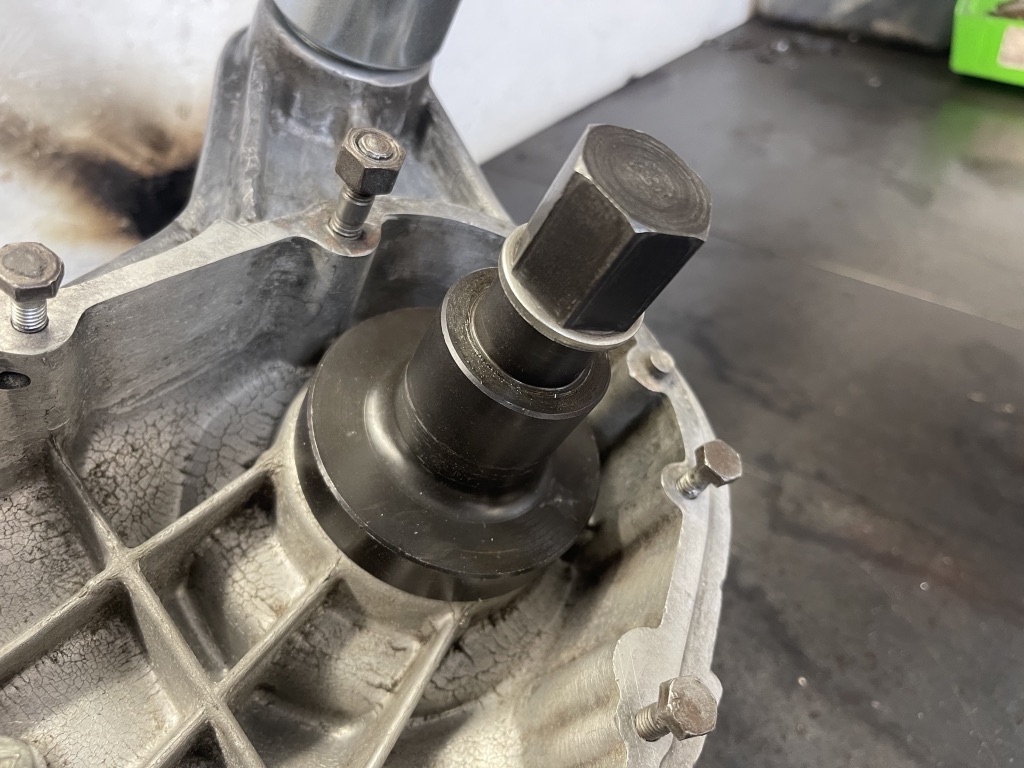
Now as you can see in the photos a bearing has been fitted wrong by the dealer. Its back to front, the seal fitted there is trying to stop the gear oil from lubricating the bearing and its not really doing much to help the drive seal – the amount of times Ive seen this or seen a twin sealed bearing fitted!
Now I expect Billy bullshitter coming up with more billybullshit saying it’s totally wrong to fit this type of bearing – wrong! – If it works – it works – get over your self! The only down side is when a seal is fitted in theory it lowers the rev range, but a single seal bearing still revs to well over 9000rpm, so it’s well within a Lambretta working rev range!
I’ve called these bearings the ‘Touring bearing’ as the idea was for using in long distant touring engines. If I’m building a race motor I would use a standard bearing letting the motor rev that bit more as there’s just slightly less friction.
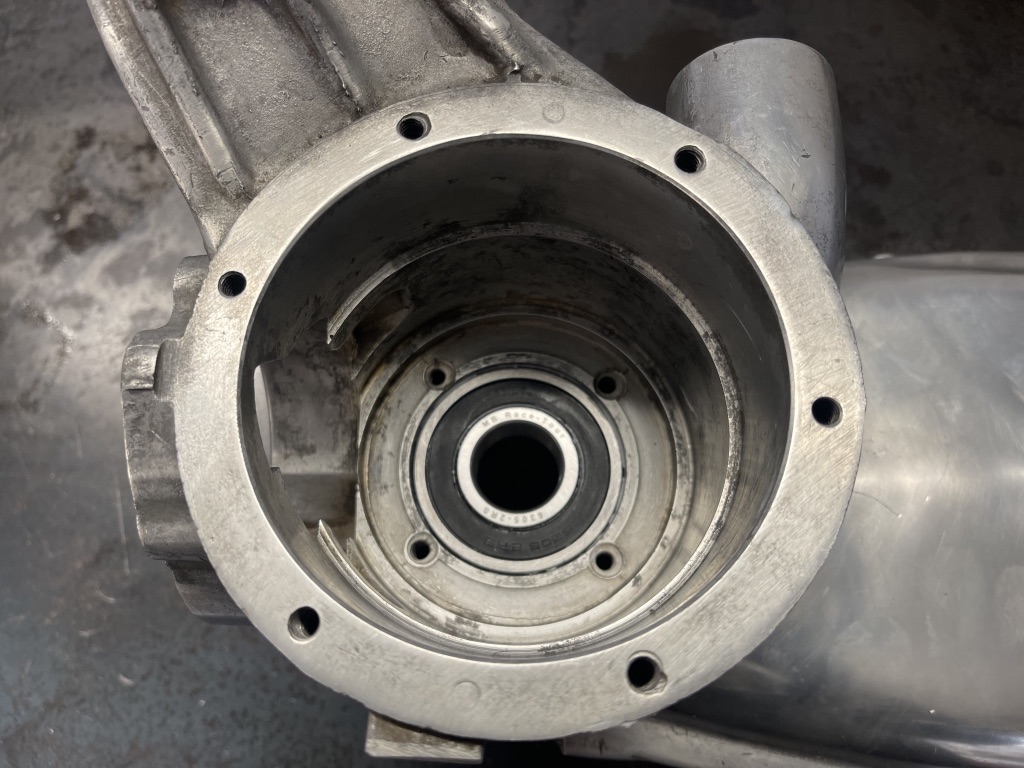
We offer 4 drive bearings. We have our own MB Race-Tour brand bearing in both a plain bearing or a single seal and we also offer named brand plain bearings or single seal bearings. It’s up to the customer to choose. Our own bearings are cheaper than named brand bearings but quality is the same.
And it leads us onto the new product, I did these before FB shut the write up down and people forget so Im doing it again.
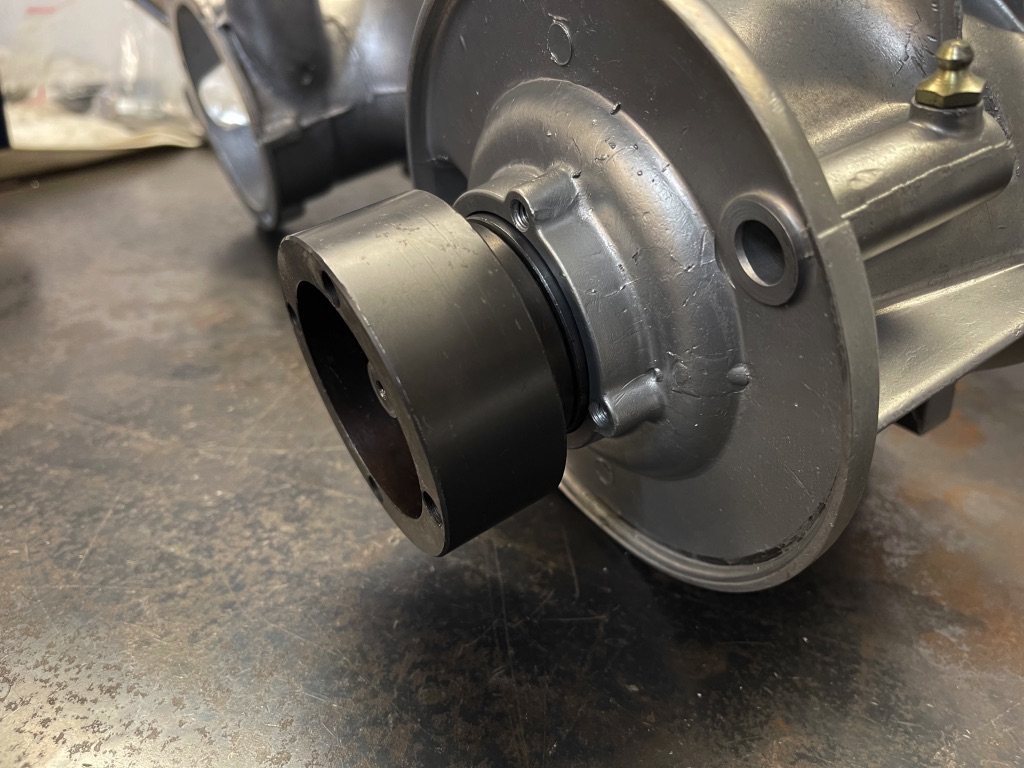
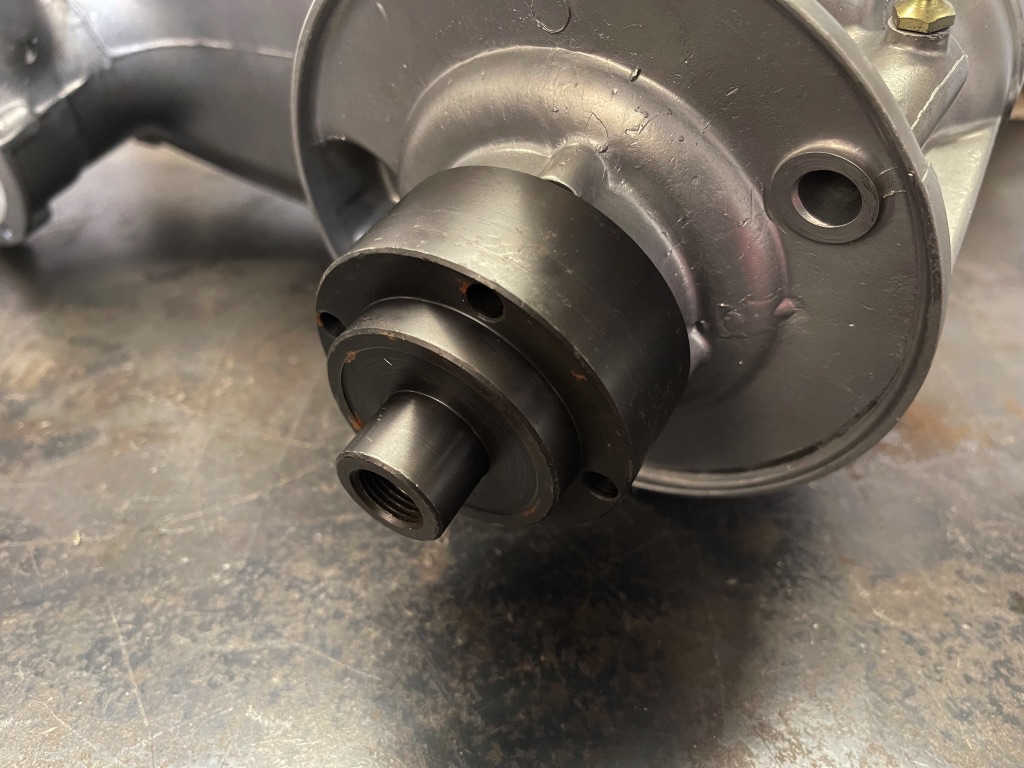
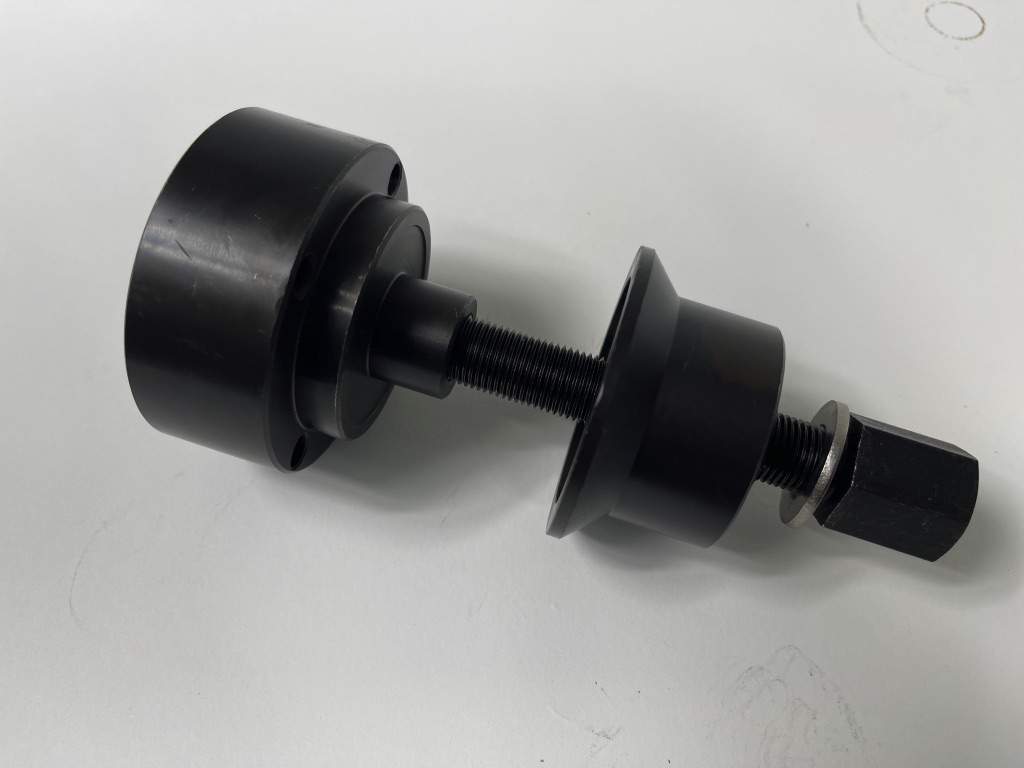
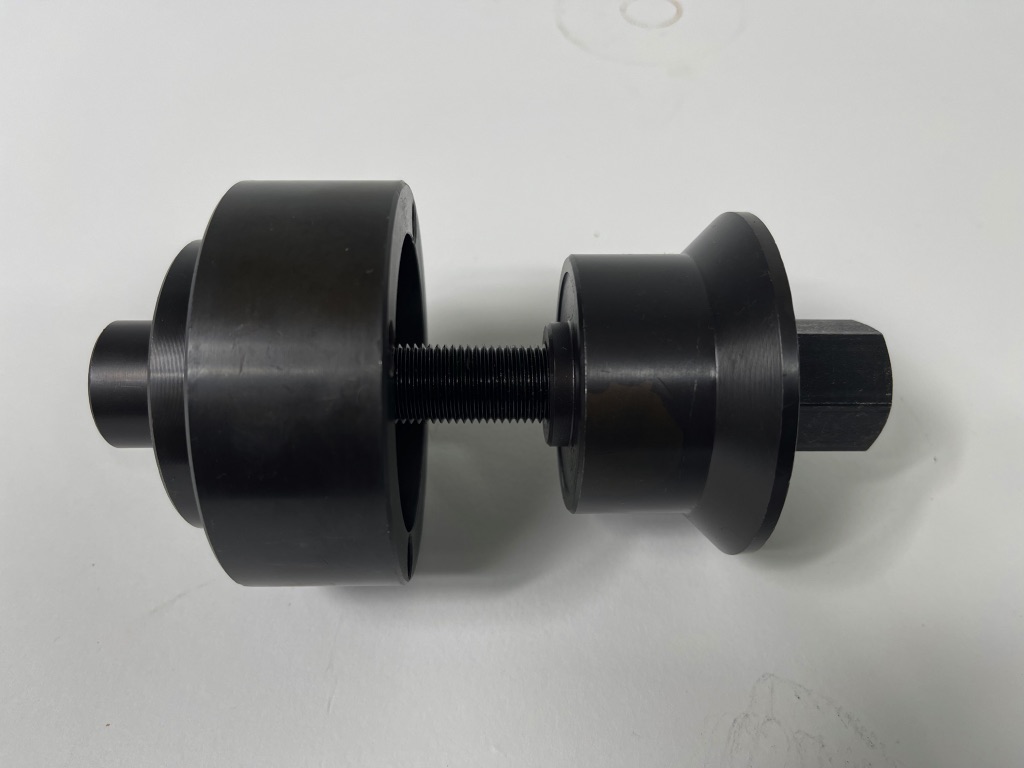
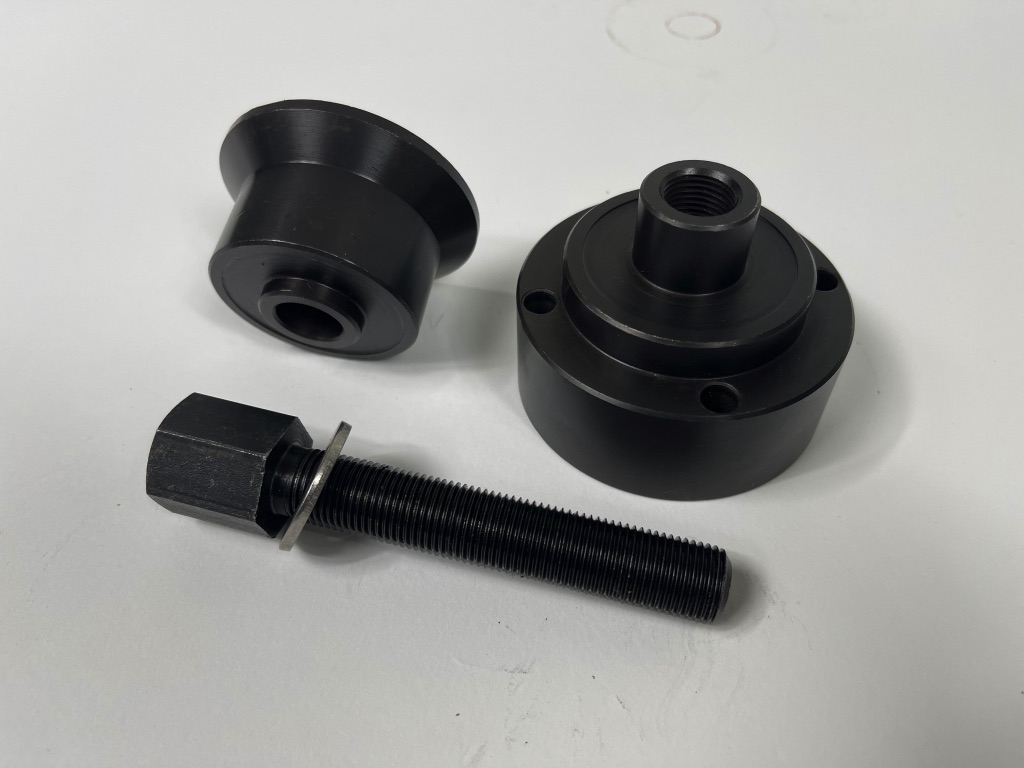
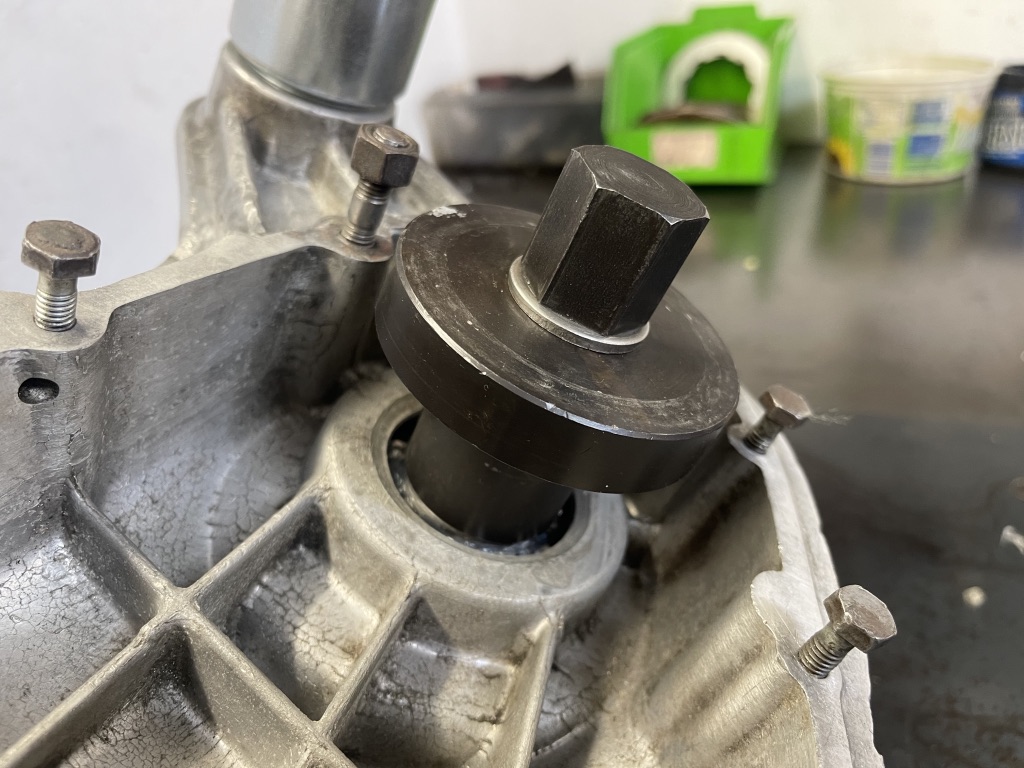
Fitting a drive bearing should be easy, but it’s not always straight forward. We had a casing came in today helping me prompt the article, he had got the bearing stuck on the piss. Normally if you get enough heat into a casing a cold drive bearing will drop into the casing. Not all casings are the same size and some if welded can have an egg shape so bearings don’t fit correctly. This is where our new drive bearing fitting and removing tool comes in. As one of our favourite customer tells me every time he calls – I love those drive bearing tools, best thing he’s ever had! If you’ve stripped down as many engines as I have, take away all the easy fit bearings you do see the little casting breaking off the back if a bearing has been hit in with drifts and as of today you see them knocked in sideways pushing metal away.
To fit a bearing, heat the casing, carefully wipe some gasket sealer around the outside of the bearing (stops oil coming around the back of the casing/bearing and leaking – very common) offer the bearing in place, fit the bearing tool one side in the correct position, then screw the other side together and even the stubborn of bearings can be drawn in straight safely. It’s one of those tools I wish I had all these years ago! To remove a bearing its the same but opposite.

Any comments email mark@mbscooters.co.uk


