THIS SHOULDN’T HAPPEN – BUT IT DID!
I get them all, all the problem jobs no one else wants to do.
A customer got in touch saying he was having problems sealing his new must have super latest casing, he’d tried a few times to build the crank and cylinder and it leaked in different places each time when pressure testing it. Then the casing cracked in a couple of places!
At a quick glance I saw the cylinder studs had, what looked like, been rammed in too hard cracking the casing and thought ‘another hand fisted customer’.
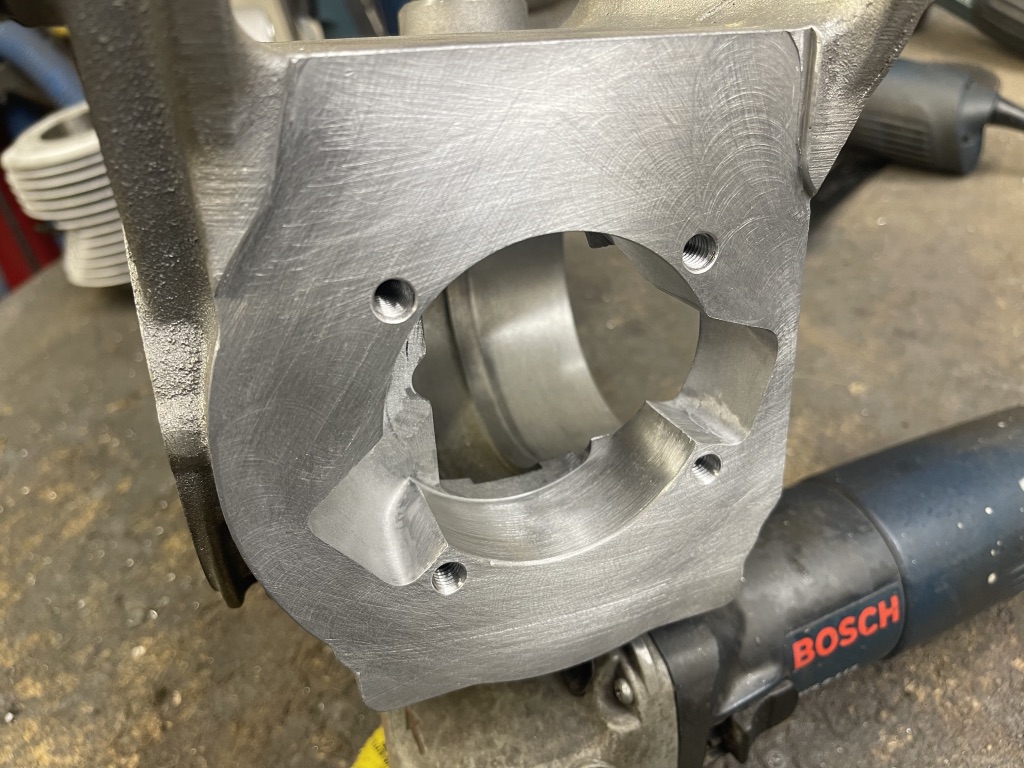
When I got to have a better look, indeed the straight section of the studs had gone into the casing damaging the first few threads and the bottom two main cylinder thread holes had split – again Im thinking ‘heavy hand fisted customer’!
There was nothing for it, it needed welding, so I chipped off some metal and looked at what I can only describe what looked like one of those really badly cast SIL casings that doesn’t like to weld! The weld structure didn’t look right. As soon as I started grinding the tools clogged up – the casing was soft! And at close inspection the machined areas were full of gas holes which can be porous!
But the heavy lump, welded beautifully, what a pleasure from the usual tat I have to repair. The face machined okay with lubricant and the new weld machined just as good as I trimmed the transfers back to shape.
This casing didn’t have the transfers cut to suit a standard cylinder they were off, but the beauty of the RT cylinder which the customer was trying to build is that – I thought about this when I designed the kit. It was designed for old type stage 6 over ported casings! What an easy job to match the cylinder to casing transfers to get that – all important nice smooth flowing transfer feeds with no miss matches.
Once done it was a case of – now find why he couldn’t seal it! The holes in the casing are everywhere.
We first started doing sand castings in the 1980’s. We made all sorts of things for Scooters. We had seen these holes in some of our castings especially in the early days with cylinder heads which showed up after machining.
To sort the problem we did our homework. To make a perfect casting you had to use a material that car manufactured used in their blocks and heads. This material needed to be de gassed to get rid of the little holes and another process to really get rid of these tiny holes and then heat treated – the end result was a perfect casting hardened yet machinable and no porosity! Some thing this isn’t.
It’s a known problem, a drive bearing can leak around the outside, if there are thousands of little holes then it’s not going to help!
The only cure was fit the bearing with sealer. Then seal the outer plate which is a different idea to a standard casing, fit and seal the drive gasket and make sure the drive seal is correct. And be careful with the drive screws. Then pull the crank in, do some measurements for the mag housing and even after the mag face was machined after welding the gap was big so the thinnest gasket
was used and sealed also, then the mag housing new outer seal plate and O ring was also sealed.
This is all called belt and braces, I certainly didn’t what to built it all to have to strip it down again.
Now back to the main problem the cylinder stud holes. I was 100% happy with the welded holes, welding is stronger than the casting. Carefully I fitted our MB stepped studs and loctited them in position again to stop leaks coming up the studs through any porosity. These studs are the business. Theres so much rubbish printed about cylinder studs its unreal! Our stud design is done so the main shank is thinner, this allows cylinders to fit easier once pushed passed the threads, it also allows some expansion as the cylinder get hot. Once the cylinder it near to the base face the cylinder studs are the normal size which locates the cylinder so there is no sideways slop making sure every time you build a motor the transfer feeds are all in line.
Theres an in-depth article on our Tech-Site about cylinder studs here if you’re interested.


