IF YOU’RE GOING TO DO A JOB – WELL YOU KNOW THE SAYING……..
PART 1
I can’t post every job I do, its relentless. Every now and then I get something interesting worth posting.
Here I’m showing my good friend and customer Sir Wings Wingstanleys Winter model forks that he wanted looking at.
By eye I could see what looked like the steering column was welded in the factory wrong and off set.
It’s okay saying by eye, my eyes are a bit keener than other eyes, even without my glasses. Someone else’s eye might see something I’m missing and the next eye hasn’t got a clue what’s going off.
The proofs in the pudding – do the job right, go through a lot of procedures to check, check and double check and make lots of fixtures as accuratly as you can.
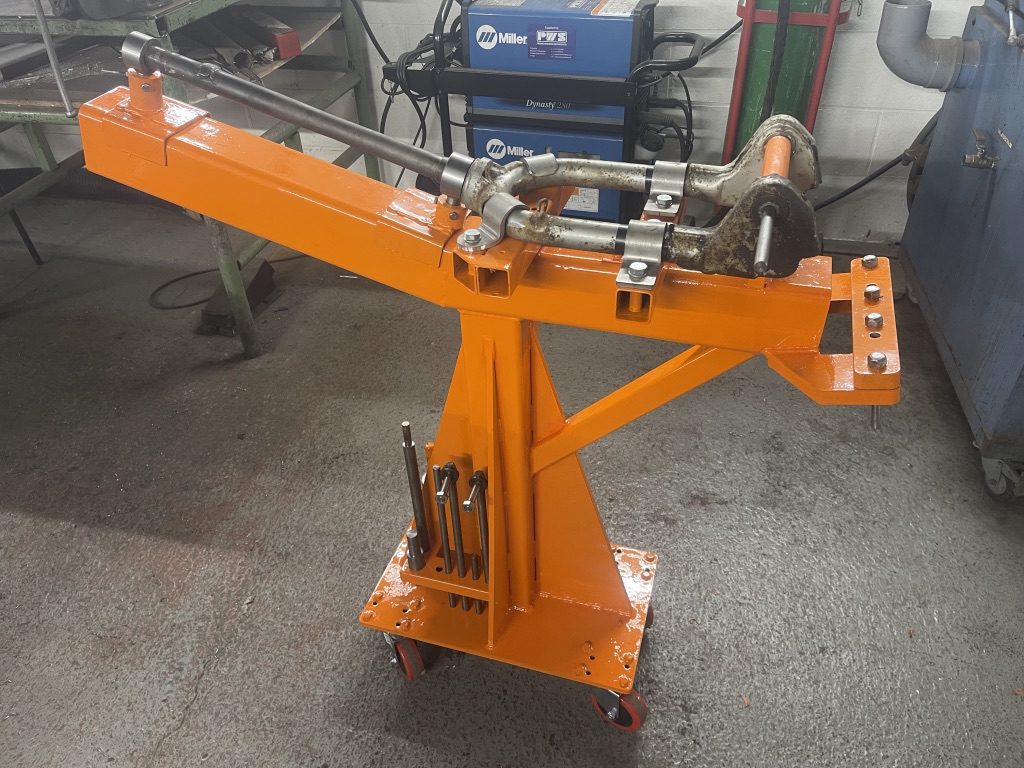
So thats what Ive been doing, making tooling to get centers on the forks to find the best forks and finally finish off my fork jig so I’m 100% happy.
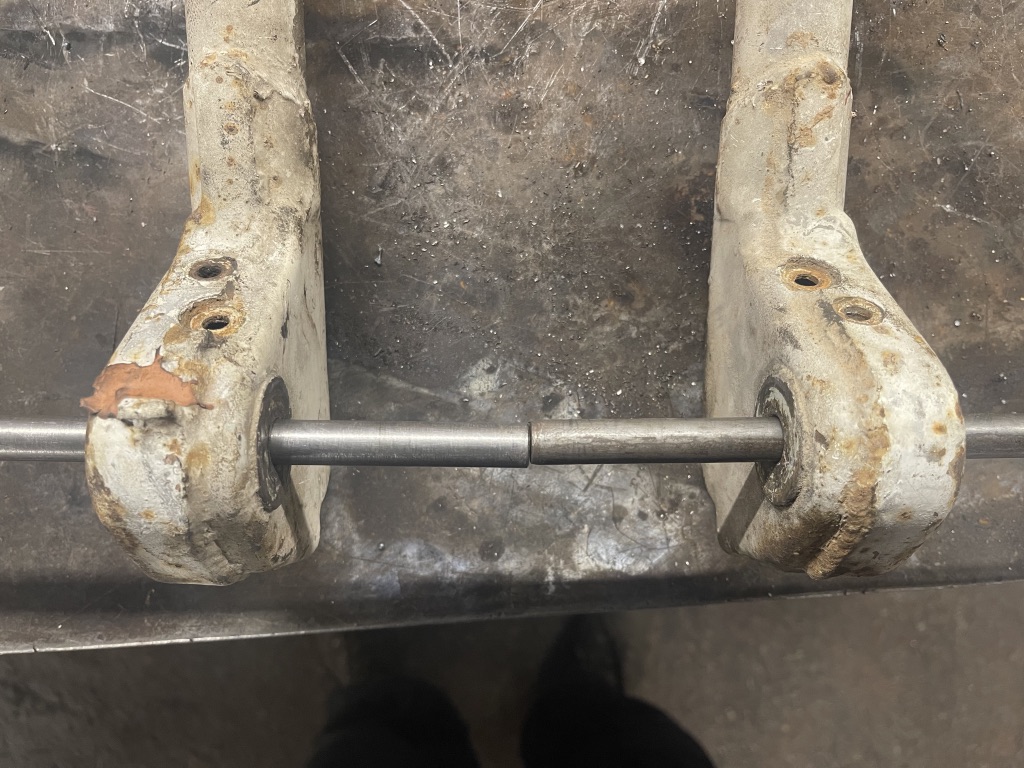
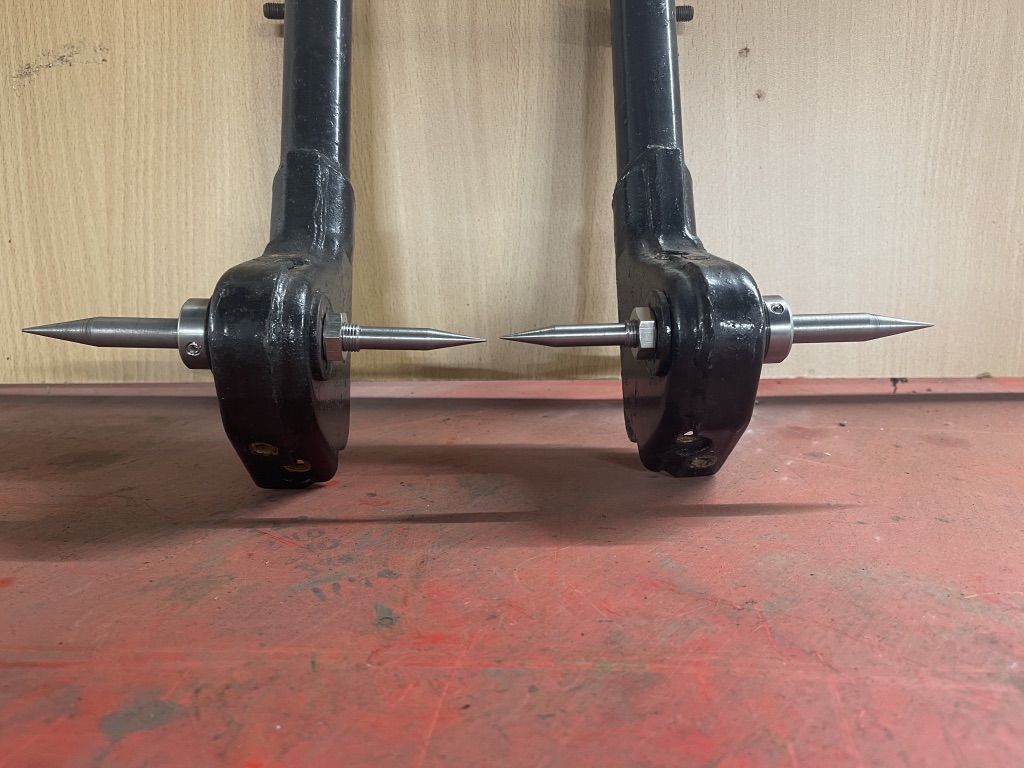
There’s some simple tests to check forks, obviously using your eye, if all looks good you need to check the holes where the fork pivot bolt goes, these I regularly find are welded wrong in the factory and if they are wrong your fork links re wrong and your hub sits at an angle.
The easy test is put a bar through the holes, if the bar goes through easily enough without a big hammer to the other side then great the first test is good, providing the bar is 90 degrees to the fork legs and stem.
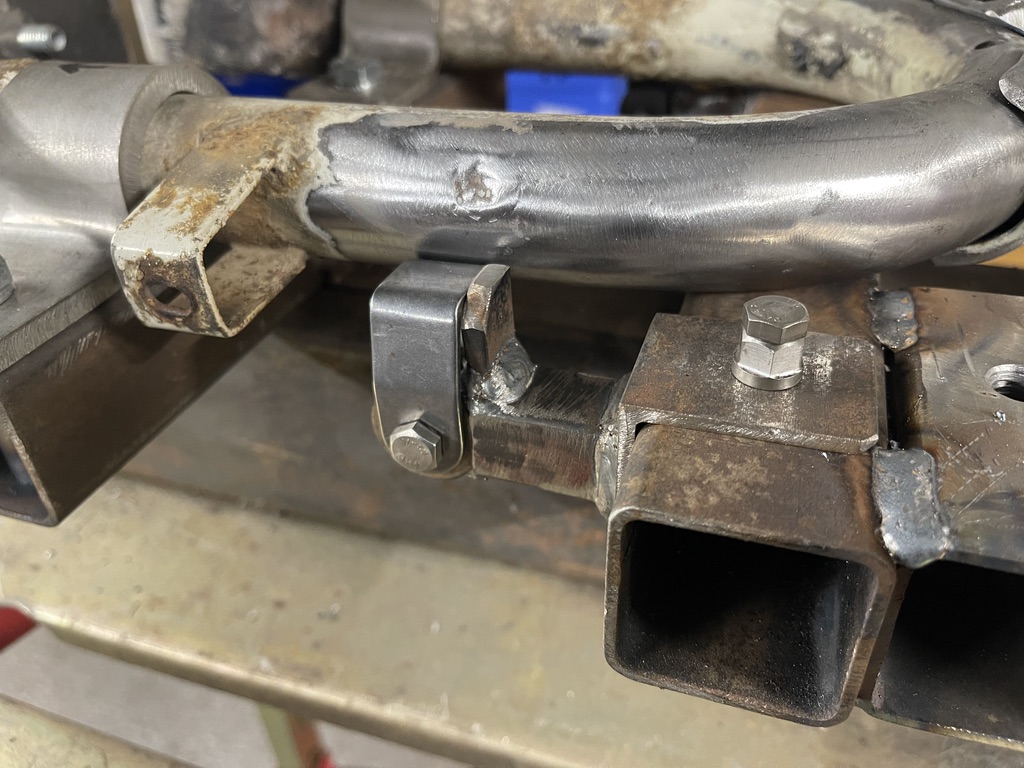
If it doesn’t go through you need to find why, a bar can fit one way and not the other. I’ve made a set of adjustable tools with pointers for both sides, you can see in the photos one fork leg is wrong – one fork link washer needs grinding off, ovalising then a new washer welding in place so the bar fits straight through.
In the photos you can see I’ve fitted some forks to my centre jig, set horizontally, setting the forks vertically then with my new laser set up I can pick horizontal and vertical points to check the trueness of the forks. Ive added sleeves with fine straight edges to pickup the points I need.
Now with the cross hatch laser you can see more accurately what is going off.
Next will be finish the jig and sort what needs doing to Wings forks – which up to now is the fork pivot hole and reset the steering stem.
PART 2
Following on from yesterdays fork jigging, today was another day of cutting up metal, using the lathe, miller and welding set!
Set up and tried out my new Green laser tool which is easier to see. Played with a few forks, as its absolutely impossible to make a jig from one set of forks – everyone I tried was different!
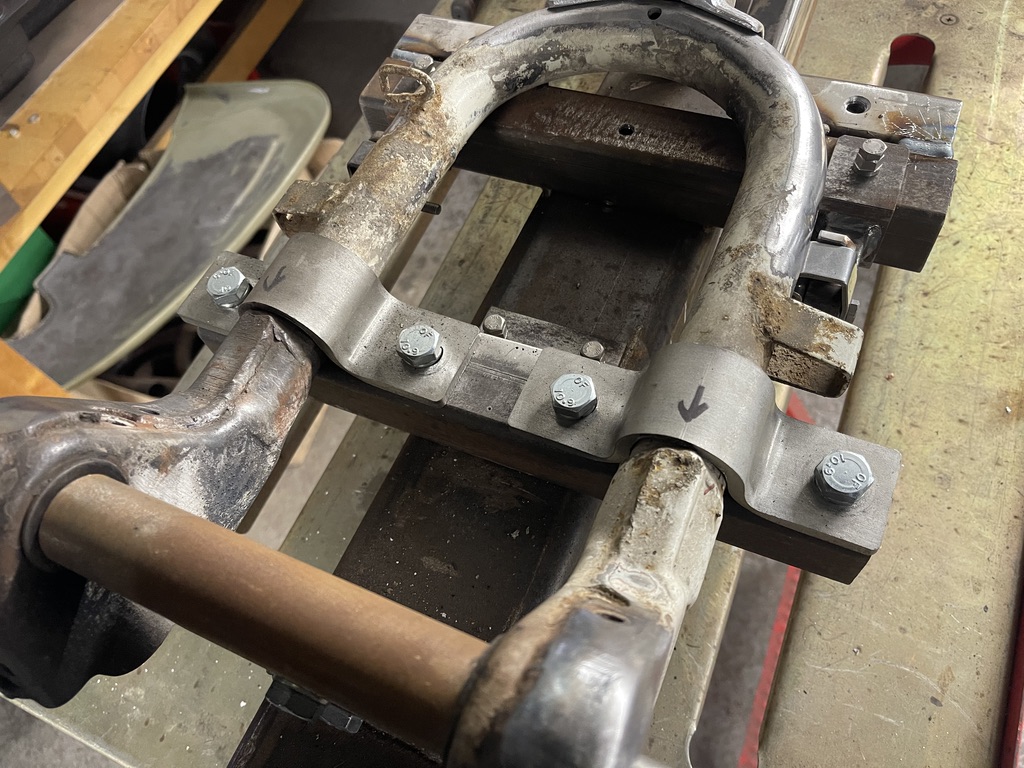
New true fixtures made to show how far out the fork link bolt washers can be from the factory. These fixtures can be moved to check alignment top, bottom or middle and also shows if the U fork leg is straight to the holes and show if the forks are welded true but also shows the datum point is never perfect meaning the wheel could be off set when built.
Funny as I suspected with Wings Winter forks, other Spanish forks have the link washers at a bad angle, this is shown in a few photos!
Daisys Series 1 forks show inline with the laser. The sharp pointers say the fork link washers are out a bit but the bar slid through both sides and was 90 degrees to the fork stem, thats good enough for me. But it did show the U fork tubes are welded to the left, centre and right, again which can push a wheel to one side or be perfect. This meant I had to slot my clamps to fit two different Italian forks!
Check the photos to see how far out some forks were.
I made my original fork jig to save setting up, fork and links to do the damper brackets. Now thats set, fork link top brackets are super easy to fit and weld in position – and the same every time, time and time again. I did Daisys brackets in a few minutes compared to a good half hour before.
The fork jig is now finished so tomorrow – Wings Wingstanleys very out Spanish forks!
This has been two days work – thats 160 forks checking to do to get the money back from lost time on engines, engineering and tuning!
All in a couple of days work! Think long term – forks – forks – forks!
PART 3
Are you still following?
The aim of our fork jig work this week was to get Sir Wings factory welded wrong Winter model Spanish forks back to something like a lot more straight. There was lots of machining, jigging and welding and setting forks with the laser tools. I’ve had to check, check and more than double check and think from all angles to make sure our jig is inline/straight and true.
Here, there are photos of the work that needed doing to get these forks more inline than the factory!
Theres various ways to look at the job and how to go about it. There’s certain steps you need to do to double check if things are right or wrong.
1) As we all have done, visually look at the forks, eye them up from different directions to see what you think.
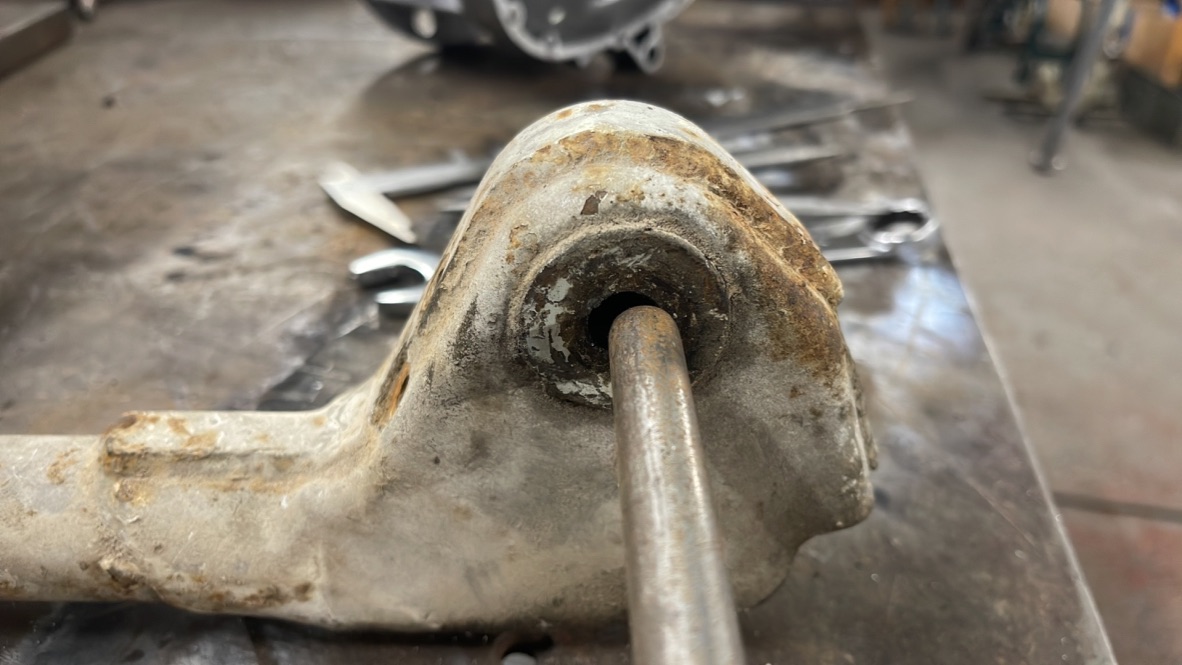
2) Fit a long straight bar down the steering column, if that goes down to the bottom the chances are the steering column is straight.
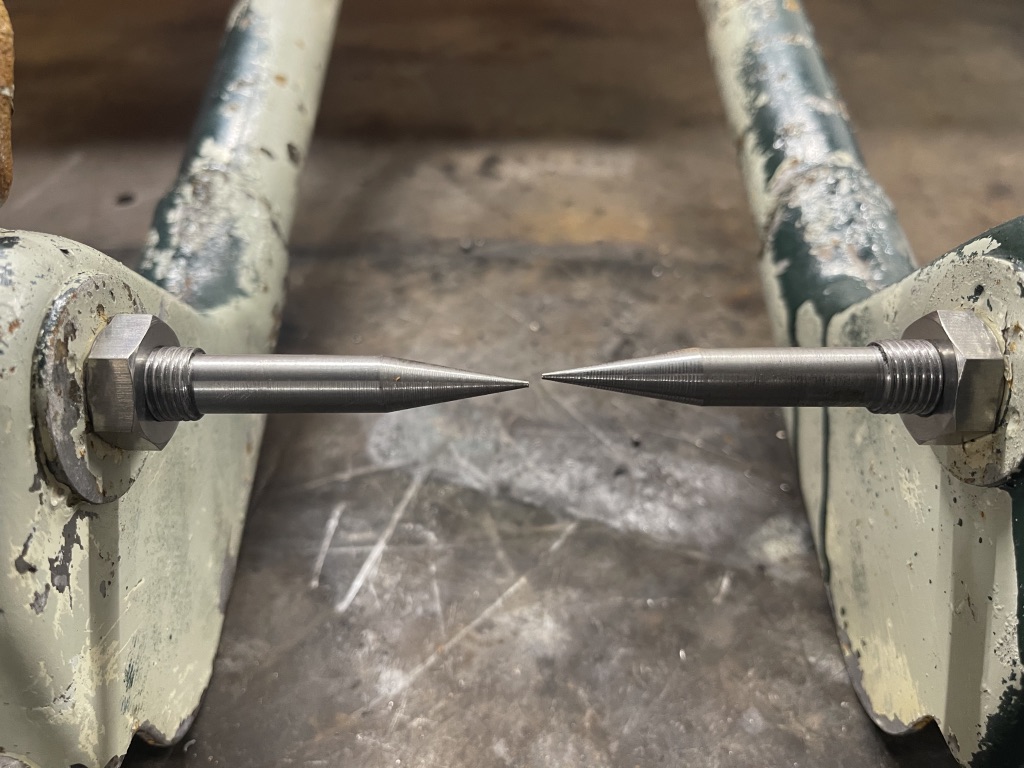
3) Fit a straight 12mm bar through the fork link holes from one side to the other, if it goes through eye the bar or use a square to eye the column to the 12mm bar and see if they are 90 degrees to each other.
4) If the 12mm bar doesn’t go through, try from the other side, if that doesn’t fit, fit 2 bars from either side and let them meet in the centre of the forks and see if they are equal or one out more to the other, this could show the fork link washers are welded wrong. You can double check this with a laser tool to carefully set up to horizontal and vertical, this will show if you’ve eyed them up correctly
5) Ive made centre bars to fit inside and out side of each side of the fork bolts, this shows if you eye up the bars to the U fork straight legs you can see if all is straight or running off. You can use a large straight edge for this with the bar fitted in the hole.
6) These forks had the link washers welded wrong in the factory. The two out side washers were true, the two inside washers were true to each other. But fit a bar in each side and check, and they were at an angle which would have thrown the fork links out to the hub spindle.
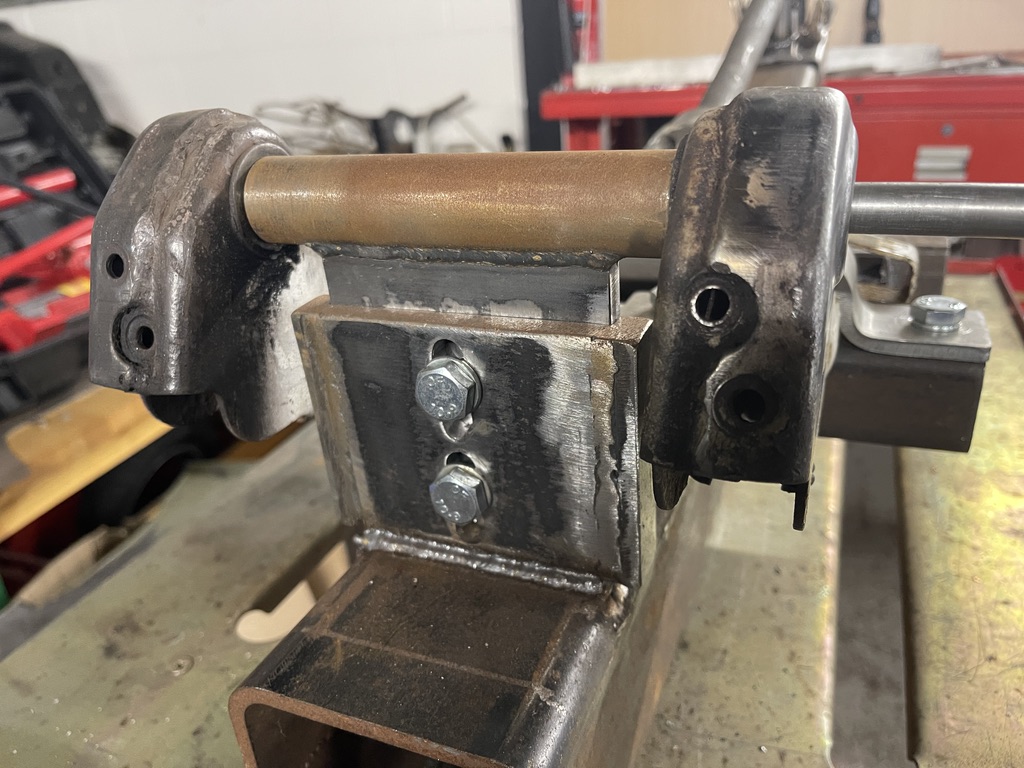
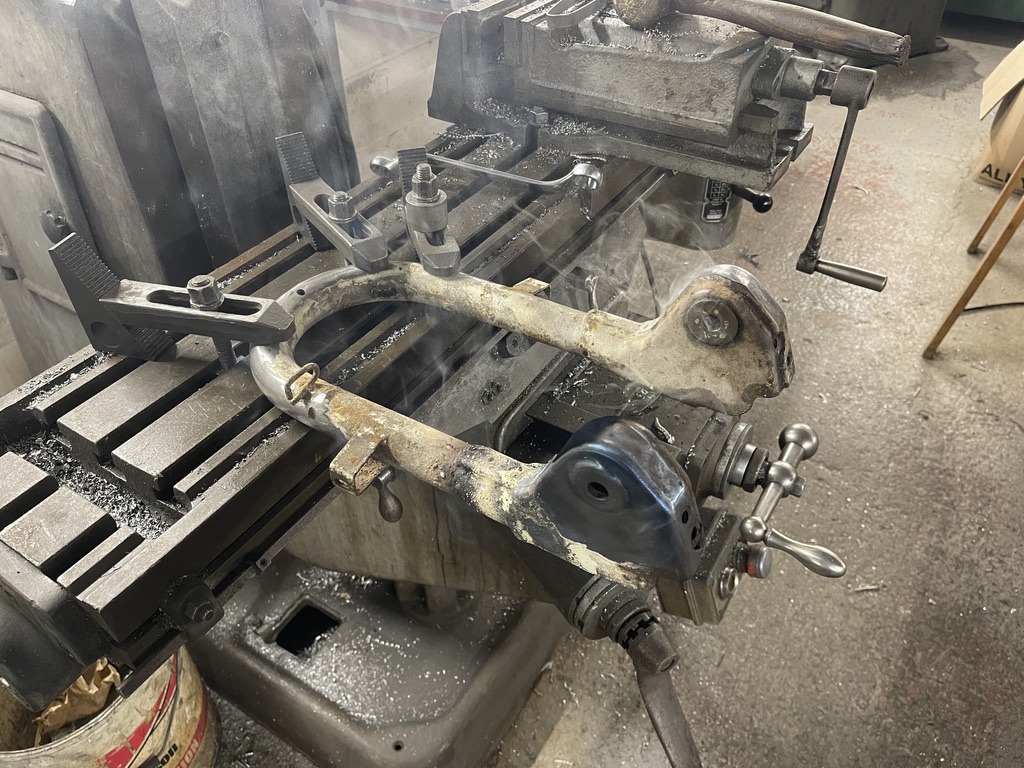
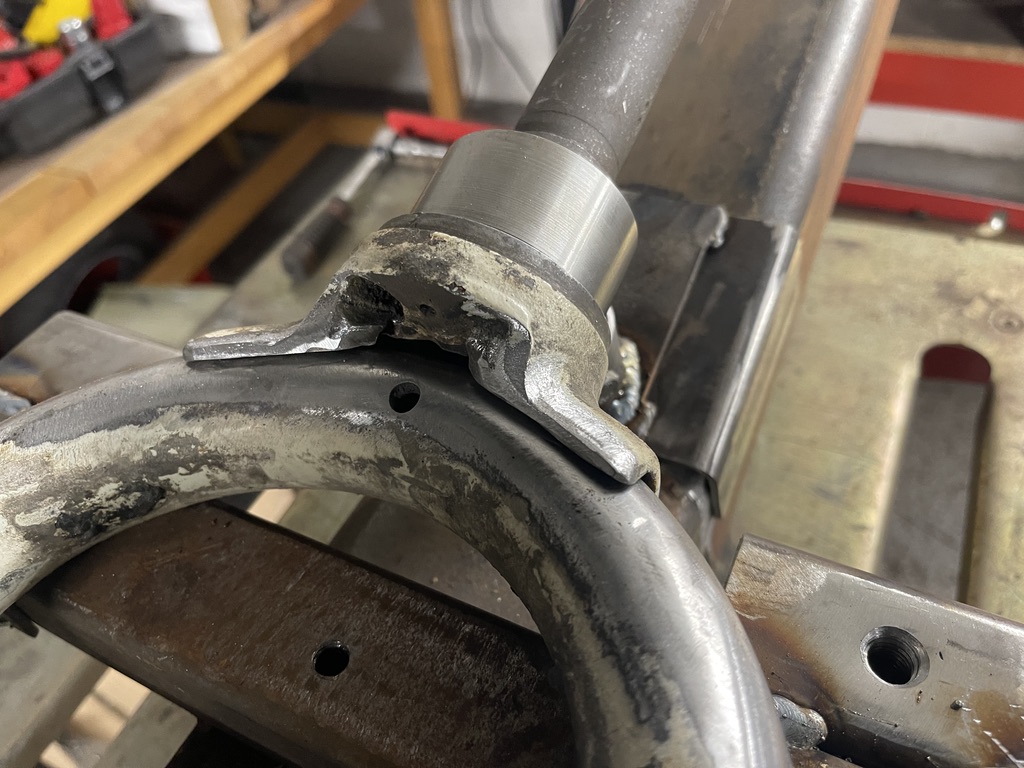
7) These forks had the steering column welded wrong, this showed up by eye, but with lots of testing it showed by laser just how far out they were, so the steering column had to be removed. I checked other Spanish forks and they were the same. I even checked my NOS 1988 Jet 200 with 5km on the clock and never been driven, possibly the only one left and you can see the forks are out to the frame!Once the steering was removed and cleaned up, I removed the two outer fork link washers and had to elongate the forks to allow for a bar to fit straight through, then the new washers can be welded in place and cleaned up. Paint needed removed to weld the top damper brackets and the steering column base cleaned ready for welding.
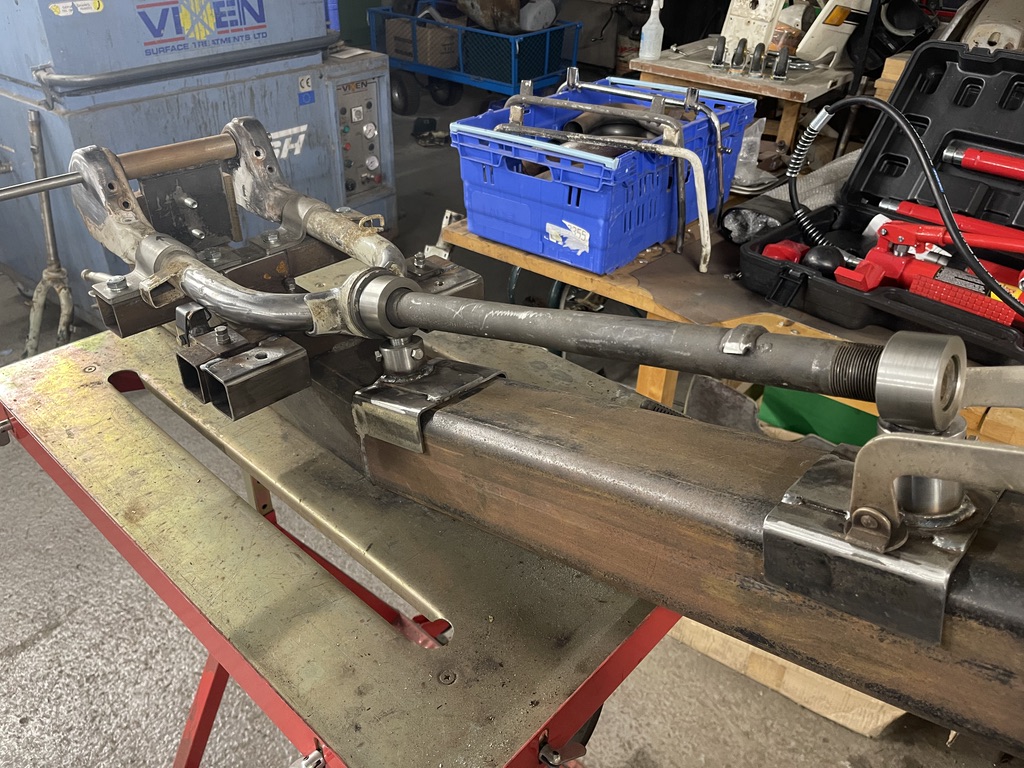
8) Then its back on the jig, fit the bar in place, fit the top damper brackets and fit the steering column in the centre bores. Then tack weld it all together and let it cool before removing them and welding all around.
9) And they are done, as near as straight as you can and much better than the factory did!
I’m now happy all that work means a set of forks, that fits the jig is good or if it doesn’t when they are cut and welded there are correct the best you can. Now this needs a jig to be free, allow for some wiggle room to get things fitting then clamp it all together to weld. Afterwards you can double check and tweak by clamping and pulling and pushing as the welding can push things a little bit out.
Even with all this work, there will be other forks that been bent with a fall or impact. The U fork may be twisted, the caps welded wrong or the rake welded wrong. Each fork needs to looked at individually.
All in a few days work.