CYLINDER STUD ARTICLE
Let’s look at cylinder studs……. it’s unreal how some people can make a mountain out of a mole hill and how many times the subject pops up. Of course cylinder studs are a very important part of your engine – do it right and nothing goes wrong – do it wrong and you know what happens! And it’s something we’ve looked into and modified over the years to point where we just don’t see any problems.
So the debate is – rolled undercut studs compared to machined straight studs – which is best?
Well it’s not just about studs, it’s easy to blame someone else’s products for problems people have with a cylinder kit. Yes in some instances studs could be to blame but there’s so much more to it.
Pistons seizing up at 4 points
It’s said that straight studs cause this, oh how untrue this is. Anyone who’s ridden a Lambretta with a standard cast iron cylinder and especially a tuned cast iron cylinder will know they are prone to seizing in 4 points inline with each long stud! It also occurs on some alloy/cast and alloy cylinders! Why is this? Standard Lambretta cylinders don’t have straight studs! They have rolled relieved studs, the cylinder is usually a loose fit in the casing so why do they seize at 4 points? If you would believe some people it’s always a straight stud to do this. But they are relieved studs in all standard engines so it’s not actually a straight stud as you are lead to believe!
This is a known problem in most 2 stroke engines where they use long cylinder studs to bolt the head and cylinder to the casing. This is why designers went away from this method and moved to short studs that bolt the cylinder to the casing and the head bolts to the top of the cylinder. So why do they seize at 4 points? The fact is the cylinder distorts at these points when they are bolted down. They actually bow out into the cylinder and it gets worse the hotter the cylinder gets and it gets worse the more you torque down the cylinder to stop head gaskets and heads warping like the old days! What you should do is torque down the cylinder when its rebored and honed, when the cylinder is released the cylinder will deform and leave 4 points thats been relieved, when its tightened up again for real it then gets a straight bore. This is not an easy problem to cure, we did look at all our engineering machines and for the amount of rebores we do these days it was a waste of time. The 4 point seizure is made worse as the Lambretta cylinder has little strength down its bore. The area where the studs go its relieved of cast iron and the studs are open to air. If you’ve read our cylinder tuning and identifications in our Tech-Site and seen the problems a cylinder has when its over bored and your left with a pile of fins you will know a Lambretta cylinder is weak – hence the 4 point seizing!
Cylinders not fit for purpose
These days most remade cylinders are stronger but not all, and in some cylinders the area where the long studs go has a casting all the way around it which supports the cylinder and creates strength compared to the original Lambretta cast iron cylinder. It’s not true for all cylinders, some are cast weak or in the wrong material or are cast too fat and yes you get problems seizing up. I know of one Italian remade cylinder that uses really poor aluminium and is soft, I’ve known these to pull over to one side and its the same with some of the alloy/iron cylinders from India.
In some cases and this is were it gets important to ‘fit for purpose’! Some cylinders do not slide down the studs because they re machined wrong!
Engine casings vary as well, the stud holes can vary in and out or side to side, it may only be one but thats enough to cause a problem. Some Spanish casings only let Spanish cylinders drop down perfect. Fit say – a TS1 to one of these Spanish casings and the spigot locks up and how many times have I seen, people hammer down a cylinder cracking a new the spigot. Or only for this to happen as the bike runs. It’s not uncommon to have to grind one side of the casing or one side of the spigot to make a non standard cylinder fit a casing. Then throw into the mix casings thats been badly repaired where a stud hole or two can be off.
Then look at various cylinders that haven’t been bored out large enough for the studs or are slightly off set on the 4 stud holes and again your having to hammer down the cylinder. This is all bad engineering and there are so many cylinders badly machined whether you’re using a straight or relieved stud.
The correct way is to look at it with some common sense to sort out a simple problem without going round the houses blaming something else!
Some cylinders stud holes need drilling larger, some cylinders need the spigot filling or machining as does the casing. There are so many combinations of cylinders and casings – don’t just expect them all to fit perfect. And don’t always go and blame someones stud for your own gains.
When your rebuilding a new top end, do it dry, make sure the cylinder slides down freely what ever type of stud you are using. If your fitting a Race-Tour kit with our straight cylinder studs and with a packer you normally find they are machined so perfect that the cylinder just drops straight down freely. This shows that straight studs are not the problem. And with the many hundreds of cylinders sold I don’t think we’ve had one comeback with 4 point seizing showing that the cylinder design is perfect and work with our straight studs.
It’s like saying and arguing which is best – a cast piston or a forged piston? Read the books and you will say a forged piston is stronger than a cast piston. But we all know a decent cast piston is perfectly good even in a race engine. And we all know there are good and bad cast pistons. And we all know there are good and bad forged pistons! Whats the answer? Well it’s not as cut and dried as you think.
Original Lambretta studs
Lets look at the standard Lambretta stud, these are a rolled type of stud. This is a high speed manufacturing technique. By doing it this way the 8mm long part is rolled and crushed making the long part thinner. This makes the stud stronger as it alters the grain structure of the steel used and case hardens the outside, again making them stronger. A bit like doing a forged piston where the grain is hammered and crushed together and becomes stronger. This is a different process but gives you an idea on what we are talking about.
So are rolled studs stronger? And just as importantly are they better? Well it depends on how you look at it and what factors are involved.
Studs in general
The weakest part of a stud is the thinnest point. With a rolled stud its the under cut thin area of the shank along its length as this is thinner than the bottom of the cut thread. If its going to snap it with be somewhere along the length. With a machined stud made from solid using a fatter straight length shank the weakest point is the thinnest part of the cut thread. If this type of stud is going to snap or stretch it will be the threads.
Fed up with quality
Early on in business I was so fed up with the quality of replacement Lambretta studs that the importers where selling to us dealers. They would snap and stretch and we had nothing but problems, we resorted to using old studs but that’s not professional! Innocenti ones were good but could be 50 years old and you never knew if they were going to create a problem later on!
They were also short in length – causing problems with the modern MB way of using a longer con rod and using cylinder packers and head gaskets to give you greater scope in setting up cylinders. Some combinations of cylinders using packers and thicker head gaskets meant there wasn’t enough thread to get a nut to work! You could recess into the head but that was more hassle for the customer. In some cases the limited thread in the head area on a old type shortened Suzuki kit needed spacers for the kit to work – again more hassle and the best things are the simple ones!
A better option
I was one of the first to use Vespa P2 studs in a Lambretta, that would be in the 90’s. We used what we could get from Piaggio, but we were ordering more than they could supply and it was frustrating making phone calls on a weekly basis to be told ‘sorry – they still haven’t arrived’ it just delayed all the engines we were doing. After months of this and getting the odd 10 here and there we gave up and in the end made our own studs from straight stock.
Piaggio P2 studs
Take the Piaggio P2 stud – these are rolled, they use a longer thread at the head end and the stud was longer than the Lambretta item making them better suited for the MB modern way of long rods/packers/head gaskets. But the short thread that fits in the casing was cut much larger in diameter! Even if you tapped out the threads in the casing the threads were tight, so you had to screw in the stud which actually opens out your threads in the casing like a roll tap. Now this is good if you’ve got some dodgy loose stud holes, but if you’ve got a perfect casing you’ve just ruined a good casing. Fit a normal cut stud and the threads are all loose and could pull out. This is the big down side to the P2 studs!
The other down side for the P2 and Innocenti studs from a rebuilders point of view was the threads lock in the casing and threads stick out of the casing as the threads were usually longer than the thread in the casing. This meant the base gasket or packer would lock onto the threads and would rip or need distorting to remove them. Then add to the fact that some cylinders are tight in this area, you will see lower holes in the cylinder with thread damage!
MB studs
To date we’ve lost count how many studs we’ve sold. We’ve sold over 6000 just in the Race-Tour kits over the last few years, so guess it’s 10-15’000 and with very little comebacks. Yes we did have a small batch where the manufacturers used the wrong steel as did bgm with our copies but these were found within a week and was all sorted it out. The percentage of failures is very very small. Now not all metal is the same, use the wrong grade in a stud and it will go wrong, we have used different materials over the years to get where we are now and see no comebacks……. well thats IF people use the correct torque figures using a torque wrench. We’ve even seen dealers and racers so heavy handed that studs snap or casing threads pull out – it’s why the torque wrench was invented and why certain figures are given for certain sizes and applications.
The correct figure is 24-27 Nm NOTE I’ve not given pounds feet, why? Some people can’t read pounds feet to pounds inch and get confused and you do see problems because of it.
The question is – are machined straight studs strong enough compared to rolled studs? Of course they are if you use correct grade steels. If it works it works – forget all the theoretical bullshit it’s not needed. Im a firm believer in thinking in simple terms – if it worked for years why change it.
MB new super self center relieved studs
We have looked at this as a problem as it pops up now and then. Like I say its the cylinders and engine hole and bore positioning causing most of the problems. It’s not rocket science – if the cylinder doesn’t fit – do something about it – drill a hole the next oversize!
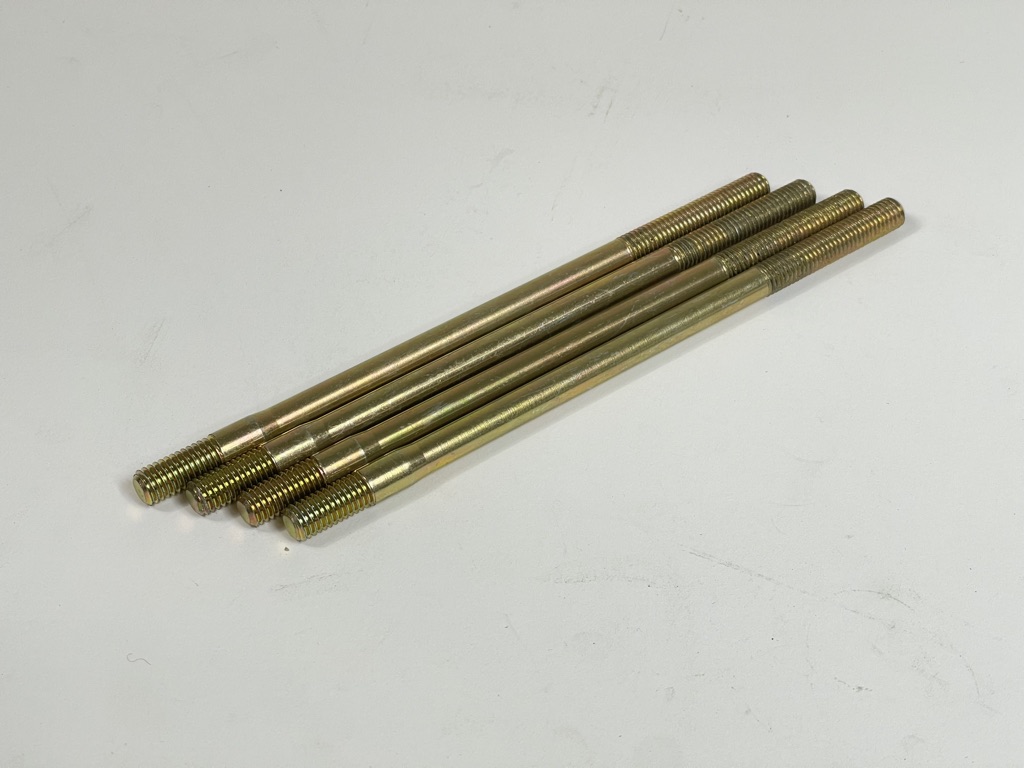
We still make our normal straight studs – they sell by the hundreds on a yearly basis for 20+ years, these are cheap and sell as 4 studs or with our super designed thick flat head washers and our special MB load spreading steel head nuts.
What did we do about this thread argument? Well we’ve redesigned our own studs – with a relief down the length!
But not only that, we still used our tried and proven ideas in the straight studs.
Any tuner who’s worth his salt, who is charging money for tuning casings and transfer ports should have some morals to cut the casing and cylinder ports so when they are built up they match near perfect or something close so there are no obstructions to gas flow. Unfortunately not all tuners can actually do this. I loose sleep and kick myself when ports don’t line up correctly and laugh when I see a bad casing done. Then add to the fact when you use Lambretta’s and Vespa rolled studs, cylinders wobble in the casing making all that hard work to tune the casing by matching a packer and match a cylinder – nothing lines up on assembly because its got so much side to side slop in some cylinders with rolled studs. Ideally a casing/packer/cylinder should be dowelled to centralise them together – but not an easy job with the very thin poor sealing area of the base faces.
This one reason is why Ive preferred straight studs – it keeps things lined up nicely.
We have used the same length on the stud, it fits everything that gets bolted down. Ok there are now so many packer/head gasket/head combinations that you may have to recess the cylinder head to get more threads, but on the whole if your building a standard modern set up with say a 3mm packer and a 2mm head gasket all things fit and work well.
If you’ve ever seen our MB straight studs or the bgm copy versions you will note the short thread that fits in the casing is shorter than a standard Lambretta stud – why!
We’ve been in this game for so long we’ve got that much more experience in these things. We’ve come across casings drilled and tapped at different depths, use a standard Lambretta stud and more thread can stick out of the casing – its the same for the Vespa stud – it creates complications. Our studs go the full way into any casing and stop where the start of the straight stud starts regardless on how deep the threads are in the casing. Also if your trying to lock the stud into the bottom of the thread and there is grease, gasket sealer or loctite at the bottom the stud will hydrolock the casting and split it, this is the most common repair we do on the casings area for the cylinders. You don’t get this from our shorter threaded studs!
There is no need to wind and wind a stud into a casing, this is bad fitting. All you need to do is make sure the casing threads are cleaned out, you can use a tapered 8 x 1.25mm number 1 or 2 tap to do this, don’t use a plug tap there is no need. Make sure the threads on the casing and stud are cleaned and dried. Use a bit of loctite on the last 4-5 threads and fit the stud and nip it up. It won’t damage the casing! Adding the loctite stops any air coming through the stud hole which is a common area for porosity and you can get leaking head nuts. Adding loctite stops studs coming loose on disassembly at a later date.
But a stud doesn’t need to lock down at the bottom of the threads, studs can be fitted loose, when you tighten the head nuts everything pulls tight, its only the same as fitting a screw in a casing. My advice is loctite the stud in place, it works and lasts for years! Don’t over do the loctite theres no need and can cause more problems later on – a bad worker uses too much loctite!
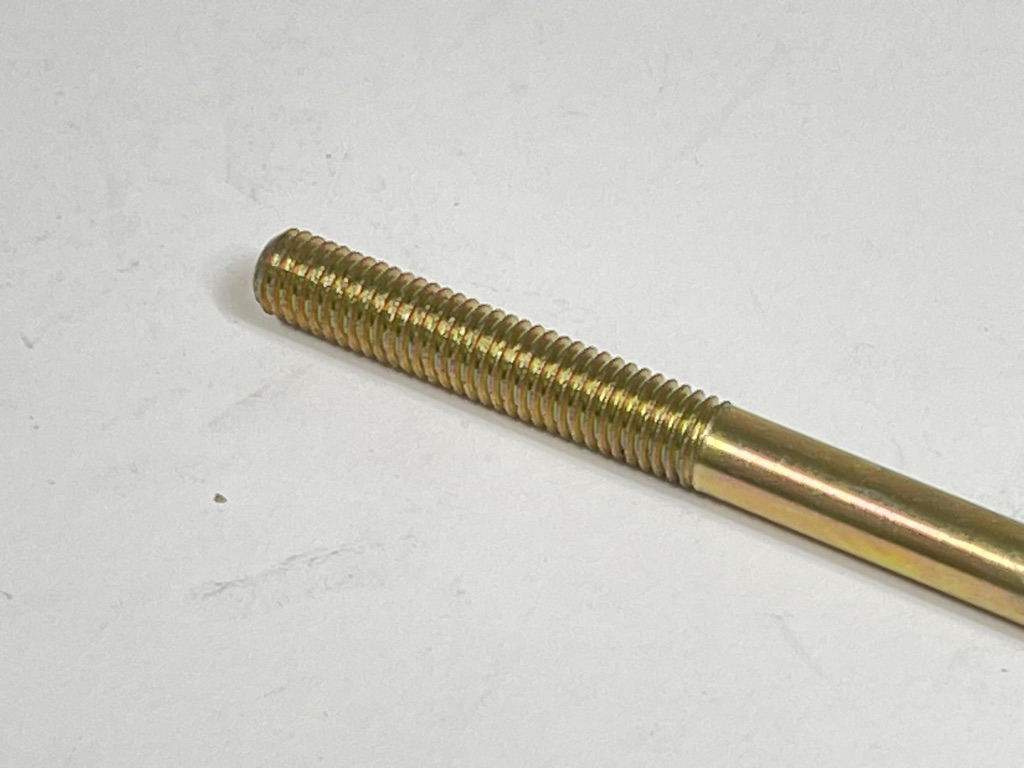
And what is good about our new version studs? Well yes we’ve relieved the long length to help cylinder fitting or any pressurising issues. Just to be on the safe side, we’ve increased the spec on the material to cope with a thinner long section. But what we have done is – left a straight 10mm thicker section at the bottom.
This is done for 2 reasons
1) to help set the stud in the casing.
2) to line up the gaskets/packers and cylinder so ports stay lined up. The short thread end that fits into the casing is the same – so it fits all known casings and doesn’t bottom out. The long threads are the same so a very short Suzuki cylinder fits and works with the more common packer/gasket way. Then to identify them we had them chemically Blacked compared to our standard self coloured studs. We did have some issues with Black studs snapping on a small batch, where incorrect material was used by our manufacturers – anyone with an issue please get in touch. We remade a massive batch and coloured them in Yellow zinc to identify against the Black versions.
So why use these over normal studs? If you’ve believed the hype over studs causing cylinders to blow up, we’ve addressed the long thickness, we’ve increase metal spec so when tightened down the stud will stretch (as it should) and hold cylinders and heads tight when heating up and cooling down. We’ve left a small thick tapered area to line up a cylinder to ports and packers at its coolest point at the bottom of the stud. The short threads are cut correctly, they are very slightly over sized to help a worn casing and the threads at the head end are long enough for all combinations.
All in all possibly the best Lambretta stud on the market – not that there was anything wrong with our standard studs. Yes these cost more there is more work to machine them and the metal grade costs more. Totally up to you what stud or method you use.
We can only help by giving you our vast experience in engineering and Lambrettas.
And now we’ve made thse studs as a repair stepped stud for casings that need a thread repair, 10mm in the casing and normal 8mm at the head end. An easier, cheaper and stronger way to repair the casing.
MB Stepped relieved centralising long stud MBP0513
MB Stepped relieved centralising long studs set of 4 MBP0541S
MB Stepped relieved centralising long studs set of 4, with 4 fat washers and 4 special head nuts MRB0885K
Mark Broadhurst. Any comments email mark@mbscooters.co.uk