


VAPE IGNITION SYSTEMS
OUR STORY
A big deep breath on this one. The Vape Lambretta ignition is quickly taking over as the must have ignitions for Lambrettas.
Thats fine but it should be MB with the exclusive rights as it’s a kit I designed.
I first saw Vape products many years ago at a trade show in Germany. I visited the stand by chance walking around. It was a small affair surrounded by glass cabinets full of electronic motorcycle parts. There was no one else there, only what turns out to be the designer of the parts.
As I looked, I was putting two and two together, that stator looks like it will fit that flywheel, that seems to be the CDI and that seems to be the regulator.
The designer came over and I asked ‘does that fit that’? In broken English the answer was ‘yes’ I asked ‘can you have fixed and advance ignition’? The answer was ‘yes’. I asked ‘can I program my curves in the CDI’? The answer was ‘yes’. I asked ‘can it work as AC lighting, AC/DC lighting and full DC lighting’? And the answer was ‘yes’.
And I asked the price to put a system together if I did all the missing links and the price was really workable as was the minimum order quantity!
So I bought the parts, then worked out and made a one off stator base to fit the engine. I made a flywheel cone, flywheel extractor and flywheel fins. Once all this was worked out I rewired the stator to suit my bike and wired up the lights and it all worked. Well it did for a few miles then the stator went. Which was replaced with ’these things happen’!
I sent an engine to the factory with a crank and the ignition fitted with drawings to have it copied. I then waited and waited and no emails. I chased and no reply, I chased and chased again, eventually they confirmed the engine was there and they were looking into it! More emails and nothing! Another show turns up and another meeting – they are looking into it!
I even drove to the Czech Republic on the bike to have more meetings! I arrived late after a long drive and the bossman popped his head out and I explained I was here for the meeting, he took us to a nice hotel to return the next day for the meeting!
This is where it went down hill even further. I thought he said 10am, when we got there the was the bossman, the secretary translator and the designer all scowling at me! We went through my sample and drawings and took a tour of the workshops. One room had women wiring up rectifiers, CDIs and stators and all looked good. Then we entered the CNC shop – you could have eaten your dinner off the floor! There we a few people stood around doing nothing! There was nothing else in the building apart from some machines – no metal, no swarf, no machined parts no stock – its was all a bit surreal.
We left with promises to crack on. Again more emails and nothing, even more emails and nothing! Another year another show! ‘Hey remember me’? ‘Yes’ and another meeting with ‘Okay we are ready to continue with the project’! Again more emails and even more and nothing! And I gave up 4 years wasted!
The next I know Im seeing rumours on forums from Europe that there was a new ignition coming on!
Then SIP are advertising them – umm! So we got one in stock and looked at it. It looked lovely, but everything looked so familiar! It just so happened the same day I was searching an old draw looking for something else and found the Vape folder! We got out the drawings and photos and blow me the kit was as I designed all those years ago – even down to the length of wires! To say I wasn’t happy with SIP was an understatement, not even ‘oh sorry we didn’t know you designed it’. But did confirm Vape was really hard to deal with, with increased prices and quantities! Maybe it wasn’t for me in the end after all.
VAPE IGNITION KIT
They really have taken over as the must have Lambretta ignition. They offer everything any Lambretta owner needs. 12 volt lighting, fixed ignition CDI coils and coils with an advance curve. And they offer AC lighting, AC lighting with DC trickle charge and they offer a DC rectifier for full DC lighting. And they offer Gp and Li type flywheel cones. SIP also offer the flywheel tool, mounting brackets and spares of each component.
The kit just says quality. They come in a well designed box with the parts well packed. Theres an in-depth fitting guide in different languages. The down side is the instructions are aimed at Vespas which Vape also make kits for. The Lambretta guide is a bit of paper thrown in with a very out of date wiring structure and really should be over looked.
WHATS IN THE BOX
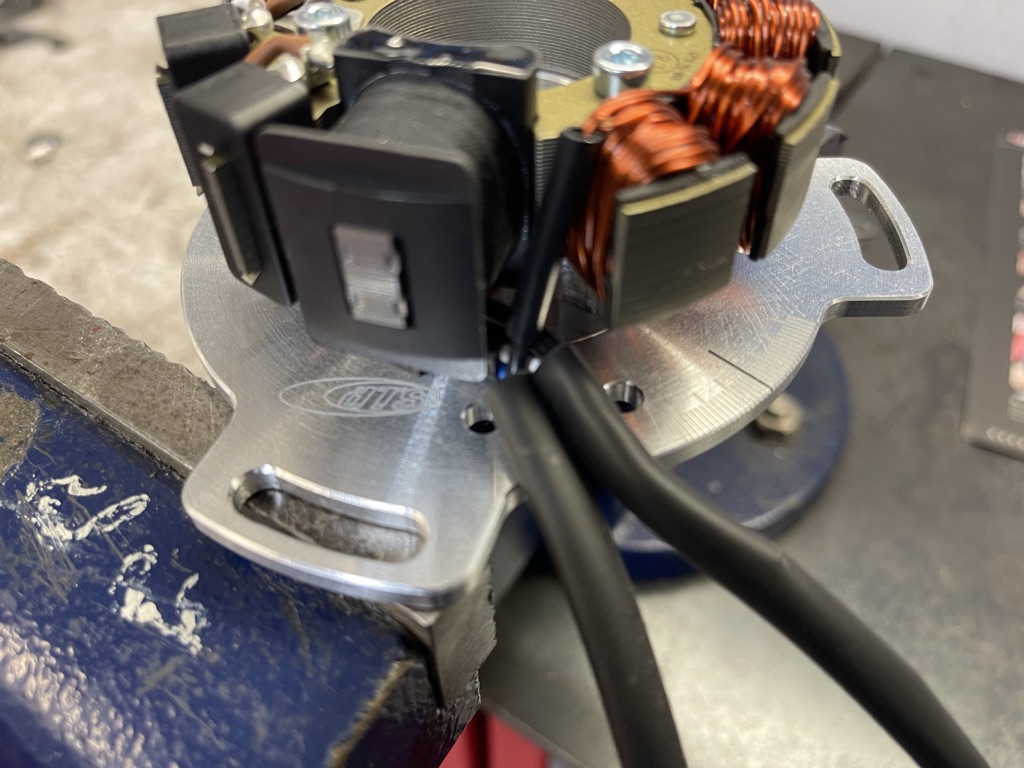
The very solid box holds the 2 part flywheel, stator and alloy back plate. The CDI and rectifier, instructions, a pack of wiring and some fasteners.
There is no flywheel holding tool these are an extra and very weak and is liable to twisting so be careful when using it. The stator can only really go one way and 3 x 4mm allen cap head screws hold it together – loctite the screws in place when fitting. The flywheel is a steel one piece affair the improved one I tried to get made. The flywheel is quite small and an alloy fan bolts to it from the outside with 6 special counter sunk screws. The CDI coil is like nothing else and is not so easy to mount without the special mounting brackets for S1/2 and 3’s. The regulator is small, simple and easy to mount.
It all looks great, but if you follow the instructions on how to assemble it – it could lead you into trouble.
The down side is the flywheel and how the alloy fins bolt on. It bolts with 6 counter sunk screws covered in a dry loctite. The problem is the screws are a normal right hand thread. Lots of us tried these in the 80s either repairing or modifying flywheels – we all found out – right hand threads can unscrew them selves. They really should have used left thread screws. But with enough high strength loctite you can get them to stay put! The alloy CNC flywheel is quite big it’s not really heavy but its a mass of alloy! It has been known for the screws to shear and people have complained the torx heads twist when fitting!
Ideally the flywheel should have been strunk on and pegged and made as one! The reason the fan comes off is to make altering the stator to get the timing spot on without removing the flywheel as you can easily get to the stator bolts.
Our way is to epoxy glue the flywheel fan to the flywheel. This is a permanent cure to stop screws undoing or shearing. If done right as shown in the photos the epoxy will work around the inside of the fan, at its base, into the screw holes and into the holes in the flywheel. Once done, equally tighten the screws tight with a Torx 30 driver and wipe off any excess epoxy.
The downside of glueing the flywheel into one is – you have to remove the flywheel to adjust the timing. Okay you loose the nice advantage of been able to adjust timings without removing the flywheel. But hey it’s never bothered anyone before with an electronic ignition so why should it now – take the advantage of a stronger flywheel. Also the down side of a glued flywheel is you need to mark the flywheels top dead center and work back to the timing marks desired and as usual 17 degrees work perfect on most motors!
On the stator there are degree marks which is a bonus, making adjustment easier. Beware the instructions say perfect timing – wrong! Always strobe these like any other ignition, they do vary and some fixed ignitions have some spark movement when strobing. Use the timing marks as a guide – don’t find top dead centre and work back expecting the timing marks to be where they say they are, they can be a couple of degrees out!
The flywheel needs its own holding tool these are not in the kit. SIPs version is a bit naff and weak, so be careful.
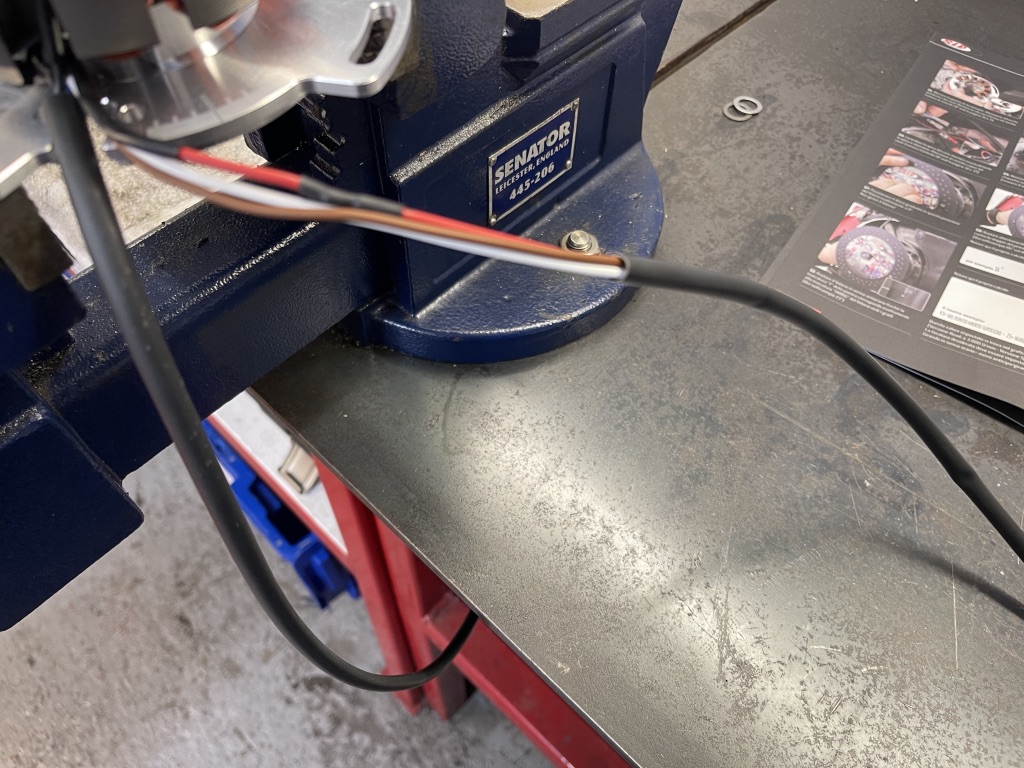
The other downside of this ignition is the wiring colours. They have wired it to suit a Vespa system! Why I don’t know, what’s hard in colour coding to suit a Lambretta – but these people are not Lambretta people! Then throw into the mix they use a Brown and a Black as an earth! When Brown is normally main power on a Lambretta and Black is a lighting wire as well. Why couldn’t they standardise it!
Following the wiring instructions for most, can be complicated it’s a drawing of a Vespa, the wires do different things and go into boxes not seen on a Lambretta. So you have to follow the wires coming from the stator to see where they go.
Or now you can follow our diagrams to make life easier for you and you can also see our wiring improvements.
The performance CDI with the fixed built in advance curve is far too wild for the majority of Lambretta engines. Its a curve for 10’000+ engines, and guess where it came from, it’s identical to one of our built in curves going back to the prototype. We suggest using the fixed ignition CDI coil that comes in the kit especially the Race-Tour engines.
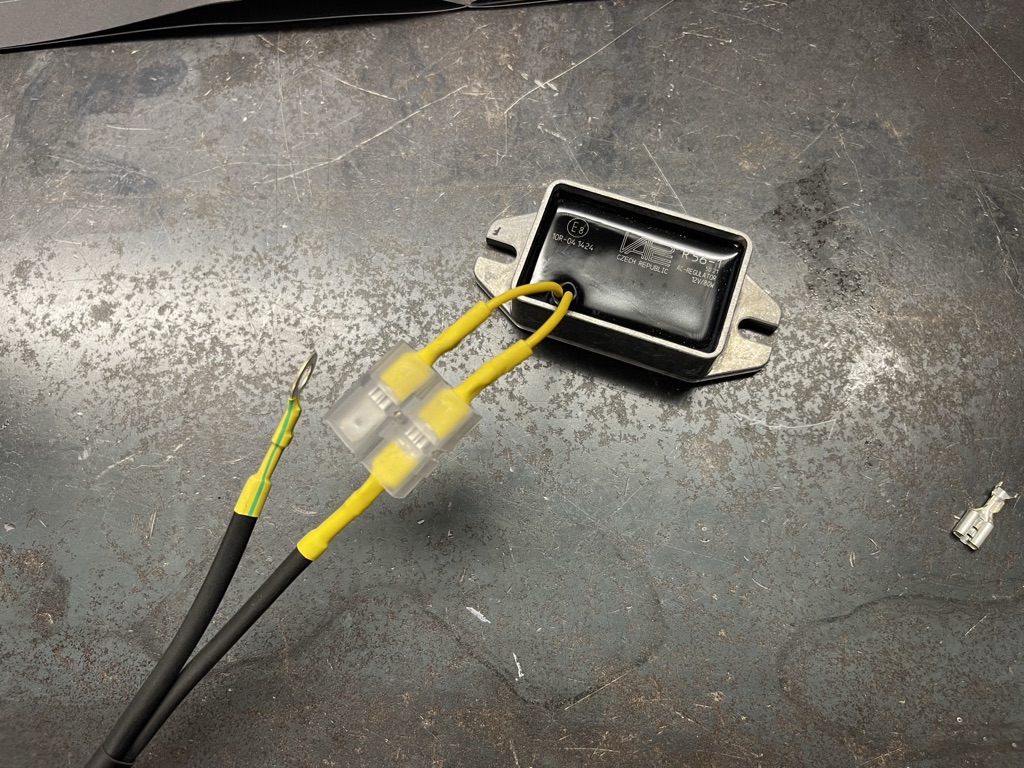
The kit supplies an AC regulator, these are perfect for most people – just AC lighting once the engine is started. But the beauty of the system is you can buy an AC Regulator with a built in 12 volt DC trickle charge to suit a small battery for toys. Don’t expect enough power for fog lights! It’s ideal for toys, sat nav, cig lighter, USB, rev counter etc.
In the box is a bag of pre crimped wires, connectors and covers – useless! Don’t bother! The extra diagram shows to wire all this up into the old style round junction box. We got rid of this in the 90s and made simple looms to avoid things going wrong with more connections and a chance of terminals going off.
The downside of the light flywheel is it needs a good hard fast kick to get the motor to turn over to start. The good part is you find extra power over the heavier flywheels. But as it’s always been – its swings and roundabouts – some like, light flywheels, some like heavier flywheels! Beware light flywheels promote more vibration!
The great thing about the kit is the standard stator works as AC, AC/DC and DC. You just swap the reg/rects to suit what you want and do some different wiring from the stator. Ideally its best to do some rewiring with some coloured heat shrink to standardise colour coding to suit Lambretta looms that we know and make earth points simple for returning to it at a later date.
MB don’t like messy wiring, that’s why we’re showing you the MB way to rewire and simplify the system with the following photos.
FITTING DRAWINGS FOR THE STATOR, CDI and REG/RECS can be found here.
WIRING DIAGRAMS TO SUIT MB LOOMS can be found here.

Take the flywheel, use some emery or scotchbrite to score the outside and degrease it

Score the inside of the fan to aid a glue key

Use arildite epoxy glue, either 5 minute version and be very quick or the 24 hour version if you have time
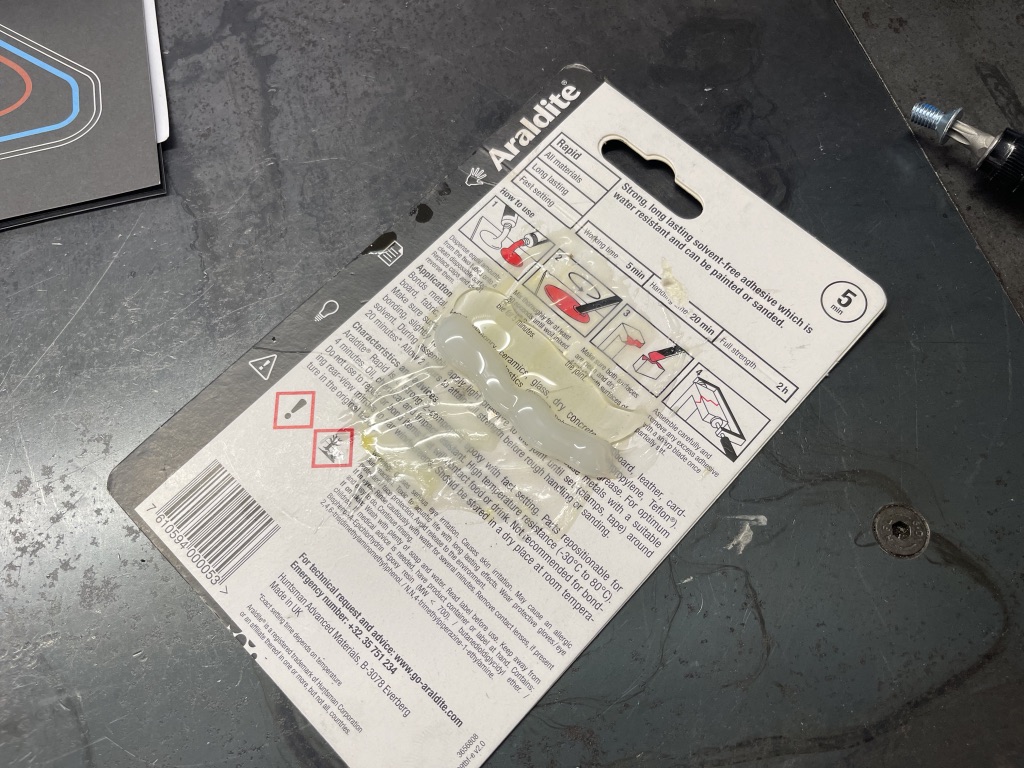
Mix 50/50 to mix it right
Give it a good mix, a top tip use a plastic mixture, stops magnets causing a problem later on

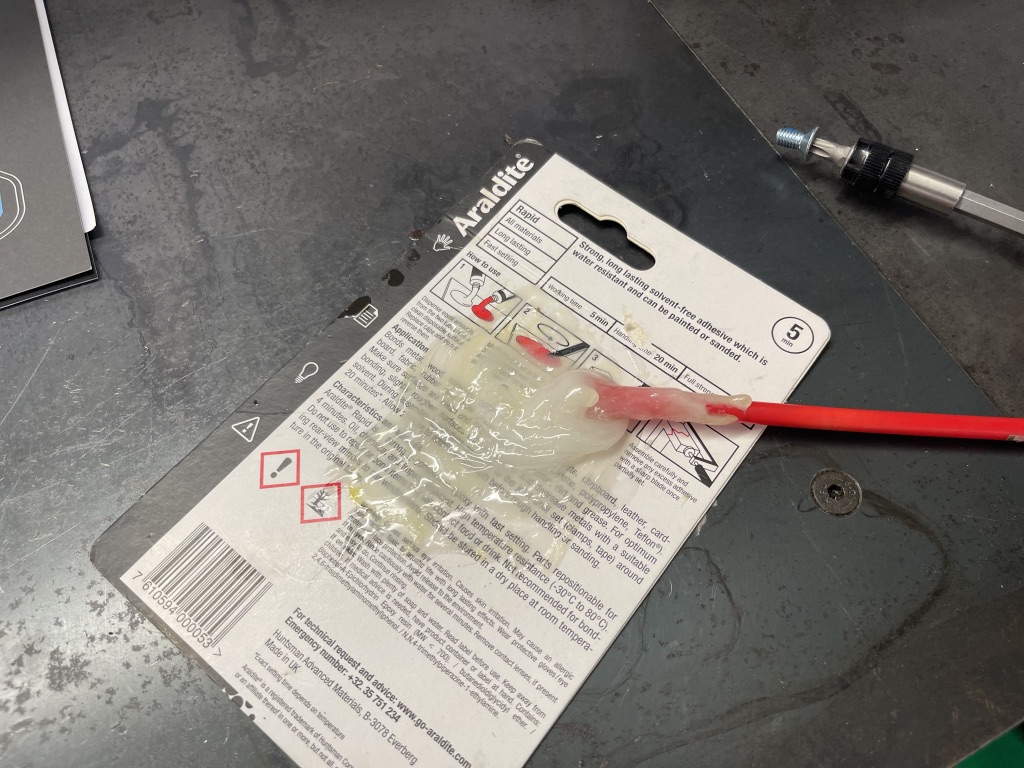
Smear as much glue a you can all over the inside

Line up the fan to the flywheel hole, and slide the flywheel into position

Use a Torx 30 bit to tighten the supplied screws
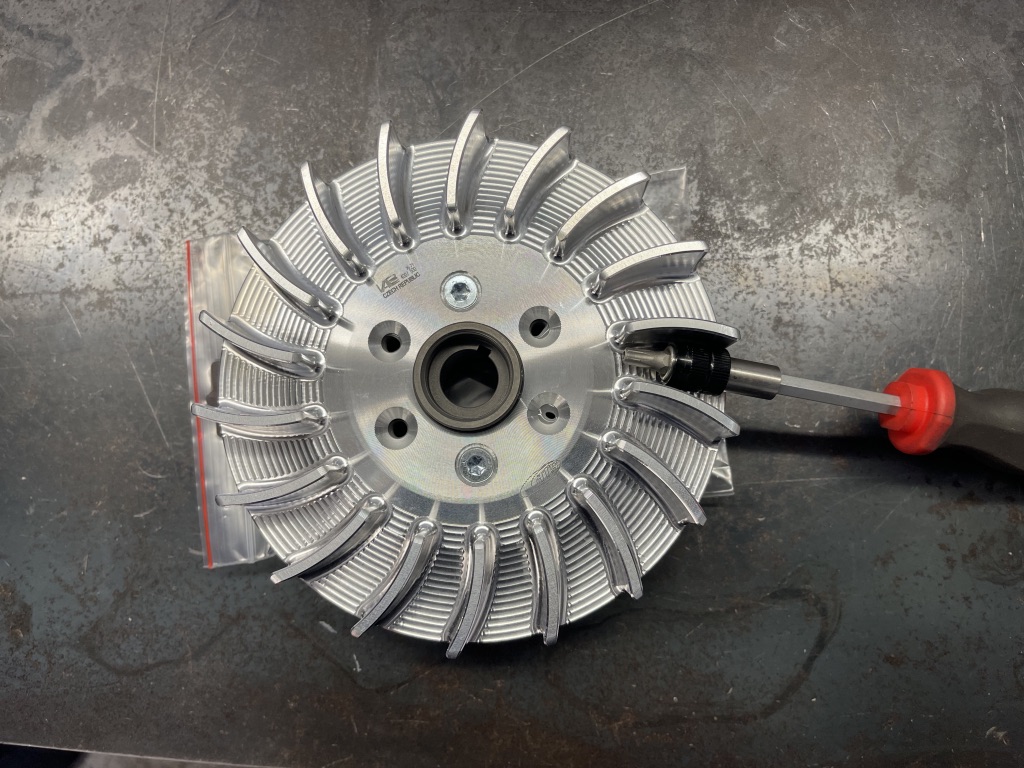
With glue in the 6 holes, gently screw in all the special screws
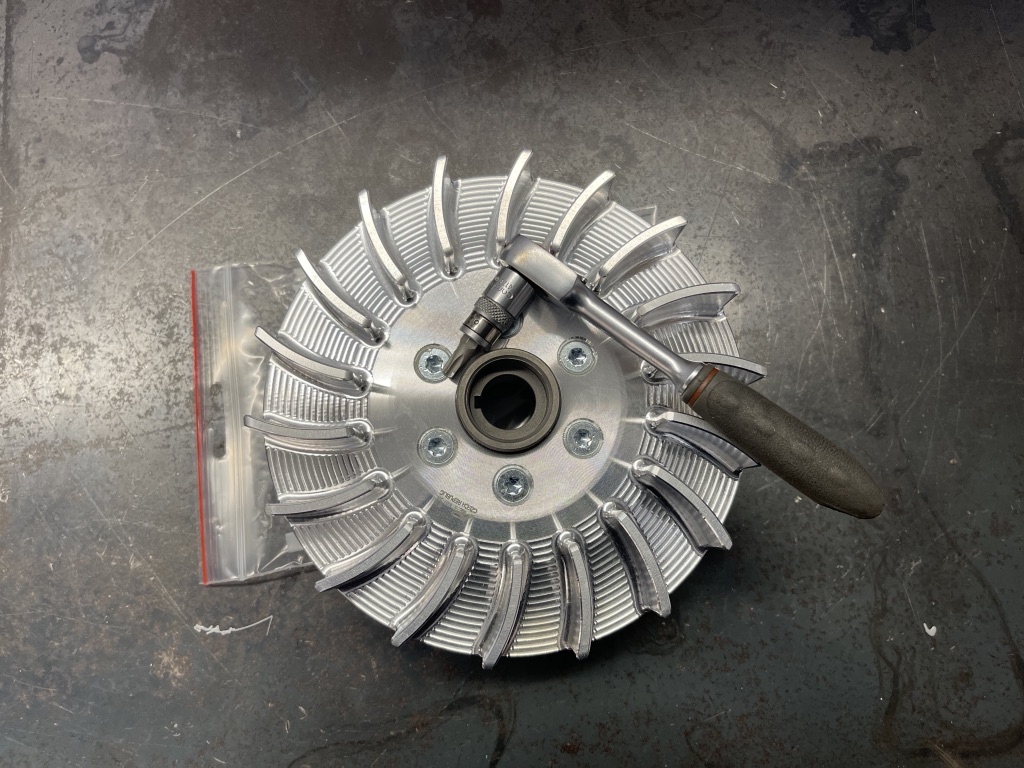
Tighten each screw slowly diagonally to pull the fan into the flywheel to seat it

Loctite the stator 4mm screws to hold the stator in place, no need for locking washers

To re wire with better connections, remove the supplied plastic connectors

Trim off the supplied connectors
You can remove the supplied sleeving which is far too hard and replace with normal flexible sleeving if you want
Push the new sleeving as far as it will go

Once pushed In place crimp into position with a small cable tight

Re seal the cables with heat shrink

Finish the ends with the correct colour coding heat shrink
Improve each wiring connector with heat shrink to colour code and make the terminals stronger
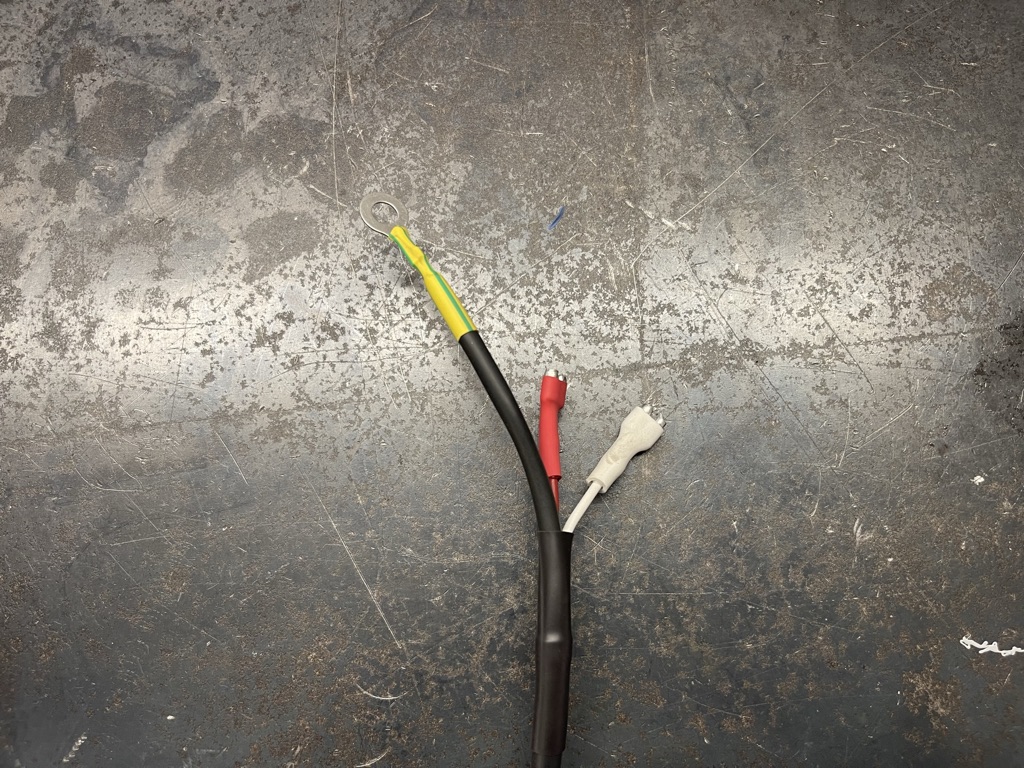
How it should be, see the wire colour see the terminal coloured ends

Same with colour coding and strengthening on the CDI
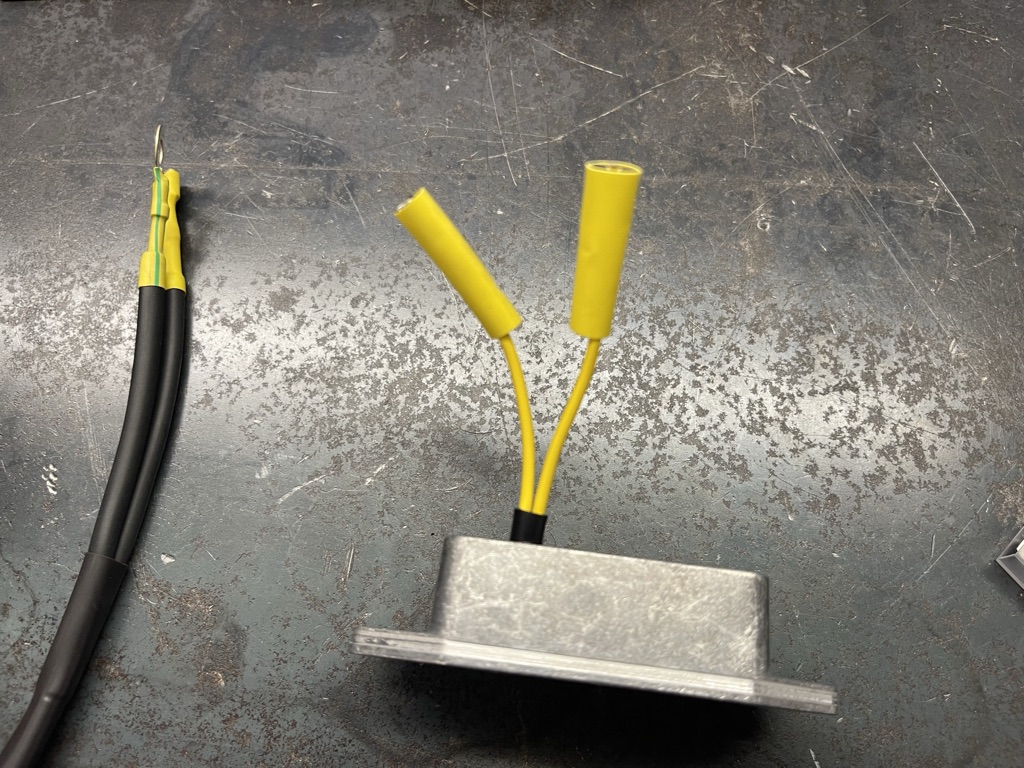
Nice and neat ends you can follow at a later date

And how it should be super tidy, easy to follow years later
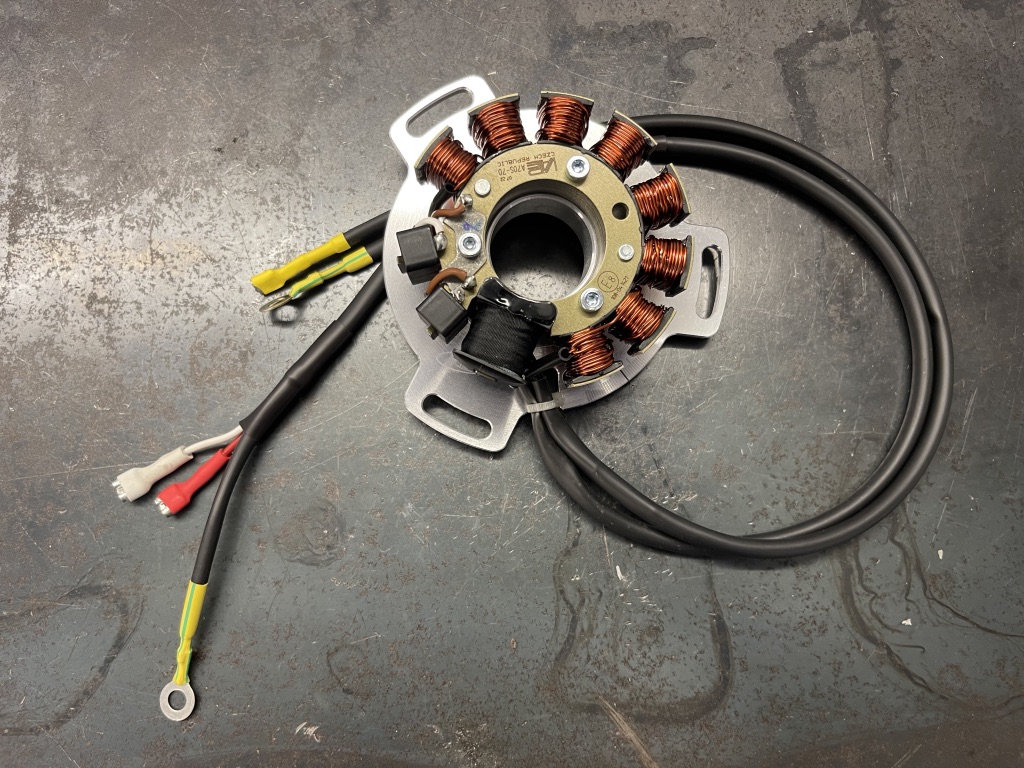
And the stator rewired or just re coloured as we know it Jim
Any questions ask mark@mbscoooters.co.uk


This is super helpful. thanks for the article. The color coding tips for the wires makes it easy.
Once again MB to the rescue!…Thanks