


Restoring a Bella fuel tap
A reliable ride starts with a reliable fuel supply. That means a fuel tap that doesn’t leak, filters the fuel and allows for a reserve fuel supply. So, let’s look at the restoration of a Bella fuel tap.
The tap
The Bella fuel tap is becoming quite rare. This is because it’s a model specific fuel tap. It was made by Armaturen Werke (‘Armature Works’) and it is the so-called ‘Frankfurter Model’.
What makes it special is the pickup for opening and closing it. Rather than being hand operated, you use the Bella ignition key instead to open and close it from the outside. Quite clever really. Well, unless you want to switch to reserve while riding…
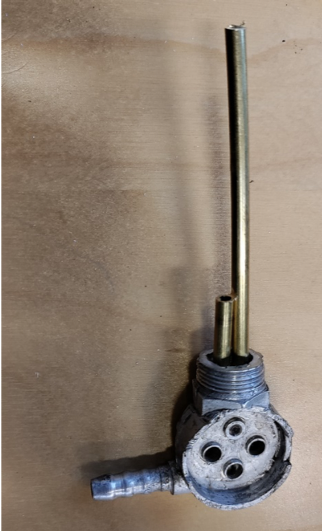
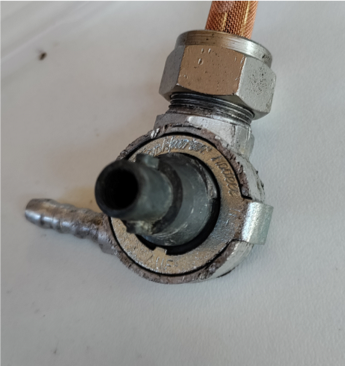
Here it is in all its glory.
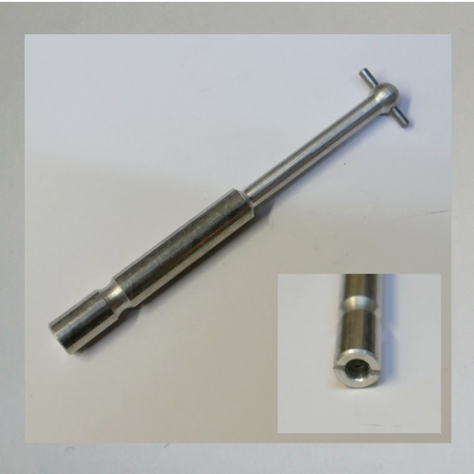
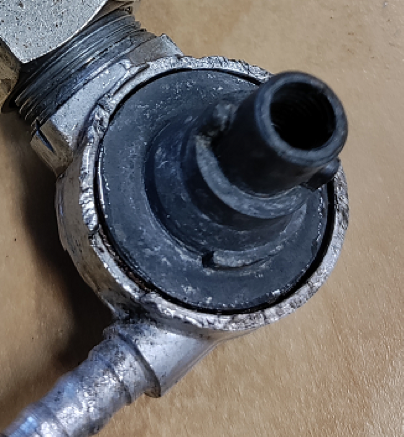
The rubber is placed in the rear body like a grommet. The extension rod is placed through the inside and once the tap is in place, the T shape on the extension rod fits nicely in the fuel tap take-up. They ignition key, in turn, fits nicely in the end of the extension rod.
So why are these taps rare? Because many Bella riders forget to pull out the extension rod when taking off the rear body and the take-up on the tap inevitably breaks. Because the original extension rod is made of aluminium the slots where the ignition key goes into can be worn too. That means either welding and re-slitting or buying a replacement rod.
What could possibly go wrong?
The filter
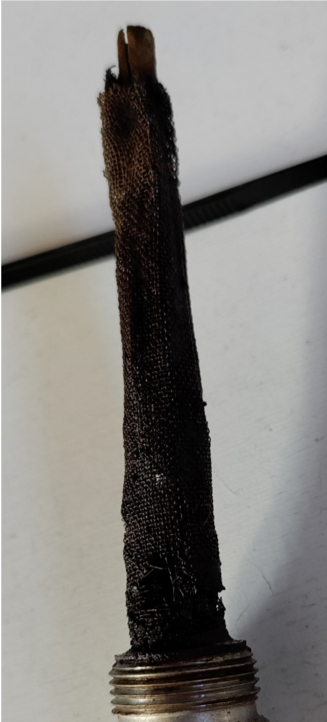
A fuel tap seems simple enough, so what could go wrong with such a simple device? To start with the filter can cause many problems. It is of course 1950’s technology and these filters are not perfect. They are made originally of a rolled-up piece of brass mesh wire that is soldered into a cylinder. At the top it’s either squeezed shut and soldered or a press fit cap is placed on it like the one in the photo.
I’ve seen quite a few of these taps now and the press fit cap is not always put on properly and sometimes the vertical line of the mesh cylinder isn’t soldered at all. In both cases impurities like rust, dirt and the usual can get into the fuel supply. In addition, when a tank has been empty, the brass will rust and degrade, so always check it before using an old tap. The filter can also come loose. It’s soldered onto one of the fuel pipes, but can let go.
Even if it performs well, it can be a good idea to install a modern in-line filter in the fuel line to complement its working.
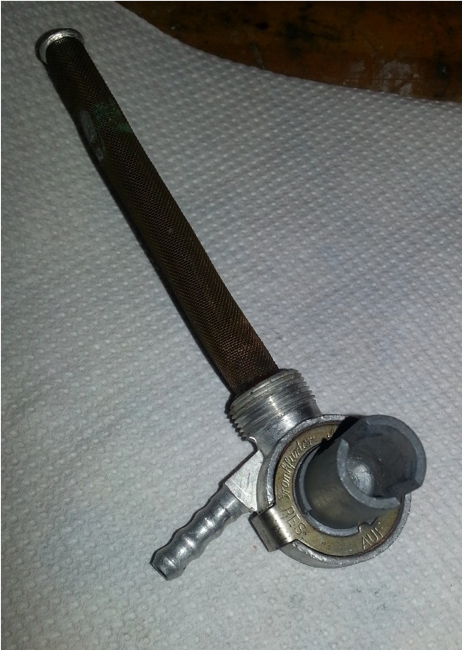
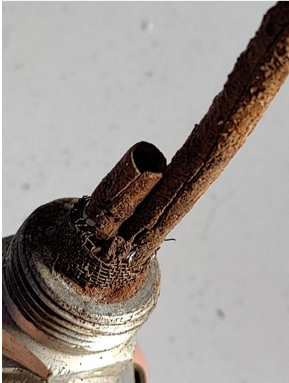
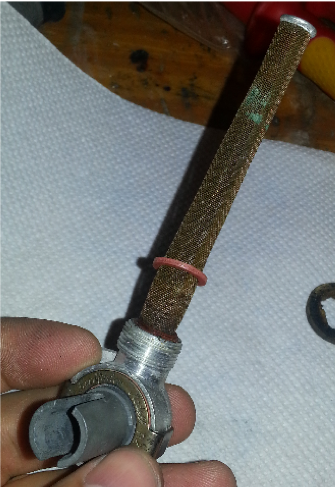
To the right is an example of a fuel tap I took out of a tank recently. The whole top is missing and you can see holes in the mesh everywhere through rot.
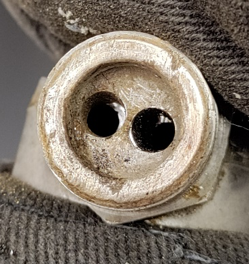
The pipes
Inside the filter there are two brass pipes. These too can rust and quite often I see cracked ones. These has two impacts: you’re reserve fuel setting won’t work which might lead to a surprise end of journey and it also means that rather than settling at the bottom of the tap, any dirt will make it into the fuel line. Here’s what’s inside the mesh of the example tap above. Pretty nasty!
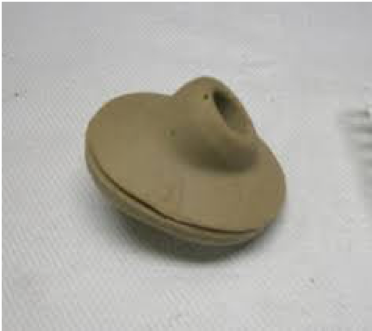
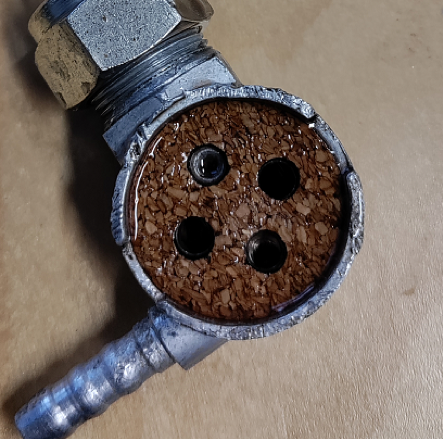
The cork disc
Inside the fuel tap is a cork disc that makes the tap fuel tight. These discs degrade over time as it’s a natural material and modern fuels aren’t particularly kind to them either. Some people replace them with a silicon variant, but the fit of those tends to be quite poor.
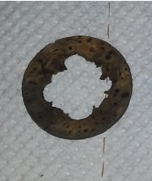
Here’s what the disc looks like when in a poor state. While it may not leak yet, it most certainly won’t make a distinction between normal and reserve supply!
Corrosion and wear
A final problem you can run into is a tap that keeps leaking, despite a new cork disc. If that happens, and you’re sure you’ve placed it correctly, take a look at the mating surfaces. The fuel tap housing is made of aluminium and doesn’t wear easily. But the extension rod take-up is made of some other material. It looks a lot like carburettor metal. This can rust over time, but rather than turning red, water can get into the tiny cracks in the material and slivers can break off. If that happens, you can try and mill a small amount off or sand it on a glass place to ensure the mating surface remains flat.
You’ll also find that the little drilled channels in the tap and take-up contain more crud that you’d expect, consisting of oily deposits as well as metal corrosion particles. All big enough to clog a jet in your carb.
Clogging
A rather obvious point, but fuel taps that look good can still have a lot of crud in them that built up over time. It’s a bit like closed arteries, the flow will reduce over time, so it’s a good idea to ensure it’s clean. Remember you’re riding a two stroke, so oil helps the buildup of crud in the tap.
Restoring the tap
Clean the tap
First off, we’ll clean the tap as best as we can. An ultrasonic bath is perfect to get the muck off and dissolve some of the oily deposits. Note, this will NOT remove all deposits. I recommend a full restore of the tap.
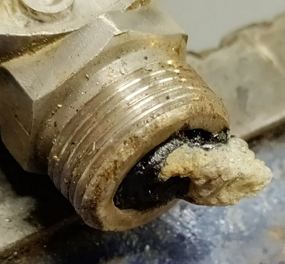
What works a treat is to use a blowtorch on the filter housing (don’t apply too much heat for too long of course). This will carbonise the crud and you can just shake it out.
Before the blowtorch and after; the carbonised deposites come out like a bit of building foam:
Rinse thoroughly after. Also ensure you pick the channels with a thin pointy tool to ensure all rust is loosened and gone from inside the tap. The housing is made of aluminium, so any corrosion will look white.
Remove the filter if needed
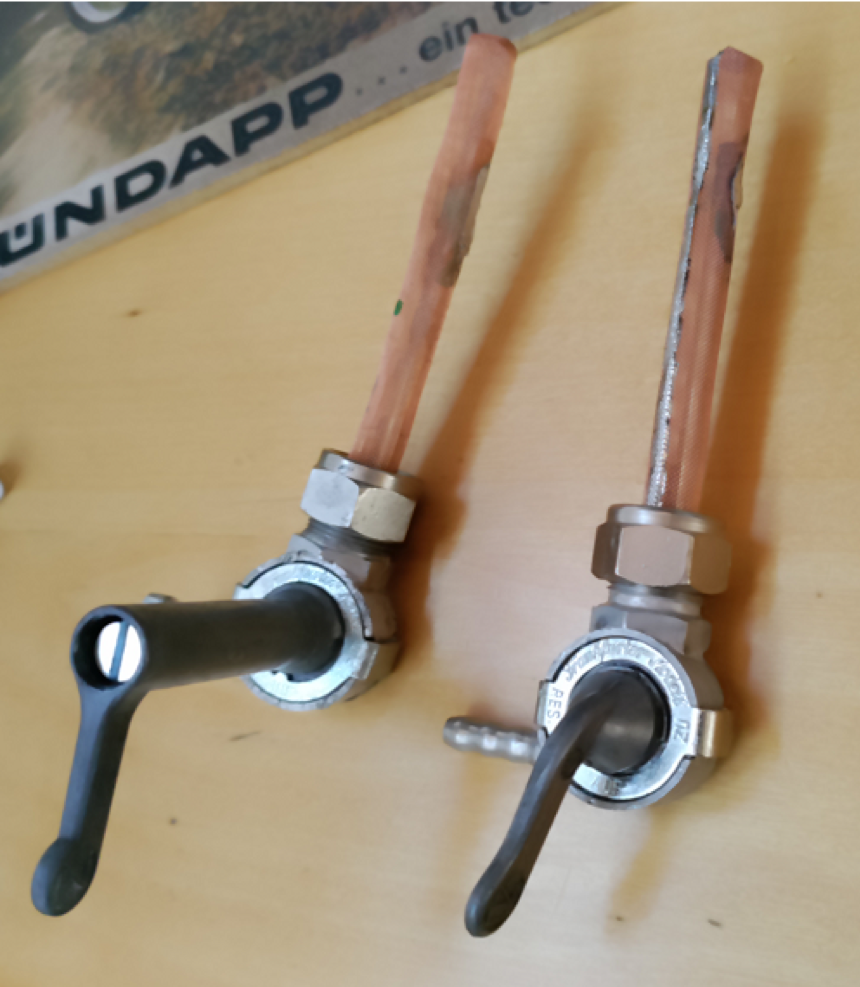
So, let’s restore a tap. Photos will be used of different Zundapp fuel taps, both Bella and 20(0/1)S, but the same principles apply.
If the filter is bad, it needs to come off first. Find the spot where the filter is soldered onto the brass fuel pipes and use a soldering iron to loosen and remove the filter. Note however, that frequently the filter is stuck at the bottom and a little force may be required. At times, I see soldering efforts at the bottom of the tap too at which point you’re down to cutting through the mesh and replacing it with the fuel pipes.
Inspect the fuel pipes
If your filter is clean and clear you may be able to inspect the pipes through the mesh, otherwise you may need to remove it to inspect the pipes. De-soldering and re-soldering are not hard, so don’t skip this step if you’re not sure (I’d do it in any case).
First measure the length the pipes stick out; you’ll need it later to retain the same normal to reserve supply ratio.
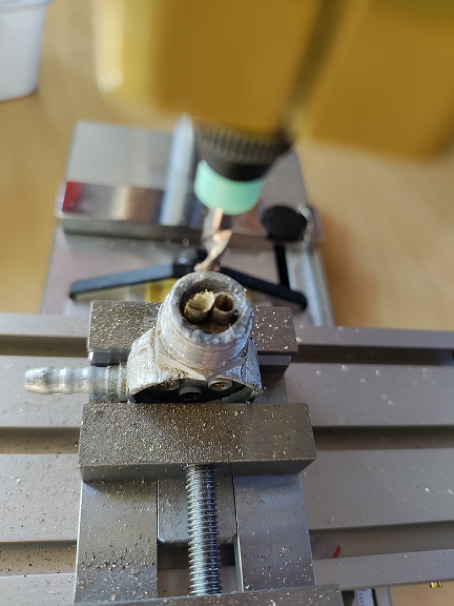
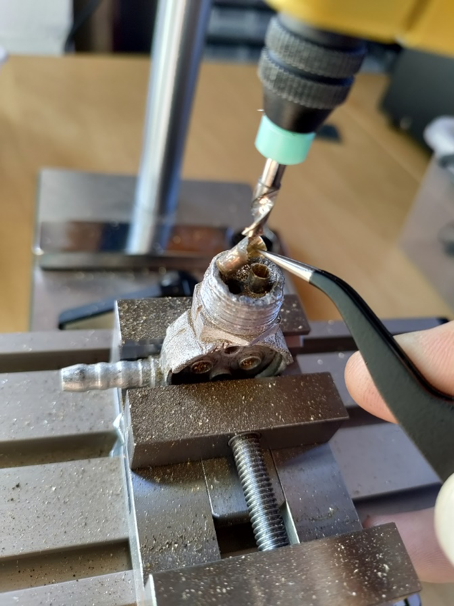
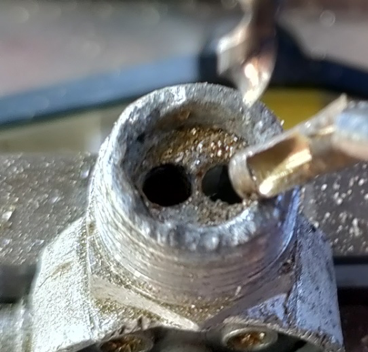
In the case of the tap in the example, they are clearly beyond repair and need replacing. For the Bella, these are 4mm outer diameter brass pipes. The only way to remove them is by drilling. You’ll need to order a set of drills in the range 3.5 to 4.0mm with 0.1mm increments. Usually, the 3.7mm will get the pipes out. They are then so thin that you can collapse them inside the tap housing and pull them out.
I use PCB drills and a mini drill stand. PCB drills are used for electronics, but they have hard tips and are cheap (when ordered from overseas). Perfect for this job. This is what a successful operation looks like:
Now this fuel tap housing has a special problem. In the past, someone has done something to the mating surface of the tap with the tank. It will be very hard to prevent a fuel leak. To prevent a leak, we take a small amount of material off the mating surface. I simply used a milling bit in my mini press drill with x-y movement. For something simple like this, it does the job.
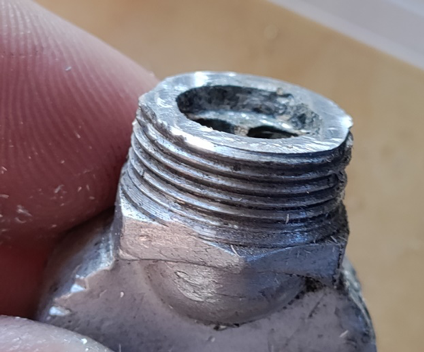
To finish it off I used a little water-proof sanding paper to smooth the mating surface (not in this photo).
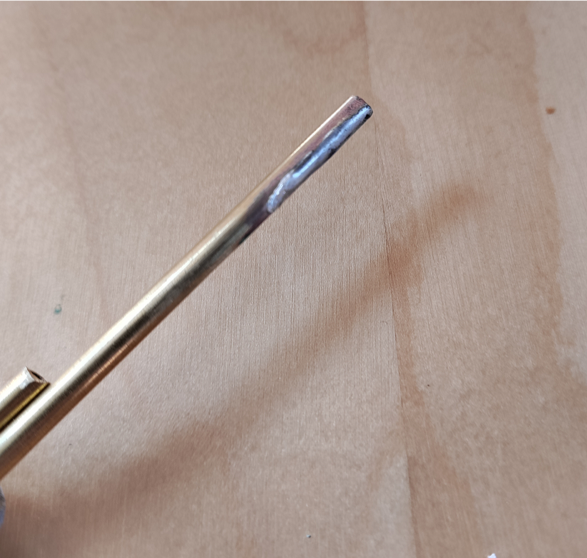
To install the new fuel pipes first taper the brass pipes you’re purchased. They are a press fit, so need to be hammered into place, but not with too much force. So, create a small taper at the start
and then sand down the pipes to get to a point where they will ‘just not go in’. You don’t want to damage the small barrier between normal and reserve.
When ready, heat the tap housing in a 150-degree Celsius oven and put the pipes in the freezer. When ready, take the tap housing out (with oven gloves) and tap the pipes into the housing with a small hammer. The mass of the pipes is very small compared to the housing, so heat transfer will occur quickly. So, get ready, hold the pipe above the housing and then put it in and quickly tap it down. It should go in approximately 5 to 8mm.
Next, cut the pipes down to the required length from the measurement you took earlier. Don’t forget to remove burrs and sharp edges from the cut pipes.
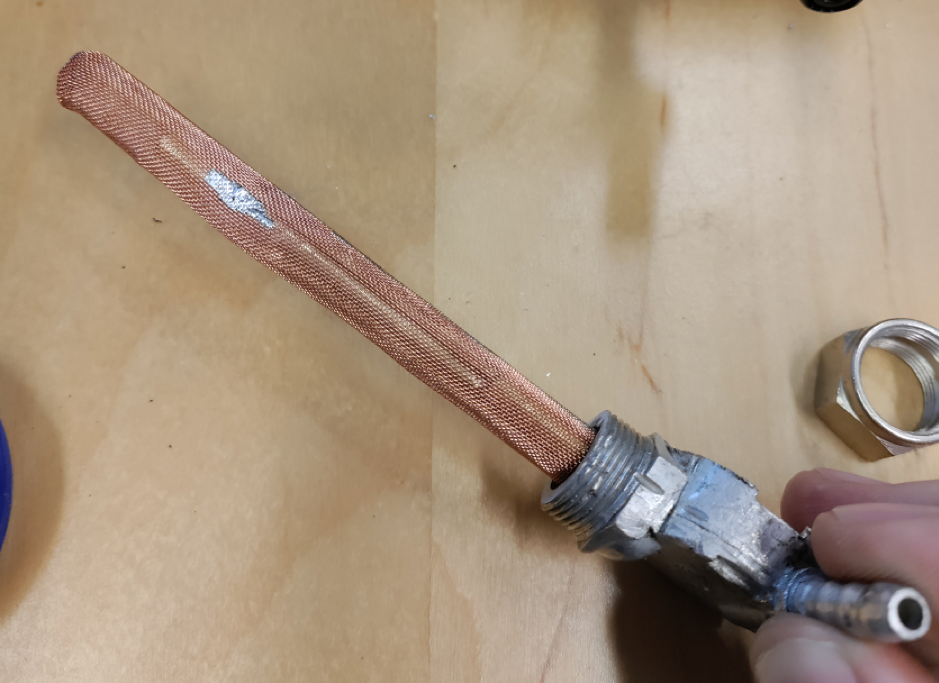
The result looks something like this (burrs not yet removed in this picture).
Installing the filter
Next, we replace the filter. This can be done in one of two ways, the original way and by using an after-market replacement.
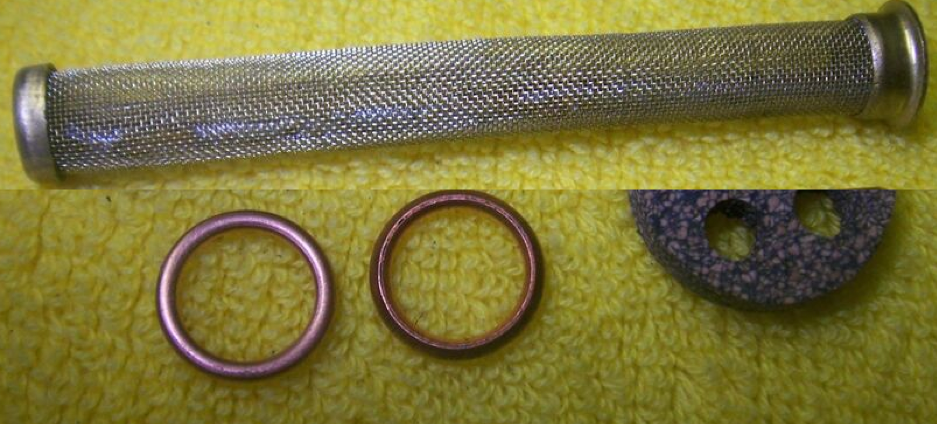
The after-market version (if you can find it) is a bit easier. Here you have a pre-made filter with two copper rings. Once goes below and one above the flange of the filter. The advantage is that no crud creeps in at the bottom of the filter and you can remove it easily. If you can find it, I would recommend it.
The original is installed as follows. First fit the new filter on and check where it touches the long brass pipe. If it doesn’t, squeeze the filter a little so it does.
Next, take the filter off and apply a thin layer of solder to the brass pipe after applying soldering fluid where you want to solder on the filter. This provides a thin coating of solder which will make fixing the filter much easier (otherwise you have to solder through the filter for a first adhesion, which can be tricky).
Subsequently, put the filter on, apply the soldering fluid and solder on mesh filter.
Replace the cork disc and place the take-up
After soaking the new soak disc in two stroke oil for a while (you may destroy the new disc otherwise), place it in the tap. The disc should be 3mm thick for the Bella. On top of the disc comes the take-up piece:
Shim and retaining clip
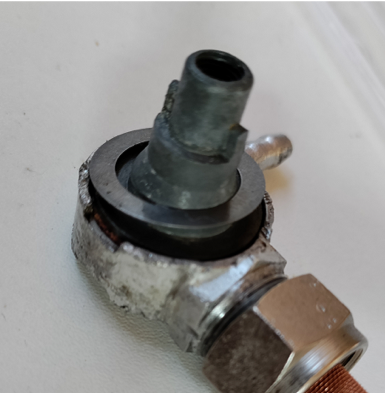
Between the take-up and the retaining clip is a shim or thin fibre washer. The size is 17×24. I use 0.3mm thick ones. They reduce friction when turning the tap and prevent wear. I put a drop of oil underneath for lubrication.
The retaining clip is clicked into place using a pair of pliers. A fibre washer goes over the fuel filter (or the copper ones if you use the after-market version).
Finally, the nut goes onto the fuel tap (remember, the tap is left thread, so use the nut the right side up!). It’s a M16x1 nut with left thread at the bottom and normal thread at the top.
Parts
There are a few specialty stores in Germany that sell the parts you need. I can recommend www.oldtimervergaser.de . They have a section on fuel taps and can provide all you need. They also sell complete restored taps. Not cheap though and expensive shipping too. Other sources can be the seller hbahn39 from German e-bay. Very reasonably priced.
That’s it, happy motoring and don’t forget to consider an in-line additional filter if space allows.
Article by Bert Zwiers ZBEC


